Videos by Andy Slye

Category: Tips & Tricks (Page 4 of 4)

Tips & Tricks

How To Speed Up Your Mac & Clean Up Your Mac

Download CleanMyMac2 to clean & speed up your Mac!

Video Transcript:

In this video I’ll be showing you how to clean up your Mac and speed up your Mac using a great application called Clean My Mac 2.

Okay so this is going to be a quick overview on how to use Clean My Mac 2 to clean up your Mac and speed it up, make it faster, and get more hard drive space. So at any time during this video if you click on the annotation on the top of this video it’ll take you to Clean My Mac’s website where you can download it. Or you can click the link in the description below, and that will take you to the site as well.

So once you’ve downloaded and installed Clean My Mac 2 it will take you to this opening screen here. Now what I love about Clean My Mac is it does exactly what its name says. It cleans up your Mac and it does it in a very simple and powerful way. And the design is very, very beautiful. It’s got a very elegant design. They really made this app look pleasing to the eye.

Now the Automatic Cleanup represents a complete cleanup guide which incorporates all other modules of Clean My Mac. Automatic Cleanup is the most efficient and rapid cleanup, and it’s divided into three main steps. The Full Scan will look through all possible areas on your Mac and automatically identify all the items that it can safely get rid of. The full scan involves System Cleanup, iPhoto Cleanup, Trash Cleanup, and Large and Old Files. There’s also an inbuilt Ignore List so you don’t have to worry that Clean My Mac will select anything for removal that it shouldn’t. All important items will not be listed in the scan results at all.

Now after the full scan is over you’re presented with a brief results list which includes items suggested for automatic cleanup. Clicking the Clean button at this point will remove all the stuff that clutters your Mac. For instance, removed items will not include any of your personal or vital system files. What you get after Automatic Cleanup is a faster Mac with a significant amount of additional free space on it with literally no effort from you at all.

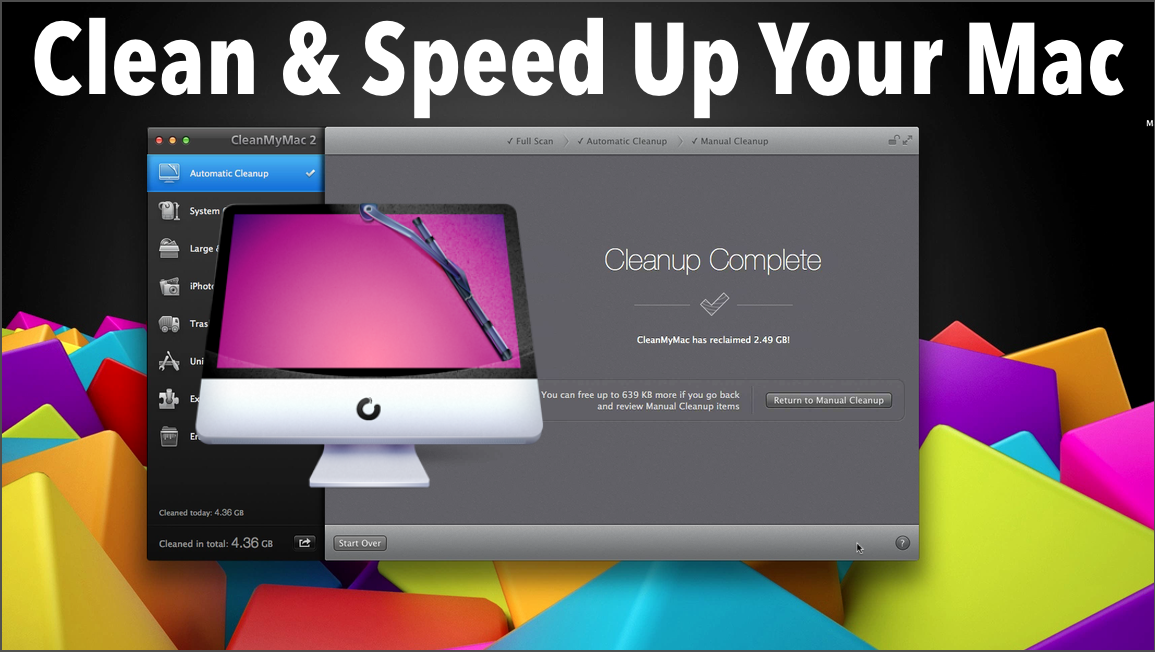
And right after Automatic Cleanup you’re presented with the Manual Cleanup steps you should take to free up even more space. When you’re done with Manual Cleanup you can click the Summarize Cleanup button to see your overall results so that you clearly know how much space was saved.

The System Cleanup section helps you take care of all the unneeded items generated by your system and applications. After you start a scan, Clean My Mac will use an algorithm to determine what files can be safely removed automatically so you shouldn’t worry about system stability. What you get after the scan is a visual representation of items that can be instantly removed with no harm. In order to review the particular stuff you’re about to remove just click the Detailed Results button, and you can see all the items that it’s about to remove. Clicking the main Clean button will remove all the unneeded items and free up a significant amount of space.

Large and Old Files helps you locate, review, and remove large files and folders that you haven’t opened for months and probably don’t need any more. The default location is your home folder, but you can select any location to analyze such as internal or external drives, network folders, or any other places where files are stored. Now once you’ve selected all the places that you want to scan just hit the Scan button to analyze the files. After the scan is over you’ll be presented with a list of all the large and old files that you have. Now what I really love about Clean My Mac is the customization. For instance here you can customize the filter by setting the minimum size of displayed items and the time they were last accessed. So now you can select the unwanted files and click Remove to finalize the process and clean up your hard drive

iPhoto Cleanup is a powerful space saving feature for those who have large iPhoto libraries. This feature looks through your iPhoto library to locate unneeded original copies of images kept by iPhoto after you’ve edited them. You can start scanning your default Library or select a different library to analyze. After the scan is over, Clean My Mac will show you the results and allowing you to automatically remove items that are completely safe to get rid of. These may include rotated and fixed redeye original copies. Then you can decide what items you want to remove and click the Clean button and it’ll finalize the process. After the cleanup is over you get the same iPhoto library but it weighs a lot less.

Trash Cleanup helps to empty all system trash folders of your internal and external drives including iPhoto trash. Now here there’s no need to initiate any scans. Clean My Mac automatically locates all trash folders and presents you with a list of them from the very start. You can use the main Empty button right away and permanently remove all the stuff you had in all the listed trash folders. Or you can click on a trash folder and go through the items to remove its contents. Then after you decide on all the items that you want to remove permanently just click the Empty button. And again you’ll be left with more free space on your hard drive.

The Uninstaller provides easy and complete application removal from your Mac. It presents you with a list of all the applications that are installed on your Mac even if they are not in the main applications folder. The applications list represents all supported applications that are installed in your default applications folder or anywhere else on your Mac. If you wish to uninstall an application just select it. You’ll see the main app file itself and all of its related items. Now the Leftovers section provides you with a list of items on your system that earlier belonged to applications that you’ve already trashed. Basically the files that are no longer used by any of your apps and only waste space. The Unsupported section will list all the applications that are present on your system but cannot be used with it. Now once you’ve selected all the items that you wish to remove you’ll just click the main Uninstall button at the bottom.

The Extensions Manager allows you to remove or disable your widgets. Apart from your ordinary applications there are quite a lot of other software components on your system that can be generally described as extensions, and they’re all listed here. After you’ve reviewed the list you can click the Disable button next to virtually any item to isolate it from your system, or you can select items for complete removal using the corresponding checkboxes. After you’ve looked through the sections and selected the unwanted items you can go ahead and use the main Remove button at the bottom to completely remove them and clean up your system.

The Eraser lets you quickly dispose of any unwanted files from your Mac without going to the trash first. If you have any file or folder that you wish to permanently remove just click the Select Files button and add the unwanted items to Eraser. Now when you’re all set you can just click the main Erase button and it’ll get rid of all the unwanted items.

So that’s my overview on how to use Clean My Mac 2 to clean up your Mac and speed it up, make it a lot faster, and gain a lot more hard drive space. This is a highly recommended application for your Mac. It’s won a Reader’s Choice award for the best Mac system utility application two years in a row. So if you don’t have it go get it right now. Click the link at the top of this video or in the description below. It’s a must-have if you’re a Mac user. So if you enjoyed this video give it a thumbs up, and leave a comment in the comment section below and let me know how much free space you’ve gained after using Clean My Mac. And make sure you subscribe to my channel so you’re notified when I upload more helpful videos like this in the future. I will see you all next time.

How To Copy Any DVD To Your Computer

Download Win X DVD Ripper Platinum

In this video I’ll be showing you exactly how to copy any DVD movie to your computer so you can make a backup of the DVD or put it on a portable device.

WinX DVD Ripper Platinum, in my opinion, is the best and easiest way to copy DVD movies to your computer on Windows, especially if you’re planning to put the videos on a smart phone or tablet (iPad, iPod, iPhone, Kindle, Galaxy Note/Tab, Nexus 4/7/10, etc.) It’s very easy to use. It’s super fast. It can copy a DVD to your computer in just a few mouse clicks. It’ll save you a ton of time because there’s no need for additional converter programs and you don’t have to configure any settings. It will automatically transfer the DVD in the best video quality that is compatible with your computer or device so it fits perfectly on the screen. And it comes with free lifetime updates so you know you’re always able to copy the latest movies when they come out.

The first step is to download Win X DVD Ripper Platinum. (Mac users: see how to copy DVD movies to Mac)

Next you’ll load your movie disc into your DVD drive and open WinX DVD Ripper Platinum. Then click the DVD button in the top left the program and then click OK. Now here’s the cool part, on the Output Profile window you can select from nearly any device that you’re going to put the movie on. You can choose anything from Apple device, Android tablets, Android smartphones, or just PC general video for when you just want to save the DVD movie on your computer.

After making your selection, the main movie file is automatically checked for you so the only thing you have to do is choose where you’d like the DVD to be copied to. Now all you have to do is click Run and the DVD will be copied to your computer.

Once the transfer is complete your folder will open up and you’ll see your movie file right there. If you’re planning on putting it into iTunes all you have to do is open up iTunes then drag-and-drop the video file into iTunes and then sync your device. If you plan on putting it on an Android tablet or smart phone, just sync the device to your computer via the USB cable then copy it via Windows Explorer.

That is how you use WinX DVD Ripper Platinum to copy any DVD movie to your computer!

How To Copy Any DVD To iPad, iPod, iPhone

Copy a DVD to iPad, iPod, iPhone – The Easy Way!

Click here to download MacX DVD Ripper Pro
Visit the MacX Website

Video Transcript:

In this video I’ll be showing you step-by-step how to copy any DVD movie to your iPhone, iPod or iPad using a great Mac application called MacX DVD Ripper Pro.

MacX DVD Ripper Pro, in my opinion, is the best and easiest way to rip or copy DVD movies to your Mac if you’re planning to put those movies on your iOS device later. It’s very simple to use. It can copy a DVD in just a few clicks. It’s extremely fast and saves you a ton of time because there’s no need for additional converter programs and you don’t have to configure any settings. It will automatically copy the DVD in the best video quality that is compatible with your device so it fits perfectly on the screen. And it comes with free lifetime updates so you know you’re always able to copy the latest movies when they come out.

First you’ll want to download MacX DVD Ripper Pro

Next you’ll load your movie disc into your DVD drive and open MacX DVD Ripper Pro. Once it’s opened you’ll click the DVD button in the top left and choose OK. Once the output profile window pops up you’ll select Apple device then choose iPhone, iPad or iPod depending on what device you have. Then select the model of your device and click Done.

It will automatically select the main movie file for you. Then you can select the folder where you’d like the movie to be copied to. So you can click Browse then click Run and it will start to copy the DVD.

Once it’s finished the window will pop up with your video in it. Now you’ll just open up iTunes and browse to the folder and drag and drop the video file into iTunes. And when it’s done copying you’ll sync your iPad, iPod or iPhone with iTunes via the USB cable.

Now once your device shows up in iTunes you’ll click on it then click the Movies section. Then select sync movies, click apply, and your iOS device will sync & copy the DVD movie. And now when you open up the Videos app on your device your movie will be in there. Easy! That’s my review on MacX DVD Ripper Pro from MacXDVD.com. Hope you enjoyed!

Cheapest iPhone Plan: How To Save Over $2,000!

Video Transcript:

Hey what’s up everybody? Today I’m going to be giving you my top six tips on how to get the cheapest iPhone plan possible. Stay tuned.

Ok so my first tip is to get the cheapest calling or voice plan that will fit your needs and stay within your budget. A lot of people don’t use or even need unlimited calling plan or voice minutes. With all the rollover minutes these days I promise you, I’ve been an iPhone customer for four years and I’ve never come close to using all my voice minutes. I don’t know, maybe people just don’t like to call me. No but seriously the majority of people these days can get by with the minimum voice minutes. You don’t need unlimited minutes. Now if you’re that type of user, you know Grandma’s going to be calling you every night then yeah you’ll have to get that. But for the majority of people only stick to the cheapest calling plan which is forty bucks a month for 450 minutes.

Okay so tip #2 is basically the same concept as tip number one except it’s dealing with data. Just get the minimum amount of data that you need to get by. Now I believe the minimum data plan that you can get is 300 megabytes for $20/month. Now again, most people can get by with 300 megabytes, and here are a few ways to do that. Set you phone to use WiFi as much as possible, whenever you can. That way you’re not using your cellular data to watch YouTube videos, stream music from Pandora, or download apps. Those three things will use up the most data, and you’re going to want to be on Wi-Fi when you’re doing that. Also be careful of what apps are using what. Some apps like to download data in the background. They like to use your location services and track you by GPS. That will use a lot of data and it will actually lower your battery life so keep that in mind. So those are some ways that you can cut down on your data usage so that you are able to get the minimum data plan.

Okay so tip #3 is to not get a texting plan. You probably think I’m crazy but with an iPhone, it comes with iMessage which is Apple’s own service for sending messages throughout any iOS device, whether it be from an iPhone to an iPad vice versa. Anything that is made by Apple that has iMessage installed will send it over iMessage instead of using your SMS plan. It’s built in right into the SMS app. If you go into it and it turns blue instead of green, that means it’s using the iMessage instead of the regular SMS. Now this will allow you to send text, video, pictures, anything over iMessage using data and even using wireless once you’re on WiFi. So it will use Wi-Fi. It won’t use your data. Now this feature works great when you’re texting other people with iPhones, but what about if you got to text a person with an Android or another smartphone? Well this is where you have to use Google Voice, and I love Google voice. I’ve been using it for over three years now. It has saved me a ton of money. Basically what it does is you sign up for Google Voice, it’s free if you have a Gmail account. Go to Google.com/voice. And you get to pick a new number, any number that you want, a standard US number. And that number will get forwarded to your iPhone and you will be able to get text messages and send text messages to anybody you want using that number. So what I do is I usually give out my Google Voice number to people that do not have iPhones and they text that number and I can text for free with that. And my contacts with iPhones I can send them free text messages through iMessage so that way it completely cuts out my texting plan. I save $20/month and you can also do that too. It’s super easy and it’s awesome. I love it so check those out. It’s Apple iMessage and Google Voice.

Tip #4 – Decline a warranty. Do not buy an extra warranty. I promise with a little bit of carefulness and a case for your iPhone you will avoid 99 percent of the problems that you might potentially have. I’ve dropped my phone hundreds of times and all I got’s like a $10 case on it and my iPhone is still in mint condition. You’ll be able to save a hundred bucks by not getting the warranty. My only advice to you is to not drop it in the toilet.

Tip #5 is to buy an older version of the iPhone. Now I know with Apple it’s always fun to have the latest and greatest but it’s okay to buy the iPhone that came out two years ago. Usually you can get the older iPhone for free with a new two year contract, and it runs the same software as the new iPhone usually. If not you can always jailbreak it. But don’t be afraid to get the old older version of the iPhone. So if you’re looking to save a lot more money upfront you can you can do that by getting the older version of the iPhone.

And last but not least tip #6 is to try to find an employer or student discount. I know personally I have a discount that gets me 15% off so don’t, don’t miss out on that. Check with your work, check with your school. With a simple Google search you’ll probably be able to find a discount for you that you can use. It will save you money each and every month. Do not pass that up.

So those are my six tips on how to save tons, tons of money over the course of two years. You can save money by doing these things no matter what wireless carrier you’re on. So try these out and I hope this helps so that we can all continue to watch YouTube wherever we are for less money. If you like this video, if you enjoyed it please Subscribe. Please hit the Like button and comment and tell me if any of these tips work for you or if you’re going to use any of these tips or if you’re already using some of these tips. I’ll be talking to you guys and girls later. Keep having fun out there. I’m out.

Newer posts »

© 2024 My Tech Methods

Theme by Anders NorenUp ↑