Videos by Andy Slye

Category: Tips & Tricks (Page 2 of 4)

Tips & Tricks

How to Install Multiple Mac Apps Automatically

GetMacApps.com

Transcript:

What’s up? It’s Andy with MyTechMethods. In this video I’ll be showing you how to install multiple Mac apps at once automatically using a free web app. So if you’re a Mac user and you want to install multiple apps at once, and you want to save a lot of time, a lot of effort, this website will help you out. It’s called GetMacApps.com and it lists a bunch of the most popular free Mac Apps on here, and you can go down here and just select any app that you want to install. You can select all of them if you want to and then once you select all the apps that you want to install on your Mac you just click this button called Install These. And the instructions for this website are right here on the left if you want to just follow those but for this video I’ll just show you how to do it really quickly. So if you go through here select all the ones that you want, I’m just going to select an app that I don’t have on my system currently which is, I don’t have Audacity so I’ll just select that. But you like I said you can select all the apps that you want and then click this little button here and it’ll give you this code here. What you want to do is just copy this code then open up terminal on your Mac. Okay now once you’re in terminal you’re just gonna paste that code into your terminal that you just copied and then hit enter. It’s going to install all the apps you selected in the background automatically, and you can go get your coffee, get your caffeine in for the day, come back and it’ll be done. The time it takes will depend on how many apps you selected to install. This one went pretty quickly because it was only one app so there you go it’s done. And then once I close Terminal out I can go and search for my apps and there it is. Audacity has been installed and there it is. So that is an awesome website for Mac users. Bookmark that. It’s called GetMacApps.com. It’ll definitely come in handy if you get a new Mac or you had to reinstall for some reason. You can just reinstall all those apps all at once automatically. I hope this was helpful to you. If you’re a Windows user as well you can use a similar site called Ninite.com which is really awesome. It does the same thing for Windows. It’s probably is a little easier actually so check that out. I did a video on that. You can click that little annotation. It’ll take you to that video if you’re a Windows user. Make sure you give this video a thumbs-up and subscribe to my channel. Thank you so much for watching. Keep having fun out there and I will talk to you later.

By Andy Slye
Podcastomatic: Convert Text Blogs to Audio Podcasts

Podcastomatic

A Free Web App that Converts Your Favorite Text Blogs into Subscribable Audio Podcasts

Podcastomatic is one of my favorite free web apps that converts (most) text blogs into audio podcasts. If you’re a podcast junkie like me and you also have your favorite text blogs that you visit daily but don’t have time to read them all, then this website is for you!

It converts your favorite blogs into a podcast feed using text-to-speech technology. Each blog post is automatically converted into a podcast episode. This is really cool if you want to stay up to date with your favorite text blogs, but you don’t have time to read them. You can turn them into an audio podcast and listen to them while you’re on the go with Podcastomatic.

Here’s how it works. Go to Podcastomatic and enter the URL address of whatever blog that you want to convert to audio then click “Go”. It will take a few moments to convert the blog posts into audio files and into a whole entire podcast that you can subscribe to on iTunes. Each blog post is turned into its own podcast episode.

Since this uses text-to-speech technology the voice is kind of robotic, but you will get used to it after you listen to a few episodes. Podcastomatic is a great way to keep up-to-date on your favorite text blogs if you don’t have time to read them every day. Go ahead and try this out with your favorite text blog. It won’t work with every single blog, but it works with most blogs.

By Andy Slye

Ninite: Install & Update Multiple Programs at Once (Windows)

Ninite: Install & Update Multiple Programs at Once (Windows)

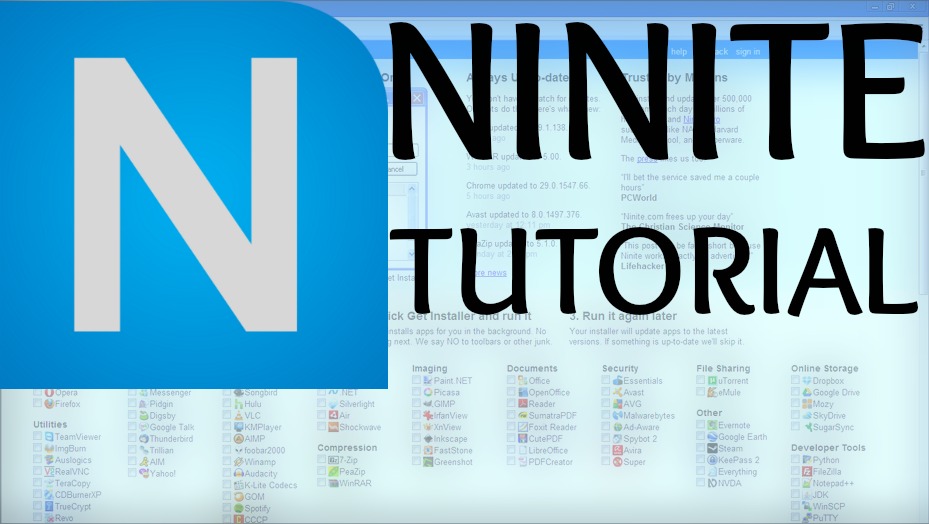
This video is going to be a brief tutorial and overview of one of my favorite free web apps called Ninite. Ninite is a website that allows you to install or update multiple applications at once on your Windows computer. It’s totally automated, and this website is a lifesaver if you’re constantly updating or installing apps for new computers that just have a clean install of Windows.It’s very handy if you always install the same programs over and over again. You know what applications you’re going to install so this helps you install all those applications at once, and it saves you a ton of time.

Ninite is pretty straightforward. You select the programs that you want to install (or update). You click “Get Installer” and just run that installer file, and it will install all the applications that you have selected. Not only does it install new programs, but if you keep the installer file you can update all the applications that you just installed with this file. Ninite offers some of the most popular applications from different categories such as utilities, browsers, security, storage, etc.

Once you select all your applications that you want, click the “Get Installer” button. It will download the installer file to your Downloads folder then you can just run it from there. It automatically installs or updates those applications that you selected. If you click “Show Details” it will show you what stage it’s doing. It’s totally automated and can be left unattended. In fact you can just minimize the Ninite window and go do other stuff (like cook some blueberry pancakes — yummy!) and Ninite will automatically install everything for you.

That was a brief overview of one of my favorite free web apps, www.Ninite.com. Here are some of the main features: The programs that Ninite offers are always up-to-date so it’s a good way to keep your computer more secure. When it installs and updates the programs that you select, it automatically says No to toolbars and other junkware. It not only installs, but it updates multiple programs too. Ninite automatically selects the correct 32-bit or 64-bit version to install on your PC.

If you’re a Windows user I definitely recommend bookmarking this website. I’d also suggest going to Ninite right now and choosing all the applications that you have installed on your PC (and maybe applications that you don’t have but you want to install) and download that installer file. Keep that installer file on your computer and run it about once a month so you can keep all those applications up to date just by running that one installer file. It’ll save you a ton of time, and again it will keep your computer more secure.

By Andy Slye

How to Free Up Space on iPhone, iPad or iPod Touch

iOS Quick Tip: How to Free Up Space on iPhone, iPad or iPod Touch

Here’s a quick tip for all you iOS users out there. This is how to free up space on an iPhone, iPod, or iPad – instantaneously. So if you ever find yourself running low on storage space on your iOS device, have no fear. It’s really easy to free up space. First go into your Settings, then tap General, and then go to your Usage. Here it’ll populate a list of all the apps that you have installed on your iOS device and how much space each app is taking up. It’s listed by putting the app that uses the most space on top. Music is listed first on mine because it’s using up the most.

What you want to do here on this list is find apps that you can delete then immediately reinstall to free up a lot of space. For example, I’m not going to delete my music or podcasts, but I can delete Facebook because it’s using up 147 unnecessary megabytes of data. The original app size is only 57 MB, which means it’s using up 147 MB of cached files. To free up this space, hit Delete App then Delete App again, and it frees up 150 MB (on mine). So go through your apps and look for apps that are taking up at least 100 MB of storage space.

Almost all the social networking sites are big culprits of this. They take up a ton of unnecessary space. Each time you look at your Instagram feed it saves huge cache files to your device. The app size originally is only 21 MB so it’s taking up 134 MB of unnecessary space on my iPhone. I can delete this app just like with Facebook. Vine does it bad too. It’s taking up 100 MB so I’ll delete that app as well.

Once you delete those apps, all you have to do is go back into your App Store and reinstall those apps that you just deleted. They will download and reinstall in the same exact location that they were before. So if you had it in a folder it’ll go back into that folder, and you won’t lose any of the app settings that you had. That is how to free up space on an iPhone, iPod, or iPad. Go ahead and try that out, and let me know how much space you freed up using that method.

By Andy Slye

How to Transfer Music from iPod, iPhone, or iPad to Any Computer

How to Transfer Music from an iPod, iPhone, or iPad to Any Windows Computer

Click here to download Leawo iTransfer (Free trial; $19.95 for full version)

What if your computer suddenly crashed and you lost everything in your computer’s iTunes library? But all your music was still on your device (your iPhone, iPod, or iPad) and now you need to transfer all the music from your device back to your computer. This is how to do just that! In this tutorial I’ll show you how to transfer music from an iPod, iPhone, or iPad to your computer. The program is for Windows, and it is called Leawo iTransfer. You can start a free download by clicking the link at the top of this description. It doesn’t just transfer music either. It transfers photos, videos, apps, PDF documents, and songs – everything. The first thing you want to do is make sure you have iTunes installed.

Once iTunes is installed on your computer, the next thing you want to do is click the link above to start a free instant download of Leawo iTransfer. This is the program that you’ll use to transfer all the music from your iOS device back to your computer. Once the download is complete, install iTransfer and open it from your Desktop. The free trial version will let you transfer up to 100 files from your iPod, iPhone, or iPad to your computer. So if you only have 100 files to transfer then you can use this totally for free. If you have more than 100 files you can purchase a registration code that will give you unlimited transfers.

The next step is to connect your iPhone, iPod, or iPad to your computer using the USB cable. Once your device is connected if iTunes comes up just minimize it. Now in the iTransfer program you should see your device in the left hand side column so click on your device. Now you can transfer the music from your iPod, iPhone, or iPad to your computer very easily. Click on the Music section. All the songs are selected by default so if you want to transfer all songs to your computer’s iTunes library just click the “Transfer” button. It shows a list of all the songs that are going to transfer. If you see iTunes in the list you can click “Transfer Now”, but if you don’t see iTunes you can click the “Save To Folder” button and click “Change”.

Since you already have iTunes installed you can save it to a special folder called Automatically Add to iTunes which will automatically transfer and add the songs to iTunes once you transfer them to your computer. Here’s how to get to that folder. Click your profile name’s folder, then My Music, then iTunes, then iTunes Media, and the Automatically Add to iTunes folder should be in there. Choose that folder and click OK. You don’t have to save your files to that folder. If you want to choose another folder you can just choose whatever folder you want, but I just like to save it there because it makes the process a bit easier. Once you have your folder selected that you want to transfer the music to, click “Transfer Now”. When the transfer is complete you can open iTunes. If you saved your songs to the Automatically Add to iTunes folder they will automatically be in iTunes. If you saved it to another folder just go to that folder, and your songs will be there. That’s how to transfer music from an iPhone, iPod, or iPad to your computer. It’s very easy to do with Leawo iTransfer.

By Andy Slye

« Older posts Newer posts »

© 2024 My Tech Methods

Theme by Anders NorenUp ↑