Videos by Andy Slye

Category: iPod (Page 4 of 4)

Apple iPod

Review: Case Star Aluminum Stand for iPhone, iPad, iPod Touch

Buy the Case Star Aluminum Stand on Amazon
Subscribe on YouTube
Twitter
Facebook
Google+
Instagram

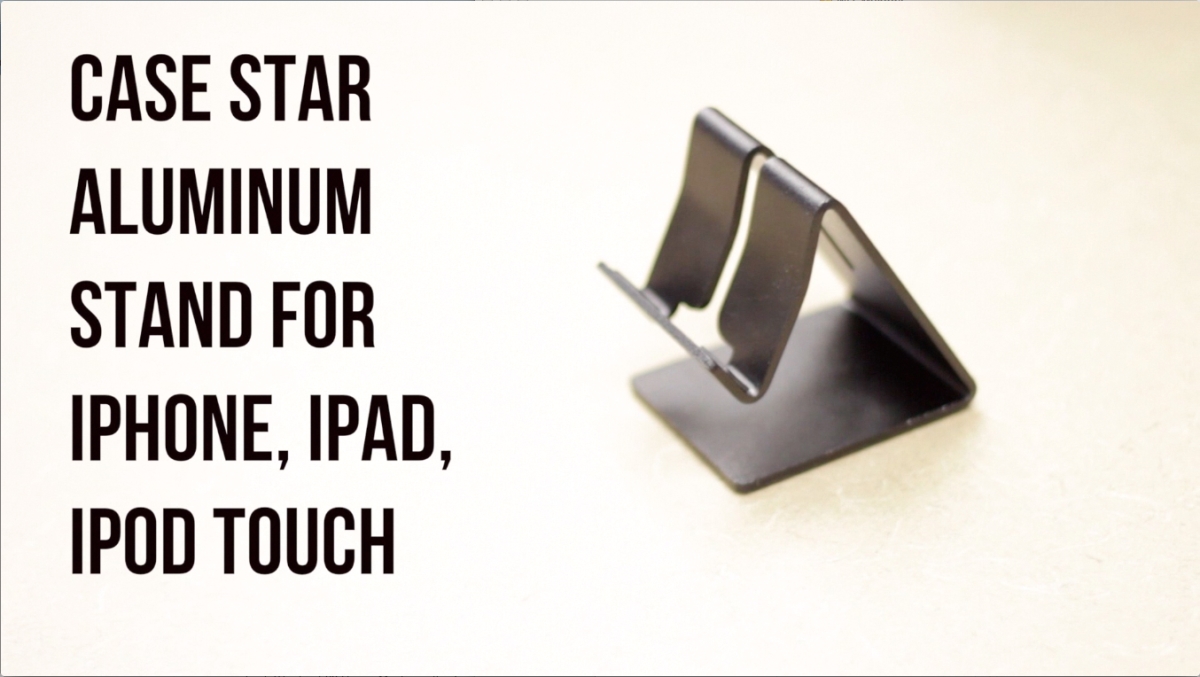
Alright I may have found the perfect stand for my iPhone. This is the Case Star aluminum desktop stand. This is going to be a short video review over it. This is a nice sturdy stand, and it’s very affordable. I got it for $10 on Amazon with free shipping. So if you want to get this stand click the link in the video description. This is a very nice stand. It’s made out of pure aluminum. It has rubber feet as you can see so it doesn’t slide. I wanted to make sure I got a very well made stand that wouldn’t tip over or move when I used my device. I not only wanted a dock, but I wanted to be able to have a stand that I can use my device and press the physical buttons and the screen while the device was sitting in the stand. This one does a great job at that.

What I really like about this stand is that it doesn’t tip over. It actually comes in more colors than black. Amazon had silver and blue editions as well. There are probably more. As you can see from the video when I touch the screen the stand does not move. It remains stationary, which was a big plus for me. That’s why I bought this one, and I wanted to show you that this stand does not move. You can press the physical buttons as well as tap the screen while it’s in the stand. It also has a hole in the bottom and a slit on the back where you can put your charger through so you can charge your device while it’s in the stand. In the video you can see my phone charging while it’s in the stand. It’s a very nice looking stand, and it seems pretty durable. A device can sit in portrait view as well as landscape. It not only holds my iPhone, but it actually holds my iPad Mini very well too. Plus I can actually use my iPad while it’s sitting in the stand so that’s awesome. It doesn’t move when the iPad is in there. It holds up very well, and it doesn’t rock or tip over and the iPad does not fall.

Overall I’ll give this stand a thumbs up. It looks nice, and I can see it holding up strongly over a long period of time. So again if you want to pick this up the link will be in the video description. You can get it on Amazon for a very affordable price. It’s a super good deal if you’re looking for a nice stand for your iPhone, iPod Touch, or iPad.

What is Cydia? How to Use Cydia After Jailbreaking


So you’ve just jailbroken your device and want to know more about Cydia. In this video I’ll explain what Cydia is and how to use Cydia so you can customize your iPhone, iPad, or iPod Touch!

Cydia is basically the App Store for a jailbroken device. It’s like the secondary App Store where you can get third-party custom apps after you jailbreak. Jailbreaking is the only way to get Cydia on your iOS device. Cydia is where you download, install, and manage everything for your jailbroken device.

A good analogy is to look at your device as a town, and this town has a mall. This “mall” is where you get everything that you can put on your device and that mall is the Apple App Store. When you jailbreak your device it’s like getting an extra mall put in that town. So now you have the old mall (the Apple App Store) and the new mall (Cydia). Cydia is where you can get everything that the old mall does not offer.

The Cydia app’s home screen has all kinds of different information and you can see a list of featured and popular apps for jailbroken devices that you can get through Cydia. It also has a User Guide section where you can learn more about Cydia and jailbreaking. Also from the home screen you can manage your Cyda account.

The Sections area lists the categories of everything that’s offered through Cydia – all the apps, all the tweaks, and all the themes. To install an app or tweak or theme from Cydia just tap on a Section, then tap on an app and tap the Install button on the top right.

The Changes section is where you can see all the upgrades and updates for all your apps that are offered by your sources that are installed on your device. It’s basically like the Updates section in the regular Apple App Store.

The Installed section is where you manage all your apps that are installed on your device via Cydia. Here you can reinstall or remove any app by tapping on it and clicking the Modify button in the top right hand corner.

A Source is also called a Repo or repository. If Cydia is a “mall” then the Sources are the individual stores within that mall. Cydia comes with default Sources installed where you can get almost any app. But if there’s an app out there that comes from a different source you can add it within the Sources section. Sources are basically the host of every app that you can install. It’s where you download and install the apps from. So whatever source you have in Cydia you can get any app from that repo.

The Search area is where you can search for any app or tweak or theme within Cydia. It searches any repo that you have in Cydia. If the app is in blue text that means it’s a paid app. Black text means it’s free. Cydia accepts two different forms of payments, Amazon or PayPal.

Those are all the basic things you need to know about Cydia to get you up and running and installing apps and tweaks and themes and customizing your iPhone, iPad, or iPod!

What Is Jailbreaking? How a Jailbreak Works

What is jailbreaking? How a jailbreak is developed & how it works!
Subscribe on YouTube!

Video Transcript:
Most people with an iOS device (iPhone, iPad, or iPod Touch) have probably heard of the term jailbreaking. Maybe you’ve even jailbroken a device before. But what does jailbreaking actually mean, and what is the process behind it? Well today you’re going to find out in this jailbreaking edition episode of “What Is?”

To jailbreak means to gain the ability to install custom third-party apps on your device. It’s completely legal, but Apple does not want you to do it because they want to control the user experience. Now before we get into the jailbreak process, let’s learn how an iOS device boots up. The iOS bootup involves a series of signature checks that makes sure everything that’s being ran is approved by Apple. It happens in the following order: BootROM, BootLoader, Kernel, and iOS operating system.

The jailbreak itself involves obtaining control of the root and media partition of the device. This is where all iOS’s files are stored. And in order to be controlled, the “private/etc/fstab” must be patched. FSTab controls the permissions of the device’s root and media partition. The main problem is not getting the modified code in but getting it through certain checkpoints. Apple put in these checkpoints to verify if a file is actually legit or if it’s from a third-party. Every file is signed with a digital signature, or key, and without it the file is useless.

Signature checks are the main roadblocks in the jailbreak process. While the kernel is loading there are tons of signature checks happening to make sure every file has been approved by Apple.

The main objective for a jailbreak is to either patch the checks or bypass them. So this brings us to the two main exploit categories.

The first is the BootROM Exploit. This is done during the BootROM, and it can’t be patched by a normal update. Since this is before almost any checkpoint, the modified code is put in and this creates a gateway to bypass all the signature checks or simply disable them.

The second exploit is the Userland Exploit. This is done during or after the loading of the kernel, and it can easily be patched by Apple. Since it’s after all the checks, it puts the modified code directly into the openings and back into the kernel.

That is how jailbreaking works! If you’re not worried about voiding your Apple warranty or if you don’t even have a warranty, I would recommend trying jailbreaking out. It’s really easy!

How To Copy Any DVD To iPad, iPod, iPhone

Copy a DVD to iPad, iPod, iPhone – The Easy Way!

Click here to download MacX DVD Ripper Pro
Visit the MacX Website

Video Transcript:

In this video I’ll be showing you step-by-step how to copy any DVD movie to your iPhone, iPod or iPad using a great Mac application called MacX DVD Ripper Pro.

MacX DVD Ripper Pro, in my opinion, is the best and easiest way to rip or copy DVD movies to your Mac if you’re planning to put those movies on your iOS device later. It’s very simple to use. It can copy a DVD in just a few clicks. It’s extremely fast and saves you a ton of time because there’s no need for additional converter programs and you don’t have to configure any settings. It will automatically copy the DVD in the best video quality that is compatible with your device so it fits perfectly on the screen. And it comes with free lifetime updates so you know you’re always able to copy the latest movies when they come out.

First you’ll want to download MacX DVD Ripper Pro

Next you’ll load your movie disc into your DVD drive and open MacX DVD Ripper Pro. Once it’s opened you’ll click the DVD button in the top left and choose OK. Once the output profile window pops up you’ll select Apple device then choose iPhone, iPad or iPod depending on what device you have. Then select the model of your device and click Done.

It will automatically select the main movie file for you. Then you can select the folder where you’d like the movie to be copied to. So you can click Browse then click Run and it will start to copy the DVD.

Once it’s finished the window will pop up with your video in it. Now you’ll just open up iTunes and browse to the folder and drag and drop the video file into iTunes. And when it’s done copying you’ll sync your iPad, iPod or iPhone with iTunes via the USB cable.

Now once your device shows up in iTunes you’ll click on it then click the Movies section. Then select sync movies, click apply, and your iOS device will sync & copy the DVD movie. And now when you open up the Videos app on your device your movie will be in there. Easy! That’s my review on MacX DVD Ripper Pro from MacXDVD.com. Hope you enjoyed!

How To Copy Any DVD To iTunes (Mac X DVD Ripper Pro)

Video Transcript:

Hey everybody what’s up? This is a quick video on how to copy any DVD to iTunes so you can put them on any device – your iPhone, iPad, iPod, Android tablet, Android smart phone, or just keep them in iTunes. This is a fantastic piece of software that I’m using. It’s called MacX DVD Ripper Pro. And if you click the annotated link at the top of this video it will take you to their site where you can download it and buy it at a discounted price. I highly recommend it. It’s very awesome. You’ll get your use out of it so go ahead and do that right now.

Once you have it downloaded and installed, start it up. It’ll bring you to this main screen here and most people are just going to load the DVD disc so if you click this DVD button it’ll load your DVD disc that is in your DVD drive right now. Or you can click this Load DVD folder if you already have a folder on your computer. Or if you have the ISO image you can click this ISO button. Most people are, like I said, are going to be using the DVD button so click that.

And here the Source DVD disc window pops up. It’ll show you what’s loaded into your drive right now. It’ll show the main title of the movie here in this box. You’ll just hit OK. Alright and here it is. It’ll pop up the output profile window and here is where you can select what output format that you want your movie to be in depending on what device you’re going to put it on. So I can choose anything from an Apple device, iPhone, iPod, iPad, all kinds of stuff, Android tablet to Android smart phone, and even YouTube video and PC General, all kinds of stuff. So right now I’m just going to choose iPhone. It gives you these recommended settings which is really awesome because you won’t have to go in here and change any of the settings. It’s already chosen for you. It gives you the best quality option and it gives you, even gives you the option to choose older models which is pretty cool. So I’m just going to leave mine on iPhone 5. Click Done.

And here it is. It automatically detects the main movie title. It’s got a check right here. You can see how it’s the longest. This is the duration so it’s an hour and six. That’s the main movie. If you just want to copy the main movie it automatically selects it for you and you just hit Run. But if you want to select any of the extras, if the DVD has any extras you can go ahead and select any of these here. You can select them all if you want to and you can go ahead and click Run.

That’s pretty easy. That’s as simple as it is. I will show you what the settings look like if you want to go in here and change some of these. Basically the default audio language we’ll just leave that at English obviously. And then you can choose this Open Output Folder that’s by default. And you can actually check this Add MP4 files to iTunes library after conversion. What this does is it automatically adds the video movie to your iTunes so you don’t have to do it manually after it’s converted, after it’s copied to your Mac. And you can actually choose this Shut down computer after conversion if you’d like. And here you can choose the default location of where the backed up copy of the DVD video goes onto your computer. I just have mine set to the desktop by default. You can change it to whatever you’d like. So now, yeah we’ll just hit Run and let it copy the DVD to your Mac.

And there it is folks, simple as that. The output folder will pop up. Your movie will be there. If you want to put it into iTunes, just open up iTunes and you can drag and drop this movie in there and then once it loads there it is. And you can load that onto your iPhone, your iPod, iPad by syncing up your iDevice to your computer via the USB cable and it’ll sync onto your device. So go get that program now it’s called MacX DVD Ripper Pro and again the link is on the top of this video, and the link is also in the info section below this video so you can click on it there too. So go get that, highly recommended program by me. And as always if you enjoyed this, if it helped you out please subscribe to my channel. Leave a comment and let me know if it helped you out or if you have any suggestions. And give this video a like, a thumbs-up. That’s it for today folks. I will talk to you guys and girls later. Bye.

Newer posts »

© 2023 My Tech Methods

Theme by Anders NorenUp ↑