Videos by Andy Slye

Category: Guides (Page 6 of 18)

Dell XPS 13 vs MacBook Pro 13″ – Which is Better?

Welcome to the ultimate showdown between the best 13″ laptops: The MacBook Pro 13″ vs the Dell XPS 13.

Both of these models I have were released in 2016 and both of them have the 6th generation Intel Skylake processors in them. Having said that, the XPS 13 and the MacBook Pro that I have are not 100% the same when it comes to the rest of the specs, but this video will focus on the bigger picture, and at the end of this video I’ll share my verdict so you can figure out which one is best for you.

Price

The Dell XPS 13 is obviously cheaper. It’s cheaper overall, they offer more affordable options for under $1000 while the MacBook Pro starts at $1499 in the US. For the models I have here, it’s currently $1699 for the Dell XPS 13 and $1999 for the MacBook Pro. Now to make pricing more fair when you’re shopping, you can compare the non-touch screen of the Dell XPS 13 to the non touch bar model of the MacBook Pro along with other different hardware configurations. But overall, Dell is obviously cheaper so Dell does win the pricing battle.

Ports

Dell has a much wider variety of ports on the XPS 13 featuring one USB-C Thunderbolt 3 port, two USB 3.0 ports, a headphone jack, and an always convenient SD card slot. The MacBook Pro, on the other hand, only has a headphone jack and either two USB-C Thunderbolt 3 ports on the non-touch bar model or four USB-C Thunderbolt 3 ports on the touch bar model. So that’s a pretty no-brainer; Dell obviously wins the ports battle because they offer more ports than the new MacBook Pro, which Apple went ahead and took away all the ports that you’re used to and replaced them with USB C ports, so nobody has all of those ports for their devices yet, so it’s kind of an inconvenience right now. It will probably be beneficial in the future sometime, but not right now. For right now, Dell does win the ports battle.

Performance

Both the Dell and the MacBook Pro come in configurations of i5 or i7 processors with turbo boost, 8 or 16GB of DDR3 RAM, and SSDs from 128GB to 1TB, and Intel Iris graphics. So the performance really just depends on the configuration you choose. However, I will point out that my XPS 13 has a Core i7 with 16GB of RAM while my MacBook Pro has a Core i5 with just 8GB RAM, and I did a video editing export test and the MacBook Pro handled it way better, 4x better to be exact. Now that test was obviously dependent on the software, and Final Cut Pro X on a Mac is known to usually have faster export times because it’s optimized specifically for the Mac hardware. But since these laptops have so many similar specs, I’m calling this one a tie.

Display

Both of these displays are very beautiful. The Dell XPS 13 comes in at 3200×1800 on that Quad HD InfinityEdge IPS touch display, with super thin bezels, so right off the bat Dell is hard to beat. The MacBook Pro screen still looks great with a resolution of 2560×1600 plus the new P3 color space and at 500 nits, it gets a little brighter than the XPS 13, and in my opinion it does have the advantage of having a 16:10 aspect ratio, but when the display is compared side by side to the Dell XPS 13 you can tell that the XPS display is just better. So Dell does win the display battle. Up next is the battery life. Dell has a slightly bigger battery at 56 wH compared to the 49 wH on the MacBook Pro. However, the non touch bar MacBook Pro has a 55 wH battery, which should be right around the same battery life as the Dell XPS 13. In my test, the XPS 13 went from full charge to 0% in about 8 hours, and the MacBook Pro went from 100%-0% in about 7 hours so you’re getting about an hour longer battery life with the XPS 13; however, the MacBook Pro did charge faster than the Dell XPS 13, actually by 50 minutes faster. It went from 0-100% charge in 90 minutes, while the Dell XPS 13 went from 0-100% in about 140 mins, so the MacBook Pro does charge faster,  but the Dell has a bigger battery and a better battery life, thus winning the battery battle.

Portability

Starting off with the weight, the MacBook Pro 13″ weighs right at three pounds. The Dell XPS 13 weighs right under three pounds at two pounds and fourteen ounces to be exact. The XPS 13 is squeezed into a typical 11″ laptop shell which makes it one of the most portable 13″ laptops out right now. They’re both almost the same exact length, but the MacBook Pro is about a half inch longer in depth. However the MacBook Pro appears to be thinner than the XPS 13. It’s so close, and even though Dell wins the weight battle by two ounces, the MacBook Pro wins the thinness battle by a hair, so that makes it a tie for me. You really can’t go wrong with either of these laptops if you’re planning on being portable and mobile.

Design

Starting off with audio, the speakers on the MacBook Pro just sounded better to me; they have the faux grills on top, so the speakers aren’t really directly under the grills on the MacBook Pro but they do sound better. They’re coming up through the top while the Dell XPS speakers are really small and they’re on the side. So the MacBook Pro just sounded cleaner to me when I was listening to music and vocals and things like that. The MacBook Pro build is very solid, it’s attractive and symmetrical, the space grey looks very sleek, and I can open the lid without the laptop moving. The XPS 13 looks very good with the silver on the outside and the inside has a nice black carbon fiber finish. And I love the battery gauge button that used to be an advantage that MacBooks had until they stopped doing it, but the XPS 13 does have a common issue with coil whine and some trackpad issues with certain software. It’s not symmetrical, and you cannot open the lid without the laptop moving, which doesn’t seem like a big deal, but it does make a difference. Both keyboards have backlights; the MacBook Pro’s keys are a little bigger than the Dell’s keys but the biggest difference is the key travel. The MacBook Pro has Apple’s new 2nd generation butterfly mechanism keyboard which is totally subjective to the user but I like the MacBook Pro keyboard a little better than the traditional keyboard on the Dell XPS 13. It feels nicer when typing on it. Some people hate the butterfly mechanism but I’m a fan, especially with the 2nd generation. The MacBook Pro trackpad is king compared to the XPS 13. It’s bigger and works like Apple has always made them even with the Force touch. The Dell trackpad still physically clicks down but I still have issues with the Dell trackpad in Google Chrome. Having said that, the Dell XPS 13 still does have the best trackpad on a Windows machine that I’ve ever used, but just not as good as Apple’s yet. So MacBook Pro wins the overall design category.

OS

Which has the best operating system? This is going to cause a lot of ruckus in the comment section! Windows 10 is fantastic and is the Windows version ever, but MacOS is still superior. You will most likely run into fewer problems in a five year span with a Mac than you would with Windows. Plus, the MacBook Pro can run Windows 10 virtually if you need it while Windows still cannot run MacOS which isn’t Windows fault but it’s still an advantage. Lastly, it is entirely possible and becoming more prevalent for Macs to get viruses but it’s still nowhere near the virus problem that Windows machines face. So as you can tell I think the OS battle goes to the MacBook Pro.

Verdict

Based on those categories that we just went over, if you add them up the Dell XPS 13 does win. Does that mean the MacBook Pro is a bad buy or it’s a bad laptop? No, it’s a good laptop, very expensive, but it’s a good laptop. And it all depends on what you do specifically as a user, depends on what kind of equipment you own, maybe you own an iPhone, maybe you’re invested in the Mac environment. Just like I am, I’m a Final Cut Pro user. It makes more sense for me to own a MacBook Pro because I can edit videos faster than on the Dell XPS 13. But if you are looking at them side by side, the comparison tests we did, I tried to be objective as possible with these tests and the categories. And just prioritize the categories based on your use and then you can find out which one is best for you. But if we’re going side by side with the tests we just did the Dell XPS 13 does seem to be a better laptop and the best 13 inch laptop that you can get right now. Both links to these laptops will be in the description below. Let me know in the comment section below what you think of these laptops, if you own one, if you’re wanting to buy one. Thank you so much for watching. My name is Andy. Make sure you hit that subscribe button and give this video a thumbs up if it helped you out. I will see you guys in the next video.
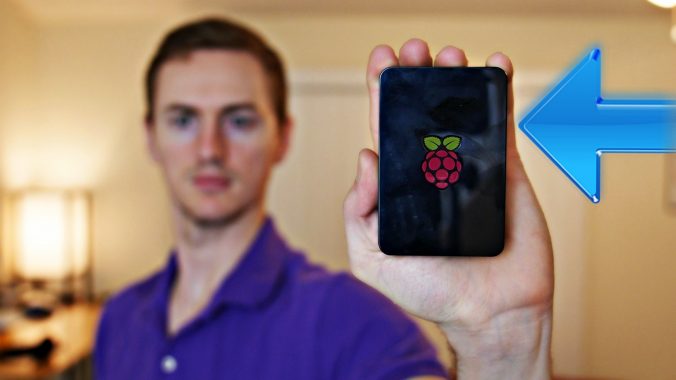
This Tiny Computer is a $75 Gaming Machine

This is the Raspberry Pi 3.

It’s a single board computer the size of a credit card and as the name suggests, it’s pretty sweet. It has a ton of uses from learning how to program to making your own DIY media center or maybe best of all which I’ll show you how to do in this video, turning it into your own Retro gaming console where you can play nearly any game from old-school consoles like Atari to Super Nintendo to Playstation and a lot more in between.

You can get the Raspberry Pi 3 on Amazon, but what I have is the #1 Best Seller CanaKit Raspberry Pi 3 Complete Starter Kit 32GB Edition. It’s the one I recommend because it comes with everything you need to get started. So let’s get into it. Here’s how to set up a Raspberry Pi 3 as your own Retro gaming machine.

First you’ll need to install the Raspberry Pi board into the CanaKit case that’s included in the kit. It’s very easy to do, just snaps right in there. Next you’ll need to insert the MicroSD card into the MicroSD card reader then connect it to your PC or Mac.

Download the free RetroPie image file.

Download a free SD Card Image writer for Mac or Windows. Use the SD Card Image writer to apply the RetroPie image file onto the MicroSD card then eject it when it is finished.

Insert the MicroSD card into your Raspberry Pi MicroSD slot, and finally connect the HDMI cable and the power adapter. Now you can either connect a regular keyboard and mouse if you want to play old school PC games, but you’ll eventually want a USB gaming controller like this Playstation one or this SNES one. I’ll leave links to the best USB controllers below.

When the Raspberry Pi is connected to power it will start up and you’ll see it boot into EmulationStation then you’ll need to configure your keyboard or controller. After you configure the buttons on your controller you should now see the RetroPie home screen.

From here you can go into your settings and connect the Raspberry Pi to your WiFi network or connect Bluetooth devices.

The last part is getting ROMs. ROMs are basically digital files of games that you can find online. The rules behind it are simple: only download ROMs to games that you physically own. I can’t provide the actual sites that host the ROMs, but you can find them with a simple Google search.

Once you have the ROMs downloaded on your Mac or PC, copy them to the correct console folder in the ROMs folder on your Raspberry Pi either over the network or using a USB flash drive. Since mine is connected to WiFi I just copied over the network from my Mac.

Once the ROMs are copied, restart the Raspberry Pi and there you go. You should be able to choose the game and start playing. By the way Donkey Kong is the best Super Nintendo game ever, hands down, no questions asked. If you have any other suggestions I’m happy to hear them. Comment down below!

How to Wipe & Restore a MacBook Pro/Air to Sell

How to wipe a MacBook Pro/Air and restore to sell on eBay or give away.
3TB WD External Hard Drive: http://amzn.to/1CbqyC3
How to backup a Mac with Time Machine: https://youtu.be/cqmPi3fnl4E

There are some things you need to do before you sell your Mac in order to wipe your personal data off securely and reinstall OS X. You’ll want to back up your computer, sign out of your Apple accounts, erase the hard drive, and restore OS X. This video shows you the steps you should follow.

If you already have your new Mac, you can use Apple’s Migration Assistant to move your files over. However, I don’t have my new Mac yet so I’ll start with the backup.

1. Create a backup
Connect an external hard drive to your Mac (or you can use a Cloud storage solution if you have enough space available) and backup all your important data such as photos, music, videos, documents, etc.

2. Sign out of Apple services
Open iTunes. From the menu bar at the top of your computer screen, choose Store, Deauthorize This Computer. When prompted, enter your Apple ID and password. Then click Deauthorize. While still in iTunes go to Store, Sign Out. Next sign out of iCloud. If you use Find My Mac or other iCloud features on your Mac, you should first archive or make copies of your iCloud data. After that, choose Apple Menu, System Preferences, click iCloud, and then deselect the Find My Mac checkbox. In System Preferences, click iCloud, and then click the Sign Out button. When you sign out of iCloud, you’re asked whether you want to remove iCloud data from your Mac. Your iCloud data will remain on any other devices that are using the same Apple ID. If you’re using OS X Mountain Lion or later, sign out of iMessage by going to the Messages app, choose Preferences, Accounts. Select your iMessage account, then click Sign Out.

3. Erase your Mac hard drive and reinstall OS X
If you’re transferring your Mac to a new owner, you might want to erase your built-in startup disk before reinstalling OS X. Before you erase and reinstall, make sure you have backed up your important files. If you’re using a MacBook, MacBook Air, or MacBook Pro, make sure the power adapter is connected and plugged in while performing these steps.
You can use these steps to erase the files on your startup disk and install a new copy of OS X:
Before you begin, make sure your Mac is connected to the Internet.
Restart your Mac. Immediately hold down the Command and R keys after you hear the startup sound to start up in OS X Recovery.
When the Recovery window appears, select Disk Utility then click Continue.
Select the indented volume name of your startup disk from the left side of the Disk Utility window, then click the Erase tab.
If you want to securely erase the drive, click Security Options. Select an erase method, then click OK.
From the Format pop-up menu, select Mac OS Extended (Journaled). Type a name for your disk, then click Erase.
After the drive is erased, close the Disk Utility window.
If you’re not connected to the Internet, choose a network from the Wi-Fi menu.
Select the option to Reinstall OS X.
Click Continue and follow the onscreen instructions to reinstall OS X.
After you reformat your hard drive and reinstall OS X, the computer restarts to a Welcome screen and asks you to choose a country or region. If you want to leave the Mac in an out-of-box state, don’t continue with the setup of your system. Instead, press Command-Q to shut down the Mac. When the new owner turns on the Mac, the Setup Assistant will guide them through the setup process.


Best Antivirus for Windows in 2017

If you’re a PC user, having an antivirus is almost always a necessity.

But which antivirus is the best? Here’s my vote for the best antivirus and anti-malware applications in 2017 for Windows computers.

Best Antivirus: BitDefender

In my opinion, BitDefender offers the best free and premium antivirus applications for Windows in 2017. BitDefender Free Edition has everything you’d want in a free antivirus: hassle-free installation, easy-to-use and simple interface, quiet and unobtrusive, lightweight and optimized, and strong threat prevention. It’s a top-ranked antivirus that consistently gets rated as one of the best antivirus programs by security companies each year.

Many people can feel safe with the free edition, but if you’re less tech-savvy and want the peace of mind of having the most complete protection for your Windows computer then BitDefender Total Security 2017 is a solid choice when you want a premium antivirus. It gives you everything you need to keep your computer and data protected if you don’t know much about safe computing and safe web browsing.

Best Anti-Malware: MalwareBytes

MalwareBytes is a free anti-malware program that every Windows user should have installed. The free version features an on-demand scanner that does a great job at finding and removing malware such as worms, Trojans, rootkits, spyware, adware and other threats that can slip by your typical antivirus program.

It’s a smart move to have this installed as a second line of defense along with your main antivirus program. You can run a weekly scan to make sure your system is clean. They also offer a premium version for just $24.95 per year that can be used for real-time protection and scheduled scanning to keep you fully protected without worrying about scanning manually.

More Tips to Stay Safe

  • Don’t install software from random websites. If you install software, make sure it’s from a trusted source.
  • Avoid Internet Explorer. Use a more secure web browser like Chrome orFirefox. Also consider an adblocker.
  • Don’t click on links or pop-ups. If you encounter links, hover your mouse over them to preview and verify the destination. If it looks suspicious, don’t click.
  • Don’t visit sketchy or unsafe websites.
  • Don’t install toolbars. Consider using Unchecky.
  • Don’t click on links in emails or download attachments from un-verified sources.
  • If you see something like “OMG watch what happens when this fight breaks out!” on Facebook, don’t click it. Just don’t.
  • Subscribe to MyTechMethods on YouTube!

Chromecast 2015 Review: How to Set Up a Chromecast 2

The Chromecast is one of my favorite devices. For those of you wondering how to set up your new Chromecast 2nd generation, look no further. This is my quick review and setup tutorial for the 2015 Chromecast.

What is a Chromecast?

A Chromecast is a small dongle that connects to your HDTV and enables you to use your smartphone, tablet, or computer to wirelessly stream video or audio to your TV. So if you want to make your TV “smart” then this $35 Chromecast is one of the easiest and cheapest ways to do it.

The box comes with everything you need: the Chromecast, a USB cable, and a power adapter along with simple instructions that I will walk you through in this tutorial.

How Set Up Your Chromecast

First, make sure you have the following:

  • WiFi connection
  • HDTV with an available HDMI port
  • Smartphone, tablet, or computer (Chromecast works with Android devices, iPhone/iPad, Windows, Mac, and Chromebooks)

Next, connect the small end of the USB cable into the Chromecast. Then connect your Chromecast to your TV’s HDMI port using the HDMI connector. If your TV has a USB port you can plug the USB cable into it to power your Chromecast. If your TV does not have a USB port, you’ll have to connect the USB cable to the power adapter and plug the power adapter into an outlet.

Once you see the Chromecast light up, that means it has power and the next step is to turn on your TV if it’s not already on and change the Source (or Input) to the HDMI port where your Chromecast is connected. For some TVs like mine it will say Chromecast next to the HDMI port so you know which one to go to.

Now once you see your Chromecast screen on your TV you can go to your phone, tablet, or computer and visit Chromecast.com/setup. Before doing this, however, make sure your phone, tablet, or computer is connected to your WiFi network.

If you’re on your phone or tablet, it’ll ask you to install the free Chromecast app. Once that’s installed, open it up and go to Devices and follow the prompts to set up a new Chromecast. Verify that your TV screen is displaying the same code. Select your Region and give your Chromecast a name.

The next part is where you will select your WiFi network and enter your WiFi password in order for the Chromecast to connect to your WiFi successfully. It may take a minute or two to finish the setup and once it’s finished it’ll most likely start the update process.

During the update the Chromecast will show a short instructional video on your TV so go ahead and watch that to get a little more familiar with it. The update may take a few minutes so just be patient.

Now when it’s finished you should see your TV displaying “Ready to Cast”. Take a good look at the casting icon because whenever you see that icon in any of your apps that means it’s able to stream to your Chromecast. Another thing to remember is that your device that you’re streaming from must be connected to the same WiFi network that the Chromecast is connected to in order for it to work.

Using Chromecast with Apps

Let’s take a quick look at the new Chromecast app which now offers more features. From this app you can see which movies, TV shows, and music you can stream from your installed apps. You can search for entertainment titles in the app as well, and it will give you recommended apps that are compatible with Chromecast. You can also manage your Chromecast device from the app.

Now let me show you how to stream from some of the more popular apps that you probably have on your phone. Of course it works with YouTube, when you open it you should see the casting icon at the top and if you tap it and select your Chromecast from the pop-up menu it should connect to your TV. Now you can tap on a YouTube video from your phone and it will play on your TV. You can create queues of videos to have them automatically play after each other, and yes it will keep playing if you lock your device or go to another app.

You can also use apps like Netflix, Hulu, Spotify, and Pandora just to name a few. To see a full list of compatible Chromecast apps I will have a link in the description below so check that out. And an often overlooked feature of the Chromecast that I absolutely love is the screensaver feature that has some of the most amazing photos on it. Sometimes I’ll just have the Chromecast on so I can look at those pictures on my TV.

So there you go, you now have a smart TV thanks to your new 2015 Chromecast 2nd generation. If you have any questions leave a comment below and I’ll try to answer them for you.

By Andy Slye

« Older posts Newer posts »

© 2024 My Tech Methods

Theme by Anders NorenUp ↑