Videos by Andy Slye

Category: Guides (Page 5 of 18)

Best Smart Thermostat? Nest Learning Thermostat Setup & Review!

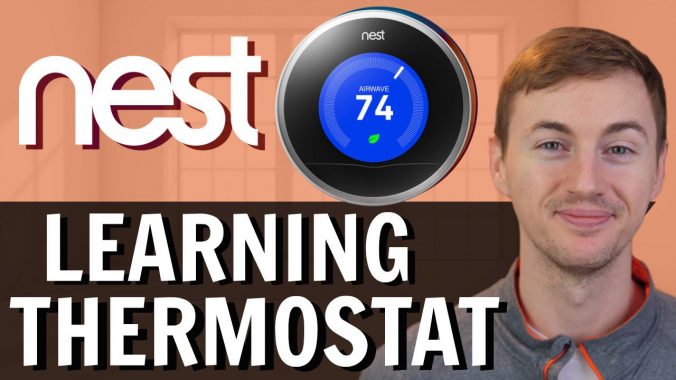
My Christmas gift to myself this year was a Nest Learning Thermostat 3rd Gen (Amazon) in my continuous effort to transition my home to a full blown smart house, and in this video I’ll explain how to install the Nest Learning Thermostat, and I’ll go over the features along with the pros/cons from my experience so far.

After tons of research, I found that the Nest Learning Thermostat was by far the most popular choice as the best smart thermostat. The main reason I wanted a smart thermostat was to save money on my electric bill because not only is it auto-programmable but it’s controllable from anywhere using your smartphone.

In the box there is the Nest learning thermostat itself, the installation and welcome guides, a Nest screwdriver with screws, and a trim kit.

Even though this thermostat works with most 24V systems you should first visit the Nest compatibility checker to see if it’s compatible with your home before purchasing. I’ll leave that link in the description as well. https://nest.com/widget/compatibility

The installation is actually pretty simple. Here’s a quick overview of how to install it.

First, switch off power to your current system by turning off the switch on the breaker box or turning off your system’s dedicated switch if it has one. Remove the cover off your old thermostat and verify that your old thermostat does not say 120V or 240V. If it does, that means its high voltage and Nest is not compatible with high voltage wires. Once you’ve verified Nest is compatible, take a picture of the current wire setup in case you need to reference it later on. Remove any jumper wires which are not needed for the Nest thermostat.

Next, peel off the included sticky labels in the installation guide and attach them to the matching wires. After you’re finished labeling the wires, disconnect the wires from the old thermostat. You can use the included Nest screwdriver to loosen the screws if needed. Remove the old plate while making sure none of the wires fall back into the wall. To install the Nest thermostat, first mark where your screws will go. If your old thermostat was larger than the Nest and there are visible screw holes you can use the optional trim plate to cover up the holes which is what I had to do with mine. Pull the wires through the center of the Nest base and attach it to your wall with the screws, using the built-in level to make sure it’s straight.

Insert each wire into its matching connector by holding down the button and inserting the wire all the way in. After all your labeled wires are connected, make sure the excess wire length in the center are flush with the wall. Attach the Nest display by pressing it onto the base until it clicks then turn your system’s power back on. You should see the Nest turn on automatically and it will walk you through a quick setup. To navigate it, just rotate the outer ring left or right and press on the display to select. During setup it’ll ask your location and language, you’ll connect it to your WiFi network, set your temperature settings, and answer some basic questions about your heating/cooling system.

After setup is complete, you can press down on the display to bring up the menu. From here you can change the mode from heating to cooling, view how much energy you’ve used in the last ten days, view or change the schedule, set it to Away if you’re leaving the house and want to save energy, and adjust some basic settings.

The Nest home screen turns blue when cooling and orange when heating. It not only shows you what temperature the thermostat is set to but it also shows you the current temperature inside and will give you an estimate of how long it will take for the current temperature to reach your set temperature. It also has a motion sensor built into it so when you walk by the thermostat it will light up so you can quickly see the thermostat temperature, and you can also choose to change the setting for it to show the weather or time.

One of its most compelling features is the way it “learns” your heating/cooling habits. After a few days, it will set an automatic schedule based on how/when you adjust the temperature. This is useful if your weekly routine doesn’t change much because with the auto schedule you seemingly don’t need to adjust the thermostat each time you leave and come home. However, if your routine is very different week to week then the auto schedule won’t be as helpful. Luckily you can customize the schedule to however you want it or turn off the schedule completely.

To take full advantage the features you’ll want to download the free Nest smartphone app. It does require an account but the account is completely free to set up.

From the app you can manually change from Home to Away mode. However, the Nest Thermostat uses sensors, algorithms, and even your phones location if you choose to allow that, to automatically determine when you’re home and when you’re away to set the thermostat accordingly so you can save as much energy as possible which is nice.

If you tap on the temperature in the app, you can quickly adjust the thermostat temperature and you also get access to the same settings that are accessible from the thermostat itself: Mode, Eco, Fan, Schedule, and History. There’s also a gear icon in the top right which gives you even more customization options for your thermostat.

Eco temperatures are automatic temperatures that are set when your thermostat is in Away mode and it’s indicated by the green leaf. The default Eco temperatures are good for most people. However if you have a pet you may want to customize the Eco temperatures based on your pet’s needs.

What’s neat about scheduling is you can turn on the Early-On feature which will start the heating or cooling early in order to reach the set temperature at the time specified in your schedule, instead of having it start the heating or cooling at that set time.

You can also create a 4-digit PIN to lock your thermostat to avoid people changing it without the code which may be useful in certain situations.

The only downside I’ve seen so far is how to adjust the schedule using the app. It’s definitely not intuitive when you first start using it. It took me a bit to figure it out and even now I think Nest could make it a little easier to adjust the schedule. Hopefully that will come in a future update. That’s what’s great about smart thermostats is that they are WiFi connected so not only can you control them from anywhere, they also download software updates as Nest releases them so it can technically improve over time.

Overall I’m extremely happy with my Nest Learning Thermostat. It’s only been a few weeks but I’ve already seen the energy saving benefits from having a smart thermostat which was my main goal. I also love the ability to control the thermostat from anywhere with my smartphone.

I hope you enjoyed this setup and review of the Nest Learning Thermostat 3rd generation. The Amazon link to this is in the description below. Let me know if you have any questions by leaving a comment and hit that thumbs-up button if this helped you out. Subscribe to see more tech reviews in the future. My name is Andy, thank you for watching and I will talk to you in the next one.

Which MacBook to Buy in 2018? Apple Laptop Guide!

Which MacBook to Buy in 2018? Apple Laptop Guide!

So you’re interested in buying an Apple laptop. Congratulations, a laptop is a big purchase so it’s very important to choose the right one. In this video I’ll explain which MacBook model is best for you in 2018.

Currently there are 3 MacBook models: MacBook, MacBook Air, and MacBook Pro
(All MacBook models come standard with an SSD and at least 8GB RAM)

MacBook

  • Apple’s 12″ screen laptop; Base model starts at $1299
  • Only MacBook available in 4 different colors: rose gold, space gray, gold, and silver
  • Base model has 7th-Gen 1.2GHz Intel Core m3 mobile processor; configurable to dual-core i5 or i7
  • 8GB RAM (up to 16GB) and 256GB SSD (up to 512GB)

Get MacBook if you

  • Care about looks more than performance (sexy; IPS Retina display with 226 ppi; colors)
  • Want something ultra portable and mobile; Apple’s thinnest lightest laptop (2 lbs and up to 10 hours battery life)
  • Want the smallest screen of any Apple laptop (12″ diagonal)
  • Mainly run basic applications, nothing too CPU dependent (base model has mobile processor)
  • Don’t need a lot of ports (only 1 USB-C port for charging/input/output)
  • Don’t mind having a crappy webcam (only 480p)

MacBook Air

  • Base model starts at $999
  • 13.3″ screen; 8GB RAM; 128GB SSD (configurable to 256GB or 512GB)
  • 5th-Gen Intel dual-core i5 processor (can be upgraded to 2.2GHz Core i7)

Get MacBook Air if you

  • Have the lowest budget (Apple’s most affordable laptop)
  • Care about battery life more than anything (up to 12 hours; longest battery life of any Apple laptop)
  • Want a small lightweight laptop like the MacBook but with more ports (great for students and travelers)
  • Don’t mind having a mediocre display (it’s not an IPS Retina display; 1440×900 not even Full HD)
  • Don’t mind having silver bezels (has fairly large bezels relative to its size)
  • Run the same basic applications that the MacBook is good for and if you know you don’t need more than 8GB RAM (this is Apple’s only laptop that is limited to 8GB)
  • Need an HD webcam (720p)
  • Don’t need a lot of storage space on the laptop and you utilize Cloud storage or external drives (base model only has 128GB storage)

MacBook Pro

  • Comes in silver or space gray and 2 screen sizes: 13.3″ starting at $1299 (non-TouchBar) & $1799 w/ TouchBar. 15.4″ starts at $1999 (2015 non-TouchBar model) & $2399 w/ TouchBar
  • All MacBook Pro models have IPS Retina displays (13″ has 227ppi; 15″ has 220ppi) and all MBP models can expect 9-10 hours battery life
  • 13″ comes with 8GB RAM (configurable to 16GB); 15″ comes with 16GB RAM
  • 13″ starts at 128GB SSD (configurable up to 1TB); 15″ starts at 256GB SSD (configurable to 2TB)
  • 13″ starts with Intel 7th-Gen Kaby Lake dual-core i5 (configurable to dual-core i7)
  • 15″ 2015 non-TouchBar comes with 4th-gen quad-core; 15″ TouchBar comes with 7th-Gen Kaby Lake quad-core i7

Get 2015 15″ MacBook Pro if you

  • Want an awesome laptop for under $2,000 (some say it’s the best laptop ever made)
  • Want Mag-Safe
  • Want all the other ports besides USB-C (HDMI, SD slot, USB-A, Thunderbolt 2)
  • Don’t mind having an older processor (4th-gen)
  • Want 15″ size but no Touch Bar

Get newest MacBook Pro if you

  • Want the best performance and fastest speed of all the Apple laptops (for professional work; 15″ Touch Bar has the best specs out of all MBPs)
  • Need the most internal storage (only Apple laptop to be configured for 1-2TB of storage)
  • Want the best/brightest display out of all Apple laptops (The newest 13″ and 15″ MBPs have 25% more colors than sRGB and 500 nits of brightness; 2015 MBP has sRGB and 300 nits; 13″ has the most ppi)
  • Run CPU-intensive or graphics-intensive applications like gaming, HD video editing, 3D modeling, CAD, virtual machines, hardcore Photoshop (For best graphics performance get 15″ which has dedicated Radeon Pro GPU with up to 4GB memory)
  • Don’t mind having a slightly bigger laptop compared to the other MacBook models (having said that, the 13″ is a very compact and portable laptop)
  • Absolutely want TouchBar/TouchID (even though 13″ MBP doesn’t have it)
  • Are okay with having USB-C ports (USB-C to USB-A adapters are a must-have)
  • Have a large budget (expensive; can go over $4,000 for certain configurations)


Tesla Model 3: Complete Guide to the World’s Most Hyped Car

The Tesla Model 3 is changing the auto industry as we know it. It’s a relatively affordable and attractive mass-market electric car that has taken the world by storm. It was announced on March 31, 2016 and deliveries to non-employee customers will start in October. This video is my complete guide to the Tesla Model 3 so you can learn all about it in case you’re trying to decide if it’s right for you, and I’ll also explain why I chose the Model 3 to be my next car.

Tesla is not just a car manufacturer. They’re mainly a tech company with a heavy focus on energy innovation. Their official mission is to accelerate the world’s transition to sustainable energy.

The Model 3 is Tesla’s newest addition to their all-electric vehicle lineup which now consists of the Model S (premium sedan), Model X (premium SUV), and now the Model 3 (smaller, more basic sedan for mass market). The Tesla Model 3 has sparked a lot of demand across the entire globe.

One of the biggest selling points for all Teslas including the Model 3 is Autopilot. This is a combination of drive-assisting software combined with 8 cameras built into the car that provide 360 degrees of visibility around the car, 12 ultrasonic sensors allow for detection of objects, and a forward-facing radar that provides additional data and is able to see through rain, fog, dust and even the car ahead.

Enhanced Autopilot costs $5,000 for the Model 3 and adds these new capabilities to the Autopilot experience. Your Tesla will match speed to traffic conditions, keep within a lane, automatically change lanes without requiring driver input, transition from one freeway to another, exit the freeway when your destination is near, self-park when near a parking spot and be summoned to and from your garage.

Autopilot is the precursor to what will eventually become full self-driving cars (which costs another $3,000 and requires the $5,000 EAP). The hardware required for full self driving comes standard on all new Tesla vehicles, but of course until the software is validated and legalized, the hardware is currently only used for Enhanced Autopilot.

Other than Autopilot and future full self-driving capability, I think the biggest factor for Tesla’s success and what separates them from all the other electric cars is their Supercharger network. The Tesla Supercharger network enables long distance travel when you’re in an electric car.

Superchargers are like gas stations for Teslas. It’s the world’s fastest charging station. With the Model 3 standard battery you can get 130 miles of range per 30 minutes of charge at a Supercharger, and with the Long Range option you can get 170 miles of range per 30 minutes of charging at a Supercharger.

Tesla designed the Model 3 with one thing in mind: simplicity. This car definitely strikes a cord with minimalism. Sometimes less is more, and in my opinion, simplicity wins.

To make up for the lack of physical buttons, the 15” touchscreen display in the center is really the main control hub of the entire car. It serves as the speedometer, so your speed will display in the top left of the screen. The touch screen also serves as your way of controlling the air vent. The Model 3 just has one long air vent across the dash, and using the touch screen you can manipulate where you want the air to come out of. The screen also controls the radio, music streaming, GPS navigation, and more.

The Model 3 doesn’t come with a key fob, but instead it comes with an NFC keycard. To unlock the car, tap the card to the B-pillar and tap between the front seats to start the car. This keycard is actually the backup method to unlocking and starting the car. The main way will be done through a unique Bluetooth signal from your smartphone that will unlock your car as you approach it, and then automatically start it when you get inside.

The Model 3 has built-in WiFi so when it’s charging at home, it will be connected to your WiFi and will automatically download free software updates as Tesla releases them. This is what makes Tesla ownership really enticing for me because with software updates, the car is constantly improving without having to add any hardware.

Not only did Tesla make this car simple because they needed to produce them as fast as possible to keep up with demand and to also keep them affordable, but the overall minimalist nature of the car plays into the fact that this car was designed to become a self-driving car at some point in the future.

I think the Tesla Model 3 is the iPhone 3G of cars. It has everything needed to move the auto industry forward to sustainable energy and new technology, but also keeps the excitement and sleekness of fast sporty cars from the past.

$7500 EV Tax Credit (US): https://www.irs.gov/businesses/plug-in-electric-vehicle-credit-irc-30-and-irc-30d

My Tesla Project Loveday submission:

Reserving my Tesla Model 3 (vlog)

Apple Music vs Spotify Premium: Which is Better?

Try Apple Music free for 3 months
Try Spotify

Two years ago I published my original comparison video of Spotify vs Apple Music and it has become one of my most popular videos, but it was published right after Apple Music came out and a lot has changed in the last two years. Today, Apple Music and Spotify are the two most popular music streaming services and in this video I will compare both of them in a head-to-head battle to see which is the best music service and to help you make the ultimate choice of on-demand music.

Pricing

Both services have the same pricing structures. They’re both $9.99/month for the all-access individual plan, $14.99/month for a family plan up to 6 people, and $4.99/month for the college student discount. So based on that, they have the exact same monthly plans. However, here are some key differences to keep in mind:
Apple Music is available in many more countries than Spotify so that’s pretty much the decision maker right there if you reside in a country that’s only supported by one of the services, you gotta go with that one. The trials are a bit different too. Apple Music’s 3-month trial is free to try while Spotify’s 3-month trial costs 99 cents. Not a huge deal but it does make it easier to try out Apple Music. Another difference is Apple Music’s secret annual plan so if you’re already an Apple Music member instead of paying $10/month which is $120/year you can switch to a $99 annual subscription which saves you $20/year by drilling down into your Apple Music subscription settings on your iPhone and choosing the 1-year option. I’ll leave the full path on how to do that in the description below. So that’s something that Spotify does not currently offer at the time of this video. I’m subscribed to the $9.99/month plan for both services, and something I noticed is that Spotify only charges me $9.99 per month, without any taxes. Apple Music charges taxes which comes to be $10.59 per month, which will vary based on where you live. But that comes to be 60 cents extra per month compared to Spotify, and hypothetically speaking over the course of 10 years that is an extra $72. Is that a huge deal? Not for most people, but if you’ve ever been to the Frugal subreddit I guarantee there are people who will say that’s why they use Spotify over Apple Music, to save that 60 cents a month baby. Shouts out to my frugal peeps out there, all love. But the biggest difference is that Spotify offers a free plan. It’s shuffle-only and has limits and ads, but it’s still a big advantage to have since Apple Music does not offer a free plan. The only thing that can be accessed for free on Apple Music is their Beats 1 radio.

Music Collection

At the time of this post:

Spotify offers 30 million+ songs
Apple Music offers 40 million+ songs

(Will change after time; Song availability depends on region)

Sound Quality

Spotify lets you choose between 96Kbps, 160Kbps, and 320Kbps which is nice because you can save data when streaming and have high quality for the songs you download.

Apple Music streams at 256Kbps.

Offline Listening

Both services offer the ability to download music and listen to it while you’re disconnected from the internet.

Library Limit

Spotify: 10,000 song limit in library
Apple Music: 100,000 song limit in library

Supported Devices

Spotify is more “open” and cross-platform friendly. PC/Mac/Web, Spotify Connect lets you switch between devices seamlessly. It works with a plethora of devices like Samsung Gear, Amazon devices, Alexa integration, PlayStation, Smart TVs, Roku, and many more.

Apple Music is more of a “closed” environment like most Apple products: PC/Mac (requires iTunes; no web player), is supported on Android but works best with iOS; Seamless integration with Apple TV, Apple Watch, Apple CarPlay, and the HomePod, Apple’s new smart speaker. Supports Siri so you can say things like “Play the #1 song from 2004”. So it makes a lot of sense to go with Apple Music if you’re heavily invested in the Apple ecosystem but that’s not necessarily always the case.

Exclusive Content

Apple Music seems to land more exclusive deals with big artists where certain albums are released first to Apple Music then later to Spotify (Drake’s Views and Frank Ocean’s Blonde are examples of this). Some albums and artists choose to only be on Apple Music. Taylor Swift was the most notable example of that, but she is now back on Spotify.

Both services offer their own exclusive content. For Example, Apple Music has exclusive video shows like Planet of the Apps that are only available to Apple Music members. Spotify has things like Spotify Sessions which are studio and live recordings of a wide variety of artists.

Lyrics

Apple Music shows full lyrics of a song in the app itself. Spotify has an integration with Genius, which shows some of the lyrics mixed in with fun facts about the song or the meaning of certain lyrics but it doesn’t show full lyrics like Apple Music, and the Genius lyrics integration is only available for certain songs. You can use a free third party app like MusixMatch and it will recognize whatever song you’re playing on Spotify and show you the lyrics in real time which is cool, but I think Apple Music gets the nod if you want the quickest access to full lyrics of the current song playing.

Existing Library

Apple Music syncs your existing iTunes library pretty effortlessly. Spotify syncs your existing iTunes library too, but it’s a bit more of a complicated process and it’s not as seamlessly integrated as it is with Apple Music. So they both do it, but Apple Music does it a little better.

Radio

Radio is very subjective so here’s how I personally feel about the radio stations. Both radio stations created from artists are pretty similar, it’s kind of what you expect. However, Apple Music radio stations created from individual songs seem to be a little better than Spotify. It seems to play more new music. Spotify radio stations created from individual songs seem to play more of that artist of the song that the radio was created from. It doesn’t suggest as many new artists or songs as Apple Music.

Apple Music has Beats 1 radio which is a popular feature that users love, but they also have these really cool on-demand radio stations from certain artists so you can listen to music and also listen to commentary like a normal radio show.

Even though I think Apple Music radio is better, I do prefer Spotify’s interface with Radio stations because you can see the list of songs that it’s going to play next. On Apple Music you can only see the next song.

Playlists

Playlists are also subjective, but in my experience Spotify has a better selection and layout of hand-curated playlists along with algorithm-based playlists. Both services have a large number of playlists based on things like Mood and Feel, or Genre but I think Spotify really gets Playlists right since they have way more experience with it. But the two big advantages of Spotify playlists are Daily Mixes and Discover Weekly.

Daily Mixes are custom playlists of songs that you have listened to a lot with some new songs thrown in and they’re automatically updated for you multiple times per week. So it’s a great way to listen to a specific genre of songs that you know you already like. Discover Weekly, in my opinion, is the best way to discover new music that you’ve never heard before that you’re almost guaranteed to like. It’s automatically updated every Monday and it’s something that I can throw on and listen to any time and I’ll almost always end up saving a song to my library form the result of discovering it on my Discover Weekly playlist.

For some reason Apple as a company just doesn’t do Social very well. The only social aspect of Apple Music is the Connect feature that lets you follow your favorite artists. Spotify has way better Social features. For example you can create, share and follow playlists made from any Spotify user who makes them public which makes their playlist selection way more extensive than Apple Music. For example: if you search Productivity on Apple Music it doesn’t give any results for hand-made productivity playlists, but if you search Productivity on Spotify there are tons of playlists, some made by Spotify, but most created and shared by Spotify users. Another great Spotify feature is Collaborative Playlists which lets you and your friends add songs to the same playlist. So Spotify has the advantage when it comes to playlists.

App Experience

I’m using an iPhone 7 so that’s what I’ll be basing the app experience on. Both app layouts are very similar, with the menu at the bottom and the player bar on top of that then the main window above that. Apple Music menu items consist of Library, For You, Browse, Radio, and Search. Spotify has Home, Browse, Search, Radio, and Library. So they have pretty much the same exact options because we can assume Apple’s For You section is the same as Spotify’s Home section.

I think the Spotify app has a better design and layout than Apple Music. I prefer Spotify’s dark theme, and their overall design is friendly allowing more items on the screen compared to Apple Music which seems to like to showcase individual selections that almost take up the entire screen. I like how Spotify shows the number of monthly listeners for an artist, just for the fact I can gauge to see how well known an artist is in comparison to other artists in the same genre. It’s not a game changing feature but I do like it, and I do wish Apple Music had something similar or maybe even display the average rating for albums like it does on the iTunes app.

One thing I wish Spotify did was display the Featured Artist on songs. It’s weird because some songs have that info, but most songs do not display who the featured artist if the song has one. It’s really annoying. Apple Music seems to always show the featured artist info on the song that’s playing which is what Spotify should do.
When you search on Spotify, the search suggestions are split into different categories like Songs, Artists, Albums, Playlists, Podcasts, and even Profiles instead of one big list of suggestions like on Apple Music. Some people might not like this, but I think it’s way better than Apple Music’s search design and Spotify’s search algorithm does a good job at suggesting some of your most visited songs, albums, and artists. And with Spotify you’re saving a step because when you tap on a song in the search suggestions it starts playing it. On Apple Music to start playing the song, you have to tap the search result and then tap the song to play it. It’s just an extra step that you have to do.

Both apps allow you to edit the queue of the current songs or playlist that you’re listening to which is good, but neither app has a functionality that I’ve been wanting for years. I really want to be able to tap the Artist name of the current song that’s playing and have it take me directly to the Artist page. Right now on both apps, you have to tap the album first, then go to the Artist. Not a huge deal but it would definitely be a convenient feature to have. As many things that I loge about Spotify, their Shuffle sucks. It’s really bad. When I want to shuffle my music library I want a completely random order, but Spotify’s shuffle algorithm is skewed and tends to play more songs by artists that you listen to a lot or have a lot of songs saved by them. Apple does their Shuffle the way it’s supposed to be, completely random or at least way more random than Spotify.

Spotify does have some functionalities that I’ve grown to love that Apple Music doesn’t have. For example on Spotify you can hold down on a song and it will preview the song. Spotify also has convenient ways to add songs to the queue or save to your library by swiping left or right on any song respectively. It’s these little details that make Spotify’s user experience better than Apple Music in my opinion.

So after all that, which is the best music streaming service right now? Spotify or Apple Music? Well, for me, I’m going to stick with Spotify as my premium music streaming service. Even though I’m pretty invested in the Apple ecosystem, at the end of the day I prefer Spotify’s features and user experience more than Apple Music. Does that mean Apple Music is not right for you? Of course not, this is a very subjective decision and my best advice for you would be to sign up for the trial versions of both services and try them out yourself.

Try Apple Music free for 3 months
Try Spotify

How to Upgrade iMac RAM for Cheap

How to easily upgrade your iMac RAM for way less money than what Apple charges.

Buy iMac RAM at MacSales

Apple Support: “Installing iMac Memory”

I love Apple products, but it’s no surprise that they overcharge for certain things. So when I was ordering the new 2017 iMac, instead of paying $200 for 16GB of RAM, I chose the 8GB option and saved a lot of money by ordering RAM separately and installing it myself. In this video I’ll show you exactly how to do that for your iMac.

Step 1: Check Compatibility

On your iMac click on the Apple icon in the top left corner and click About This Mac. If your iMac RAM is user upgradeable you should see a Memory tab. Click the Memory tab to see how many RAM slots you’re currently using. Most likely you’ll have 2 slots available. Next, go back to the Overview tab and click System Report to find out your iMac Model Identifier. This info is needed for the next step. You can see mine is 18,3.

Step 2: Order Your RAM

One of the best ways to get RAM for your iMac is through MacSales. Here’s the link to their iMac Memory page. MacSales is great because they tell you exactly what kind of RAM you need for your particular iMac model and they also offer trade-in rebates if you’re not keeping the original RAM that came in your Mac.

Once you’ve visited MacSales click on the iMac that corresponds to your Model ID from your Mac system report in Step one. Mine is 18,3 and it’s the iMac 27” 2017 with Retina 5K display. Now you’ll choose which RAM kit you want for your iMac. Since I have 2 memory slots available I could get the 8GB kit and end up with 16GB of total RAM which ends up being $120 less than what Apple was charging. I’m actually going to get the 16GB kit so I can have a total of 24GB for my iMac.

Step 3: Install Your RAM

After you have your new RAM, turn off your iMac and disconnect the power plug from the back. Find something with a small tip like the end of a headphone cable and push in the small button to eject the RAM cover. On the inside of the RAM cover you’ll see a basic diagram of how to install the RAM. Locate the two levers on the right and left sides of the memory cage and push the two levers outward to release the memory cage. Insert the new RAM sticks into the available slots and make sure they are in the correct orientation. If it doesn’t go in smoothly, flip the RAM stick around and try again. It should just go straight in and align with the other RAM sticks. When you’re finished, push the two levers back into the housing until they click and stay in place, then replace the RAM cover and plug in the power cable.

Step 4: Verify Your RAM

Turn on your iMac and go back into the Apple icon and click About This Mac. Where it says Memory it should now show the new RAM amount and you can also go into the Memory tab to see it too.

So that’s it. It’s very easy to do and it saves you a lot of money as long as the RAM in your iMac is user removable and upgradeable. Thanks for watching. My name is Andy and I’ll talk to you guys in the next video.

« Older posts Newer posts »

© 2024 My Tech Methods

Theme by Anders NorenUp ↑