MacX DVD Ripper Pro, in my opinion, is the best and easiest way to rip or copy DVD movies to your Mac if you’re planning to put those movies on your iOS device later. It’s very simple to use. It can copy a DVD in just a few clicks. It’s extremely fast and saves you a ton of time because there’s no need for additional converter programs and you don’t have to configure any settings. It will automatically copy the DVD in the best video quality that is compatible with your device so it fits perfectly on the screen. And it comes with free lifetime updates so you know you’re always able to copy the latest movies when they come out.
Next you’ll load your movie disc into your DVD drive and open MacX DVD Ripper Pro. Once it’s opened you’ll click the DVD button in the top left and choose OK. Once the output profile window pops up you’ll select Apple device then choose iPhone, iPad or iPod depending on what device you have. Then select the model of your device and click Done.
It will automatically select the main movie file for you. Then you can select the folder where you’d like the movie to be copied to. So you can click Browse then click Run and it will start to copy the DVD.
Once it’s finished the window will pop up with your video in it. Now you’ll just open up iTunes and browse to the folder and drag and drop the video file into iTunes. And when it’s done copying you’ll sync your iPad, iPod or iPhone with iTunes via the USB cable.
Now once your device shows up in iTunes you’ll click on it then click the Movies section. Then select sync movies, click apply, and your iOS device will sync & copy the DVD movie. And now when you open up the Videos app on your device your movie will be in there. Easy! That’s my review on MacX DVD Ripper Pro from MacXDVD.com. Hope you enjoyed!
Hey everybody what’s up? This is a quick video on how to copy any DVD to iTunes so you can put them on any device – your iPhone, iPad, iPod, Android tablet, Android smart phone, or just keep them in iTunes. This is a fantastic piece of software that I’m using. It’s called MacX DVD Ripper Pro. And if you click the annotated link at the top of this video it will take you to their site where you can download it and buy it at a discounted price. I highly recommend it. It’s very awesome. You’ll get your use out of it so go ahead and do that right now.
Once you have it downloaded and installed, start it up. It’ll bring you to this main screen here and most people are just going to load the DVD disc so if you click this DVD button it’ll load your DVD disc that is in your DVD drive right now. Or you can click this Load DVD folder if you already have a folder on your computer. Or if you have the ISO image you can click this ISO button. Most people are, like I said, are going to be using the DVD button so click that.
And here the Source DVD disc window pops up. It’ll show you what’s loaded into your drive right now. It’ll show the main title of the movie here in this box. You’ll just hit OK. Alright and here it is. It’ll pop up the output profile window and here is where you can select what output format that you want your movie to be in depending on what device you’re going to put it on. So I can choose anything from an Apple device, iPhone, iPod, iPad, all kinds of stuff, Android tablet to Android smart phone, and even YouTube video and PC General, all kinds of stuff. So right now I’m just going to choose iPhone. It gives you these recommended settings which is really awesome because you won’t have to go in here and change any of the settings. It’s already chosen for you. It gives you the best quality option and it gives you, even gives you the option to choose older models which is pretty cool. So I’m just going to leave mine on iPhone 5. Click Done.
And here it is. It automatically detects the main movie title. It’s got a check right here. You can see how it’s the longest. This is the duration so it’s an hour and six. That’s the main movie. If you just want to copy the main movie it automatically selects it for you and you just hit Run. But if you want to select any of the extras, if the DVD has any extras you can go ahead and select any of these here. You can select them all if you want to and you can go ahead and click Run.
That’s pretty easy. That’s as simple as it is. I will show you what the settings look like if you want to go in here and change some of these. Basically the default audio language we’ll just leave that at English obviously. And then you can choose this Open Output Folder that’s by default. And you can actually check this Add MP4 files to iTunes library after conversion. What this does is it automatically adds the video movie to your iTunes so you don’t have to do it manually after it’s converted, after it’s copied to your Mac. And you can actually choose this Shut down computer after conversion if you’d like. And here you can choose the default location of where the backed up copy of the DVD video goes onto your computer. I just have mine set to the desktop by default. You can change it to whatever you’d like. So now, yeah we’ll just hit Run and let it copy the DVD to your Mac.
And there it is folks, simple as that. The output folder will pop up. Your movie will be there. If you want to put it into iTunes, just open up iTunes and you can drag and drop this movie in there and then once it loads there it is. And you can load that onto your iPhone, your iPod, iPad by syncing up your iDevice to your computer via the USB cable and it’ll sync onto your device. So go get that program now it’s called MacX DVD Ripper Pro and again the link is on the top of this video, and the link is also in the info section below this video so you can click on it there too. So go get that, highly recommended program by me. And as always if you enjoyed this, if it helped you out please subscribe to my channel. Leave a comment and let me know if it helped you out or if you have any suggestions. And give this video a like, a thumbs-up. That’s it for today folks. I will talk to you guys and girls later. Bye.
Hey everyone what’s up? This is Andy from MyTechMethods back with another video. Today I just want to quickly show you how to use Smart Converter. It’s a free app that will convert audio files and video files. This is a really great program. Thereís a free version and thereís a paid version. Today Iím just gonna go over the free version. It’s done everything that I needed it to do so far so I’ve just stuck with the free.
Now this does require 10.7 or later on your Mac, that’s Lion or Mountain Lion so make sure you have that. Go up here to your Apple icon, click About This Mac and it will show you what version you have. If you have anything above 10.7 or 10.8 here you’ll be good. If you have those two, any of those two versions you can go to the Mac app store and then you can search Smart Converter and this will pop up and just install it. Mine ís already installed so I’ll close out of here.
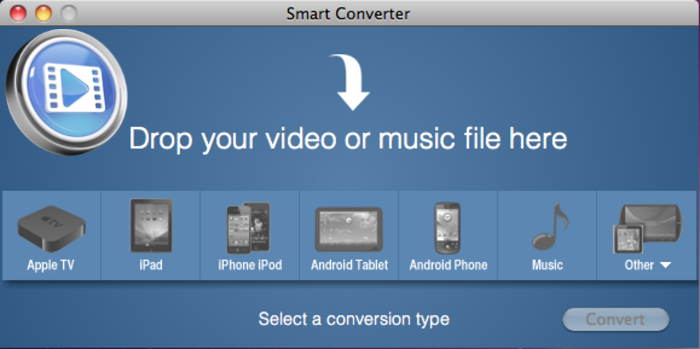
Okay so let’s open Smart Converter from our dock. So this is what you see when Smart Converter opens. It has a bunch of presets that you can select from depending on what you’re converting your file for so if you’re converting anything to MP3 or audio format youíll select music, if you’re converting something from one video format to another video format you want to select which format you want depending on what you’re going to put it on so if you want to put the video on an iPhone or iPod of course you’re going to select that. Select any of these presets or you can select other and just choose Custom on here.
Usually I just use this app just to convert video files to MP3 so say if I got this music video over here, the video file. Just drag it over to the Smart Converter box, drop it. I’ll select music and then I’ll hit convert and what it does it converts the video to MP3 opens my iTunes automatically sends it to it and if you want to see where the file ends up if you’re converting a video that’s not automatically going into iTunes click the show file button. It’ll bring up your finder and this will have your exported video or audio file whichever one you converted in Smart Converter folder and you can copy and paste it wherever you want to, wherever you want to put it.
So there it is, super quick, super easy and best of all it’s free. If you enjoyed this tutorial, if it helped you out please help me out by clicking the Like button below this video and subscribe if you want more videos like this. I’ll talk to you guys soon. Thanks, bye.
Hey what’s up YouTube? Today I’m going to do a quick little tutorial over Carbon Copy Cloner. It’s a free app for the Mac, and you use it to back up all your data to an external hard drive and I highly recommend it. If you go to Google and search Carbon Copy Cloner, the first result is the main website which is this right here. And the download button is this one right here. If you don’t want to do that I’ll put the link in the sidebar for you. Okay once you download it and install it when you bring it up it’ll bring you to this main screen right here. Now the source disk, your hard drive that’s in your Mac right now is going to be your source disk. It’s going to be the hard drive that you want to back up so I got mine. I have Macintosh HD. That’s the default name for all Mac hard drives. Yours might be different if you changed it, but most likely that’s what it will be. And I got everything checked, and here’s a setting you can put filters in like if you don’t want to back up certain file types. I’m just backing up everything. If you go over to the target disk section this is where you’re going to choose your external hard drive. I named my external hard drive Mac Backup so that’s the only one that I can choose. It’s the only external hard drive I have hooked up right now. Now the cloning options you can select back up everything or incremental backup of selected items. Now I think when the first time you do it the only option is to back up everything. Once, after the first time you back up everything you want to select incremental backup of selected items. This’ll only back up anything that’s changed since the last back up and I have this selected. Delete items that don’t exist on the source. This will delete anything on your backup hard drive which is your external hard drive. It’ll delete anything that doesn’t exist on the hard drive since the last backup. Say you backed up a song, you know, a couple weeks ago to your external hard drive and then you decided you didn’t’ want that song and you deleted it. And then you go back up your Mac again this will delete that song off the backup hard drive so you won’t have it anymore. I have it selected because I, whatever I delete I know I don’t want so; but some people like to, you know, keep everything even though they deleted it. So it’s up to you if you want to do that. And these? I don’t really check those because I don’t really see the point in doing it. That’s up to you if you want to check that. And I got mine; I got my external hard drive bootable because I would like to, if my hard drive dies I want to be up and running and I don’t want to wait and get a new hard drive and restore it and everything. So I have my backup hard drive bootable. I suggest you do that too because it’s really convenient. Alright now that’s about it. It’s real simple. Now you can save the task. I don’t save it because it automatically saves your settings so once you got everything set up like this you can go ahead and click clone, and it’ll back up everything. It might take a while depending on how big your hard drive, how much data you have, what you’re backing up. It shouldn’t take longer than 15 minutes, average user, so, not even that long really. So I hope you guys enjoyed the tutorial and hope you guys go check out this app – highly recommended by me. And if you have any questions comment, send me a message and I’ll get back to you alright? Thanks for watching. Make sure you subscribe, and I’ll talk to you guys later.