Videos by Andy Slye

Tag: iphone (Page 1 of 2)

Apple iPhone 6s Review: 6 Months Later

The Apple iPhone 6s was released in September 2015, and it’s been my only phone since then. Here is my full review so far.

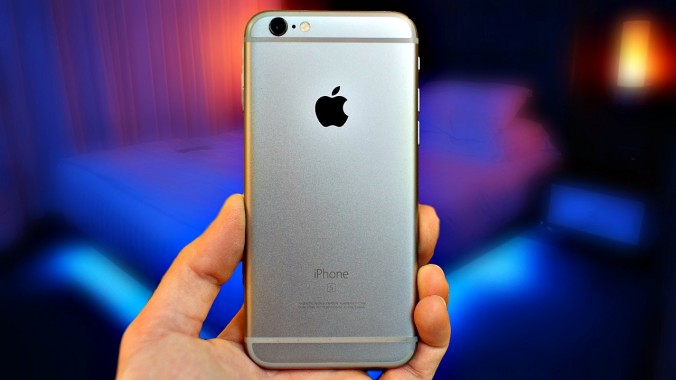
Compared to the iPhone 6 the 6s has double the RAM, Apple’s newest A9 processor, an improved GPU, better cameras, stronger display glass, and a stronger aluminum exterior. The iPhone 6s looks nearly identical to the iPhone 6. You probably won’t even be able to tell them apart if you’re looking at them side by side. However, the iPhone 6s is slightly thicker and heavier due to the new 7000-series alloy back which is stronger but also slicker. Since it is so slick I do recommend keeping a case on it. My favorite is the Spigen Ultra Hybrid. The good news is that since the design is almost exactly the same, most iPhone 6 cases will fit the iPhone 6s.

The iPhone 6s still has the same 4.7″ 1334 x 750 IPS display as the iPhone 6, but it does have a stronger glass for added protection. A lot of people like to bash the iPhone 6s for lacking a 1080p full HD display, but at 326 ppi this screen is extremely satisfying to look at. It has a 1400:1 contrast ratio and if I am planning to watch an HD video, I will take the time out to watch it on my iPhone 6s. That’s how good this display is. So it’s not full HD, but it is a stunning Retina display.

Speaking of the new display, 3D Touch is a fun concept but I hardly ever use it. Sometimes it’ll come in handy like when I’m logging my food in MyFitnessPal but I mostly use it for switching open apps and moving the cursor while typing. There are still many apps that don’t support 3D Touch and until they do I’ll most likely forget about it.

The iPhone 6s is a fast phone, almost too fast for its own good. For example, Touch ID is instantaneous. It seriously took a while for me to get used to how fast it is because if I want to see my notifications I can’t use the home button because it’ll unlock too fast for me to see them. I had to teach myself to use the power button on the side to see my notifications if I want to.

The new A9 chip is also a big reason for the fast performance on the iPhone 6s. It blows the old A8 chip out of the water. A9 paired with iOS 9 is one of the best hardware software combinations that you’ll experience on a phone, hands down. Apps load fast, multi tasking is fluid, graphics in games are handled very well. If you want a new iPhone that will last you longer than 2 years, definitely go with the iPhone 6s over the iPhone 6 because the speed is definitely future proof.

The most popular social media apps are relying heavily on photos and videos so your smartphone camera is becoming more important each day. Even though the sensor is smaller than other flagship phones, Apple’s 12 megapixel rear camera is a major highlight of the iPhone 6s. It makes up for its relatively smaller sensor by excelling in color reproduction and by how fast the camera snaps the photos. It’s ridiculously fast, and I love the quality of the photos it takes. The front facing camera got a boost as well. It’s now at 5 megapixels so it’s way better than the iPhone 6 front facing camera, but I still tend to avoid using the front facing camera when possible just because the rear camera is so good in comparison. As for the new Live Photos feature that captures 1.5 seconds of video before and after you take a photo, I’ve literally only used it once. It’s kind of a gimmicky feature that sounds cool in theory but I just never use it, mainly because I forget I even have the feature and also because the Live Photos take up a lot of space on my phone. If I want a video, I’ll just record a video.

Speaking of that, the iPhone 6s can take some amazing HD videos. It can record full 1080p HD in 120fps for super smooth slow motion. But probably the biggest feature is the ability to record in 4K which really brings out the details in a video. For a smartphone camera, it doesn’t get much better than this. There’s just one flaw with that. Apple, if you are going to give us the amazing capability of recording 4K videos with our smartphone, why oh why did you insult us with a 16GB model for $649? It is 2016. There’s no reason that the entry level model iPhone should be less than 32GB, especially at that price. You know how many family members and friends I have that like can’t update iOS or their apps because their phone is just full, they have no storage space left? We need to kill the 16GB model of the iPhone. Apple, please upgrade the 16GB model to 32GB.

Since my iPhone 6s is a 64GB model I really don’t have any problems with storage space. The only big complaint I have with the iPhone 6s is the battery life. Last year I was hoping and wishing for a bigger battery, but Apple apparently left it out then they realized “Oh we left this bigger battery out of the iPhone 6s so let’s make a case out of it and sell it for $99.” I usually start my day with my iPhone at 100% charge, and I always have to charge it around halfway through the day so that it will last me until I get home at night. The good news is that the battery does charge pretty quickly. My biggest request for the iPhone 7 is just a battery that will last me a full day.

Obviously with all that said, the iPhone 6s is the best phone I’ve ever owned up until now. My favorite things about it are the camera, fast performance, and user experience. My least favorite things are the short battery life and the high price of the 16GB model. I’m looking forward to using it for the next 6 months until the iPhone 7 is released and then of course I will be drowning in my own tears and handing Apple more of my money. Why do I do this to myself? I don’t know, maybe so I can do more videos for you. I do one every week here. If you are interested in tech videos like this make sure you subscribe. Give this video a like if it helped you out. Leave a comment down below. Let me know what you think of the iPhone 6s and what you’re looking forward to with the iPhone 7!

How To Copy Any DVD To iPad, iPod, iPhone

Copy a DVD to iPad, iPod, iPhone – The Easy Way!

Click here to download MacX DVD Ripper Pro
Visit the MacX Website

Video Transcript:

In this video I’ll be showing you step-by-step how to copy any DVD movie to your iPhone, iPod or iPad using a great Mac application called MacX DVD Ripper Pro.

MacX DVD Ripper Pro, in my opinion, is the best and easiest way to rip or copy DVD movies to your Mac if you’re planning to put those movies on your iOS device later. It’s very simple to use. It can copy a DVD in just a few clicks. It’s extremely fast and saves you a ton of time because there’s no need for additional converter programs and you don’t have to configure any settings. It will automatically copy the DVD in the best video quality that is compatible with your device so it fits perfectly on the screen. And it comes with free lifetime updates so you know you’re always able to copy the latest movies when they come out.

First you’ll want to download MacX DVD Ripper Pro

Next you’ll load your movie disc into your DVD drive and open MacX DVD Ripper Pro. Once it’s opened you’ll click the DVD button in the top left and choose OK. Once the output profile window pops up you’ll select Apple device then choose iPhone, iPad or iPod depending on what device you have. Then select the model of your device and click Done.

It will automatically select the main movie file for you. Then you can select the folder where you’d like the movie to be copied to. So you can click Browse then click Run and it will start to copy the DVD.

Once it’s finished the window will pop up with your video in it. Now you’ll just open up iTunes and browse to the folder and drag and drop the video file into iTunes. And when it’s done copying you’ll sync your iPad, iPod or iPhone with iTunes via the USB cable.

Now once your device shows up in iTunes you’ll click on it then click the Movies section. Then select sync movies, click apply, and your iOS device will sync & copy the DVD movie. And now when you open up the Videos app on your device your movie will be in there. Easy! That’s my review on MacX DVD Ripper Pro from MacXDVD.com. Hope you enjoyed!

How To Copy Any DVD To iTunes (Mac X DVD Ripper Pro)

Video Transcript:

Hey everybody what’s up? This is a quick video on how to copy any DVD to iTunes so you can put them on any device – your iPhone, iPad, iPod, Android tablet, Android smart phone, or just keep them in iTunes. This is a fantastic piece of software that I’m using. It’s called MacX DVD Ripper Pro. And if you click the annotated link at the top of this video it will take you to their site where you can download it and buy it at a discounted price. I highly recommend it. It’s very awesome. You’ll get your use out of it so go ahead and do that right now.

Once you have it downloaded and installed, start it up. It’ll bring you to this main screen here and most people are just going to load the DVD disc so if you click this DVD button it’ll load your DVD disc that is in your DVD drive right now. Or you can click this Load DVD folder if you already have a folder on your computer. Or if you have the ISO image you can click this ISO button. Most people are, like I said, are going to be using the DVD button so click that.

And here the Source DVD disc window pops up. It’ll show you what’s loaded into your drive right now. It’ll show the main title of the movie here in this box. You’ll just hit OK. Alright and here it is. It’ll pop up the output profile window and here is where you can select what output format that you want your movie to be in depending on what device you’re going to put it on. So I can choose anything from an Apple device, iPhone, iPod, iPad, all kinds of stuff, Android tablet to Android smart phone, and even YouTube video and PC General, all kinds of stuff. So right now I’m just going to choose iPhone. It gives you these recommended settings which is really awesome because you won’t have to go in here and change any of the settings. It’s already chosen for you. It gives you the best quality option and it gives you, even gives you the option to choose older models which is pretty cool. So I’m just going to leave mine on iPhone 5. Click Done.

And here it is. It automatically detects the main movie title. It’s got a check right here. You can see how it’s the longest. This is the duration so it’s an hour and six. That’s the main movie. If you just want to copy the main movie it automatically selects it for you and you just hit Run. But if you want to select any of the extras, if the DVD has any extras you can go ahead and select any of these here. You can select them all if you want to and you can go ahead and click Run.

That’s pretty easy. That’s as simple as it is. I will show you what the settings look like if you want to go in here and change some of these. Basically the default audio language we’ll just leave that at English obviously. And then you can choose this Open Output Folder that’s by default. And you can actually check this Add MP4 files to iTunes library after conversion. What this does is it automatically adds the video movie to your iTunes so you don’t have to do it manually after it’s converted, after it’s copied to your Mac. And you can actually choose this Shut down computer after conversion if you’d like. And here you can choose the default location of where the backed up copy of the DVD video goes onto your computer. I just have mine set to the desktop by default. You can change it to whatever you’d like. So now, yeah we’ll just hit Run and let it copy the DVD to your Mac.

And there it is folks, simple as that. The output folder will pop up. Your movie will be there. If you want to put it into iTunes, just open up iTunes and you can drag and drop this movie in there and then once it loads there it is. And you can load that onto your iPhone, your iPod, iPad by syncing up your iDevice to your computer via the USB cable and it’ll sync onto your device. So go get that program now it’s called MacX DVD Ripper Pro and again the link is on the top of this video, and the link is also in the info section below this video so you can click on it there too. So go get that, highly recommended program by me. And as always if you enjoyed this, if it helped you out please subscribe to my channel. Leave a comment and let me know if it helped you out or if you have any suggestions. And give this video a like, a thumbs-up. That’s it for today folks. I will talk to you guys and girls later. Bye.

Cheapest iPhone Plan: How To Save Over $2,000!

Video Transcript:

Hey what’s up everybody? Today I’m going to be giving you my top six tips on how to get the cheapest iPhone plan possible. Stay tuned.

Ok so my first tip is to get the cheapest calling or voice plan that will fit your needs and stay within your budget. A lot of people don’t use or even need unlimited calling plan or voice minutes. With all the rollover minutes these days I promise you, I’ve been an iPhone customer for four years and I’ve never come close to using all my voice minutes. I don’t know, maybe people just don’t like to call me. No but seriously the majority of people these days can get by with the minimum voice minutes. You don’t need unlimited minutes. Now if you’re that type of user, you know Grandma’s going to be calling you every night then yeah you’ll have to get that. But for the majority of people only stick to the cheapest calling plan which is forty bucks a month for 450 minutes.

Okay so tip #2 is basically the same concept as tip number one except it’s dealing with data. Just get the minimum amount of data that you need to get by. Now I believe the minimum data plan that you can get is 300 megabytes for $20/month. Now again, most people can get by with 300 megabytes, and here are a few ways to do that. Set you phone to use WiFi as much as possible, whenever you can. That way you’re not using your cellular data to watch YouTube videos, stream music from Pandora, or download apps. Those three things will use up the most data, and you’re going to want to be on Wi-Fi when you’re doing that. Also be careful of what apps are using what. Some apps like to download data in the background. They like to use your location services and track you by GPS. That will use a lot of data and it will actually lower your battery life so keep that in mind. So those are some ways that you can cut down on your data usage so that you are able to get the minimum data plan.

Okay so tip #3 is to not get a texting plan. You probably think I’m crazy but with an iPhone, it comes with iMessage which is Apple’s own service for sending messages throughout any iOS device, whether it be from an iPhone to an iPad vice versa. Anything that is made by Apple that has iMessage installed will send it over iMessage instead of using your SMS plan. It’s built in right into the SMS app. If you go into it and it turns blue instead of green, that means it’s using the iMessage instead of the regular SMS. Now this will allow you to send text, video, pictures, anything over iMessage using data and even using wireless once you’re on WiFi. So it will use Wi-Fi. It won’t use your data. Now this feature works great when you’re texting other people with iPhones, but what about if you got to text a person with an Android or another smartphone? Well this is where you have to use Google Voice, and I love Google voice. I’ve been using it for over three years now. It has saved me a ton of money. Basically what it does is you sign up for Google Voice, it’s free if you have a Gmail account. Go to Google.com/voice. And you get to pick a new number, any number that you want, a standard US number. And that number will get forwarded to your iPhone and you will be able to get text messages and send text messages to anybody you want using that number. So what I do is I usually give out my Google Voice number to people that do not have iPhones and they text that number and I can text for free with that. And my contacts with iPhones I can send them free text messages through iMessage so that way it completely cuts out my texting plan. I save $20/month and you can also do that too. It’s super easy and it’s awesome. I love it so check those out. It’s Apple iMessage and Google Voice.

Tip #4 – Decline a warranty. Do not buy an extra warranty. I promise with a little bit of carefulness and a case for your iPhone you will avoid 99 percent of the problems that you might potentially have. I’ve dropped my phone hundreds of times and all I got’s like a $10 case on it and my iPhone is still in mint condition. You’ll be able to save a hundred bucks by not getting the warranty. My only advice to you is to not drop it in the toilet.

Tip #5 is to buy an older version of the iPhone. Now I know with Apple it’s always fun to have the latest and greatest but it’s okay to buy the iPhone that came out two years ago. Usually you can get the older iPhone for free with a new two year contract, and it runs the same software as the new iPhone usually. If not you can always jailbreak it. But don’t be afraid to get the old older version of the iPhone. So if you’re looking to save a lot more money upfront you can you can do that by getting the older version of the iPhone.

And last but not least tip #6 is to try to find an employer or student discount. I know personally I have a discount that gets me 15% off so don’t, don’t miss out on that. Check with your work, check with your school. With a simple Google search you’ll probably be able to find a discount for you that you can use. It will save you money each and every month. Do not pass that up.

So those are my six tips on how to save tons, tons of money over the course of two years. You can save money by doing these things no matter what wireless carrier you’re on. So try these out and I hope this helps so that we can all continue to watch YouTube wherever we are for less money. If you like this video, if you enjoyed it please Subscribe. Please hit the Like button and comment and tell me if any of these tips work for you or if you’re going to use any of these tips or if you’re already using some of these tips. I’ll be talking to you guys and girls later. Keep having fun out there. I’m out.

« Older posts

© 2023 My Tech Methods

Theme by Anders NorenUp ↑