How to Convert MP4, MOV, MP3, M4A, MKV, FLV & More on Mac: MacX Video Converter Pro
Click here for a free trial download of MacX Video Converter Pro
This is a brief overview and tutorial video over the new version of MacX Video Converter Pro. This is a premium application for the Mac from www.macxdvd.com. If you’re a Mac user and you’re looking to convert video files to to other video file formats or to audio file formats, if you want to record your Mac screen, if you want to create photo slideshows, then this program is for you. You can try it out for free if you click on the link at the top of this video description. That will start an instant download so you can install it and try it out for free. If you like it you can register for the full version later. If you don’t like it you can delete it, but I’m pretty sure you’re going to like this application.
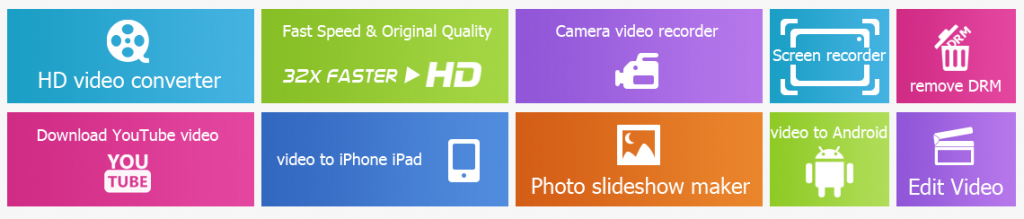
Let’s quickly look at the main features: HD video converter, fast speed, high quality, records your iSight camera, records your Mac screen so you can make a screencast, or you can remove DRM from videos. It has a photo slideshow maker. You can edit the video and audio files that you’re going to convert. You can trim them, crop them, even add watermarks, and obviously you can convert any video file to an iPhone, iPad, or iPod compatible format. So without further ado let’s open this app up and play with it. Are you excited as I am?
Here’s the home screen of Mac X Video Converter Pro 4.0. On the top menu you can choose from any of the features that we just went over: the video converter, photo slideshow, download YouTube videos, record your iSight, record your Mac screen, and the trash icon clears out all the jobs that are in your queue. Click the first button to add the videos that you want to convert. Let’s say I have an FLV file that I want to convert on my desktop. I’ll just choose that. Now here’s the output profile window. This is where you choose the file format that you want to convert your video to. I have an FLV video, and let’s say I want to convert it to MP3. I can choose “To Music” MP3 recommended. If I want to convert it to an iPhone video file format I can choose Apple device then iPhone video and choose my iPhone model (same with iPad & iPod). You can convert MP4, MP3, FLV, AVI, WMV, MPEG, MPG, MOV, etc. You can do all kinds of stuff, even convert videos to a compatible format for a Microsoft device, Android tablet, Android smartphone, YouTube video, etc.
So let’s just say I want to convert this FLV file to an MP4 video file so I can put it into iTunes. I’ll just choose Mac general video. MP4 video is automatically selected, the recommended option then click Done. The video is now in the queue ready to be converted. If you click Edit you can see all the editing options that you have. You can adjust the volume, subtitles, trim it down. You can adjust the start and end time. You can crop and expand it, and you can even add a text or image watermark. That’s pretty cool. Click Done.
If you have multiple videos that you want to convert you can add more in the queue. Let’s say I want to convert the FLV file to an MP3 file. I can add it again and click the Settings button and change it to MP3. Alright so now I’m converting FLV to MP4 and FLV to MP3. So I’ll just hit Run, and the conversions will start.
When the conversions are complete the window will pop up and it will have your final converted videos in a folder on your Mac. I can add those into iTunes now and put those on my iPhone, iPod, or iPad. You can do that with other devices as well. That’s the main feature of Mac X Video Converter Pro, but it does have extra features as well like we went over earlier. You can make a photo slideshow, download YouTube videos, record your iSight camera, and record your Mac screen. So as you can see this is a very powerful and useful application. If you’re a Mac user and you want to be able to convert any video file, edit and trim converted videos, record your Mac screen, and do all kinds of other cool stuff then this is definitely an app to have. Again the link is at the top of this description. You can click that, and it’ll start an instant download where you can download and try it out for free!
By Andy Slye