Videos by Andy Slye

Category: Reviews (Page 4 of 15)

Best Smart Light Switch? ecobee Switch+ Review!

Buy Switch+ on Amazon

Video Transcript:

I’ve recently begun to transform my house into a smart house, starting with my wireless security system all the way to my thermostat, and when I was researching the best smart thermostats I saw a particular brand called ecobee that was mentioned quite frequently. So when they reached out and asked if I wanted to do a sponsored video of their latest smart home product called the Switch+ I thought it looked like something you guys would be interested in so I agreed.

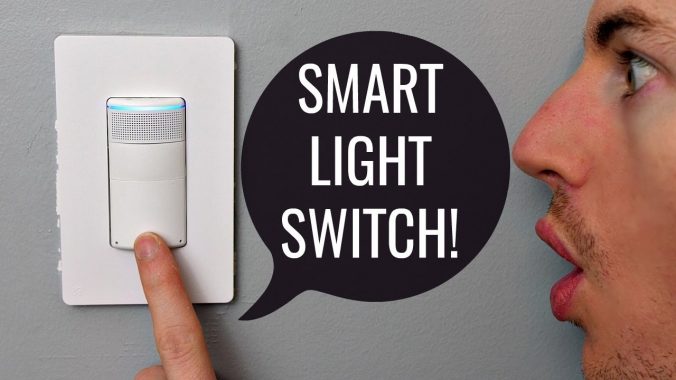
The ecobee Switch+ is a smart light switch with far-field voice technology and built-in Amazon Alexa which is the name of Amazon’s virtual assistant and it’s one of the main features of the ecobee Switch+. According to Amazon “The Alexa Voice Service is an intelligent voice recognition and natural language understanding service that allows you to voice-enable any connected device that has a microphone and speaker.” And that’s exactly what the ecobee switch+ is equipped with.

The Switch+ is like a smart personal assistant and simple light switch wrapped into one. With the built-in microphone and speaker for Amazon Alexa, the Switch+ enables invisible voice control in any room it’s installed in. It also provides smart light control by detecting occupancy and daylight. Also, a software update coming this summer will enable the Switch+ to function as a sensor to manage hot or cold spots in a room when the switch is paired with an ecobee thermostat. Like all ecobee products, the Switch+ integrates with Amazon Alexa, Apple HomeKit, Google Assistant, SmartThings, and IFTTT. The Switch+ is $99 in the U.S. and $119 in Canada and it’s available for pre-order starting March 13 and will start shipping on March 26. I’ll leave the link in the description below for you to check out.

First, let’s go over what’s in the box. Inside, you’ll find the main attraction itself the Switch+, along with a wall plate, 4 wire nuts, 2 mounting screws, and the setup guide. The install is fairly simple and only takes about 45 minutes. Even though you can follow the setup guide that comes in the box, it’s probably easier to download the free ecobee app because the app will actually walk you through the entire process and it has helpful videos along the way. The app will also tell you what tools you need and it will do a compatibility check to verify your light switch will work with the Switch+.

Once you’ve verified compatibility, you’ll need to turn off the breaker for the switch you’re installing. After confirming the power is off, remove the old switch from the wall and disconnect the wires. Next, identify and connect the necessary wires to the Switch+. This part took the longest for me so be patient. Once that is done, push the wires back into the wall and screw the Switch+ to the wall. Turn the breaker back on and test out the Switch+ by pressing the button to turn your light on and off. If it works, then the final step is to snap on the wall plate.

Next, you can use the ecobee app to finish setting up the Switch+ by creating your free ecobee account, giving your Switch+ a name & location, and connecting it to your WiFi network. Keep in mind that even though it has built-in WiFi, it does not have Bluetooth enabled at this time. Once it’s fully set up you can control your Switch+ from anywhere using the ecobee app as long as you’re connected to the internet.

On the app home screen you can quickly turn the light on or off using the main button or you can tap the middle icon at the bottom to bring up more controls. the Smart On feature will automatically turn on the lights when someone enters the room. If you enable daylight detection, Smart On will only activate when the room is dark. Smart Off will turn the lights off when no one is in the room, and you can set the off timer to different intervals based on your preference. Another awesome feature is the built-in night light which will automatically glow when the room is dark. And if you have your Switch+ set up as an outdoor light, you can set it to automatically turn on at sunset which is nice.

As I mentioned before, Amazon Alexa is a big part of the Switch+ because it allows you to perform voice commands like asking it to set a timer, read the news, give you the weather forecast, and more. This is all part of ecobee’s “Whole Home Voice” vision to deliver effortless hands-free voice control in every room without dealing with hubs or wires.

To start using Amazon Alexa, first link your Amazon account within the ecobee app. Then download the free Amazon Alexa app and sign in with your Amazon account. Next, add the ecobee skill and authorize Amazon Alexa with your Switch+. Then you can ask Alexa to discover devices, and Alexa should respond with the name of your Switch+.

What’s really cool is the built-in speaker that I mentioned earlier, and if you’re in the US and have Amazon Prime you can tell it to play any song that’s available on Amazon Prime Music and it will play it out of the speaker. Now don’t expect to use this as a high fidelity party speaker for loud music but honestly if you just want to listen to low-level background music while you’re working or studying, this little speaker does the job. You can also listen to iHeartRadio and use Tune-In Radio for audiobooks & podcasts, with support for SiriusXM & Pandora coming soon.

However, the Switch+ does not currently have Spotify integration and as a heavy Spotify Premium user I was a little let down by this. But if you have an Amazon Alexa-enabled Sonos speaker, you can ask Alexa to play music on Spotify that way. I don’t have a Sonos speaker but I was able to add a skill in the Amazon Alexa app that lets me control the playback of Spotify on my iMac which is pretty cool. And that is the key, search the Amazon Alexa app for any skill that you’re interested in and if it’s available you can add that skill to the ecobee Switch+. And you can also control other smart lights in your home if they’re connected to your Amazon Alexa account. I was also surprised at how well the Switch+ picked up my voice from across the room and even when I was playing music pretty loudly it heard me most of the time.

Overall, for $99 I think this is a pretty neat smart device that is perfect for people who want voice-control in their home without adding bulky hubs or wired speakers since this is just a small light switch basically hidden on the wall. The ecobee app is very intuitive and it’s nice that you can use the same app for the Switch+ and ecobee thermostat if you have one. The Switch+ itself is nicely designed and has worked as expected so far. Again if you want to pick this up, the link is in the description below.

Thanks to ecobee for sponsoring this video, and thank you for watching. Be sure to hit the thumbs up if you enjoyed this video and subscribe if you haven’t already to see more tech videos in the future. I will talk to you in the next video.

Best Smart Thermostat? Nest Learning Thermostat Setup & Review!

My Christmas gift to myself this year was a Nest Learning Thermostat 3rd Gen (Amazon) in my continuous effort to transition my home to a full blown smart house, and in this video I’ll explain how to install the Nest Learning Thermostat, and I’ll go over the features along with the pros/cons from my experience so far.

After tons of research, I found that the Nest Learning Thermostat was by far the most popular choice as the best smart thermostat. The main reason I wanted a smart thermostat was to save money on my electric bill because not only is it auto-programmable but it’s controllable from anywhere using your smartphone.

In the box there is the Nest learning thermostat itself, the installation and welcome guides, a Nest screwdriver with screws, and a trim kit.

Even though this thermostat works with most 24V systems you should first visit the Nest compatibility checker to see if it’s compatible with your home before purchasing. I’ll leave that link in the description as well. https://nest.com/widget/compatibility

The installation is actually pretty simple. Here’s a quick overview of how to install it.

First, switch off power to your current system by turning off the switch on the breaker box or turning off your system’s dedicated switch if it has one. Remove the cover off your old thermostat and verify that your old thermostat does not say 120V or 240V. If it does, that means its high voltage and Nest is not compatible with high voltage wires. Once you’ve verified Nest is compatible, take a picture of the current wire setup in case you need to reference it later on. Remove any jumper wires which are not needed for the Nest thermostat.

Next, peel off the included sticky labels in the installation guide and attach them to the matching wires. After you’re finished labeling the wires, disconnect the wires from the old thermostat. You can use the included Nest screwdriver to loosen the screws if needed. Remove the old plate while making sure none of the wires fall back into the wall. To install the Nest thermostat, first mark where your screws will go. If your old thermostat was larger than the Nest and there are visible screw holes you can use the optional trim plate to cover up the holes which is what I had to do with mine. Pull the wires through the center of the Nest base and attach it to your wall with the screws, using the built-in level to make sure it’s straight.

Insert each wire into its matching connector by holding down the button and inserting the wire all the way in. After all your labeled wires are connected, make sure the excess wire length in the center are flush with the wall. Attach the Nest display by pressing it onto the base until it clicks then turn your system’s power back on. You should see the Nest turn on automatically and it will walk you through a quick setup. To navigate it, just rotate the outer ring left or right and press on the display to select. During setup it’ll ask your location and language, you’ll connect it to your WiFi network, set your temperature settings, and answer some basic questions about your heating/cooling system.

After setup is complete, you can press down on the display to bring up the menu. From here you can change the mode from heating to cooling, view how much energy you’ve used in the last ten days, view or change the schedule, set it to Away if you’re leaving the house and want to save energy, and adjust some basic settings.

The Nest home screen turns blue when cooling and orange when heating. It not only shows you what temperature the thermostat is set to but it also shows you the current temperature inside and will give you an estimate of how long it will take for the current temperature to reach your set temperature. It also has a motion sensor built into it so when you walk by the thermostat it will light up so you can quickly see the thermostat temperature, and you can also choose to change the setting for it to show the weather or time.

One of its most compelling features is the way it “learns” your heating/cooling habits. After a few days, it will set an automatic schedule based on how/when you adjust the temperature. This is useful if your weekly routine doesn’t change much because with the auto schedule you seemingly don’t need to adjust the thermostat each time you leave and come home. However, if your routine is very different week to week then the auto schedule won’t be as helpful. Luckily you can customize the schedule to however you want it or turn off the schedule completely.

To take full advantage the features you’ll want to download the free Nest smartphone app. It does require an account but the account is completely free to set up.

From the app you can manually change from Home to Away mode. However, the Nest Thermostat uses sensors, algorithms, and even your phones location if you choose to allow that, to automatically determine when you’re home and when you’re away to set the thermostat accordingly so you can save as much energy as possible which is nice.

If you tap on the temperature in the app, you can quickly adjust the thermostat temperature and you also get access to the same settings that are accessible from the thermostat itself: Mode, Eco, Fan, Schedule, and History. There’s also a gear icon in the top right which gives you even more customization options for your thermostat.

Eco temperatures are automatic temperatures that are set when your thermostat is in Away mode and it’s indicated by the green leaf. The default Eco temperatures are good for most people. However if you have a pet you may want to customize the Eco temperatures based on your pet’s needs.

What’s neat about scheduling is you can turn on the Early-On feature which will start the heating or cooling early in order to reach the set temperature at the time specified in your schedule, instead of having it start the heating or cooling at that set time.

You can also create a 4-digit PIN to lock your thermostat to avoid people changing it without the code which may be useful in certain situations.

The only downside I’ve seen so far is how to adjust the schedule using the app. It’s definitely not intuitive when you first start using it. It took me a bit to figure it out and even now I think Nest could make it a little easier to adjust the schedule. Hopefully that will come in a future update. That’s what’s great about smart thermostats is that they are WiFi connected so not only can you control them from anywhere, they also download software updates as Nest releases them so it can technically improve over time.

Overall I’m extremely happy with my Nest Learning Thermostat. It’s only been a few weeks but I’ve already seen the energy saving benefits from having a smart thermostat which was my main goal. I also love the ability to control the thermostat from anywhere with my smartphone.

I hope you enjoyed this setup and review of the Nest Learning Thermostat 3rd generation. The Amazon link to this is in the description below. Let me know if you have any questions by leaving a comment and hit that thumbs-up button if this helped you out. Subscribe to see more tech reviews in the future. My name is Andy, thank you for watching and I will talk to you in the next one.

Best Wireless Security Camera System: Arlo Pro Review

Buy Arlo Pro on Amazon

You may have remembered that I bought a house last year and after doing a lot of research I finally bought a security camera system for it. And if you know me well you’ll know that I always prefer wireless over wired. I hate cords and I avoid them at all costs when possible. So that’s why I chose to go with the Netgear Arlo Pro because it’s one of the few security camera systems that is completely wireless. No power cords or data cables. I’ve had this for over a month, and now I want to share my experience with you. This is my review of the Arlo Pro wireless security system.

This is not a sponsored video. I bought this with my own money, but even if it was sponsored I do always give my own honest thoughts and opinions. I will leave a link to the Arlo Pro on Amazon in the description below for your convenience. If you do choose to buy it please consider using that link as it does help out the channel a tiny bit at not extra cost to you.

At of the time I made this video, the 3-camera Arlo Pro system which is what I have is a little over $530. So it is a bit expensive compared to ordinary security systems, but you are getting way more features with it being a smart security system along with the convenience of it being completely wireless. There are options for a 1-camera system all the way up to a 5-camera system depending on your needs.

All the systems come with the free basic plan from Arlo but if you do happen to need more than 5-cameras on a single base station you can add up to 10 cameras and upgrade to the premium plan. The free basic plan supports up to 5 cameras and includes free cloud storage for up to 7 Days. The Premier plan is $100/year and supports up to 10 cameras and includes free cloud storage for up to 30 days. I’m currently on the free basic plan so that’s what my review is going to reflect.

Included in the box are: the base station, the base station power adapter, an ethernet cable, the Arlo Pro cameras along with a rechargeable battery for each, a power adapter and cable to recharge the camera batteries, and magnetic wall mounts with mounting screws. A nice perk is that all the batteries are fully charged when they arrive.

For me the setup was very smooth. The included guide was easy to follow. It doesn’t take long at all and basically consists of downloading the free Arlo app which is compatible with iOS, Android, and Amazon devices. Creating your free Arlo account, connecting the base station to your router, then syncing and mounting the cameras, and you’re done.

Just last week Arlo announced the Arlo Pro 2 which is the newest version of Arlo Pro, and even though it is slightly better in a couple of ways, a lot of the new features depend on the Arlo Pro 2 camera being plugged into power and being indoors. So that’s why I do still recommend just getting this original Arlo Pro system because it is cheaper and you’ll get the essential functionality and features that most people need in a security camera system.

The Arlo Pro cameras are built for indoor or outdoor use. They have a 300-ft line of sight range from the base station. They are IP65-certified weatherproof so they should be fine even in the snow, rain, or heat. It’s been very mild weather since I’ve installed mine so I don’t have any experience through winter but I suspect they’ll be fine here in the Midwest. And since the cameras are completely wireless and have rechargeable batteries inside, they connect to the mounts via the built-in magnets. So all you have to do is install the mount and the cameras just snap to the magnetic mounts which allows you to easily adjust the camera angle and quickly remove the cameras whenever you need to recharge them.

As far as battery life goes, Arlo says a camera battery can last 4-6 months but it really just depends on the camera settings and how much it is recording and detecting motion or sound. Mine have been installed for about 7 weeks, and they’re all right below 60% so if they continue like this they should last around 4 months total on a full charge, and that’s right at the 4-6 month prediction that Arlo has claimed which is good.

The way Arlo Pro works is it’s not designed to be constantly recording and saving video 24/7 nonstop. Instead, Arlo Pro is meant to record short video clips only upon motion detection or sound detection. So even though it’s not constantly saving video, the cameras are constantly active and you are able to live stream any camera at any time from your smartphone or device of choice as long as your device is connected to the internet. That’s another reason I went with Arlo Pro because all the cameras can be managed and viewed via the free app wherever I am.

Here’s a quick overview of how the app and camera system work together.

First I love that the app can be configured to log in automatically with Touch ID on my iPhone. All I have to do is open the app and it logs in with my fingerprint. That is very convenient, and I’m always grateful when an app utilizes Touch ID. On the Devices tab you can see all your different cameras and you can view a live feed by tapping the View button. Under the cameras there’s also a button to trigger the base station alarm. If you tap this Alarm button it will trigger a super loud 100 decibel siren from the base station. So the ability to remotely trigger the alarm is a great feature to have in a security system. The Library tab gives you a daily list to view any recorded clips that are stored in the cloud on your account. You can tap on any video clip to view it and on the free basic plan, you can download and save it any time within 7 days of the clip being recorded. You can also quickly share it or favorite it. The filter icon on the top is a quick way to view certain types of clips, so if I want to see all the clips from my indoor living room camera I can filter to just that camera and it will show me all those clips.

The Mode tab lets you choose between 4 modes: Armed, Disarmed, Schedule, and Geofencing. The Disarmed mode cannot be customized, it just disarms your entire system. However you can customize the other 3 modes. You can really drill down and set all the settings however you’d like. In the Armed mode you can customize the rules for each of your cameras. You can set each camera to record upon motion, sound or both or neither. You can tell it what to do when it detects motion or sound, you can configure it to turn the siren on or not upon detection, and you can set your notification settings. That’s another thing I love about the Arlo Pro is that, if you want it to, it immediately notifies you via a push notification, email or both whenever a camera detects motion or sound. And it does work from my experience with it. It seems to be very successful at detecting motion and noise. For example I always get notifications whenever my cat prances into the living room to play, I’ll get notifications of when a package is left at my door so it has been very reliable for me.

The Schedule mode lets you set a custom schedule of days and times that will automatically arm and disarm your system So if you want your system to automatically arm from 6am to 11pm on weekdays and all day on the weekends, the schedule mode lets you do that.

Geofencing mode will automatically arm and disarm your system whenever your smartphone is within a certain radius of your base station so in theory if you get in your car and drive away from your house and you have your smartphone with you, your system will automatically arm your system as you leave that radius area. Then when you arrive back into the radius area it will automatically disarm your system. I’ve tested out both Schedule and Geofencing modes and they do work as expected.

The camera quality is pretty decent. These have a 720p standard HD resolution, and that’s where the new Arlo Pro 2 cameras have the biggest advantage because those are full HD 1080p. But the good news is the original Arlo Pro system is compatible with Arlo Pro 2 cameras so if you really wanted a 1080p camera you could purchase an Arlo Pro 2 camera and add it to your original Arlo Pro system and it should work. For me, 720p is fine for most situations, but 1080p would come in handy if I really wanted to capture more image detail when necessary.

The cameras have a wide 130-degree viewing angle so they are able to capture a lot inside the frame which is nice. They also have 2-way audio so they have microphones to capture the sound as well as speakers that let you speak into the app on your smartphone and your voice will be projected out of the camera’s speaker. So if you see someone on your porch you get on your app and just be like “Hey I’m your guilty conscious, you should really get off this person’s porch. He probably is very handsome and has broad shoulders.”

If you tap on the gear icon next to your camera you can customize the settings for each camera. From here you can name the camera, turn it on or off, view the battery percentage, see if it’s connected to the base station. In the Video settings you can enable night vision which is pretty decent quality even in the pitch dark, you can rotate the image, and you can change your power management. Since these are just standard HD I set all my cameras to the Best Video setting which reduces battery life but I’d rather have the best video quality possible. However there are other options such as Optimized and Best Battery Life if you prefer longer battery life over video quality.

In the Settings tab you can view all your devices, view your Arlo profile, and grant access which is really nice – this lets you give access to your spouse or whoever you choose so they can download and install the Arlo app and view all your cameras too.

Since the cameras are magnetic I do recommend installing them in high places that are out of reach so that people can’t just pull the cameras off so easily. However if you do need to install them in a place within a person’s normal reach, you can purchase screw mounts so the cameras are actually screwed in to the mount which makes it harder for someone to just pull the camera off. I’ll put a link to these along with some other cool Arlo Pro accessories in the description below.

So after using this for over a month I definitely think the Arlo Pro system is the best wireless security camera system for people who want something that’s easy to set up and use, and something that is completely wireless. It has worked exactly as expected for me. The app is intuitive – it hasn’t crashed or have bugs in the software. All the motion/sound detection rules seem to work as expected. I get instant notification on my phone wherever I am, it has free cloud storage with the ability to download and save videos anytime within 7 days. The cameras are weatherproof and work indoors and outdoors, and it comes with a base station with the ability to trigger alarm based on rules or on demand. It’s just a great security camera system and so far I’ve been very satisfied with it. Again, if you want to get this on Amazon I’ll leave the link in the description below. Thank you for watching. My name is Andy, and I will talk to you in the next one.

Best USB Microphone: Blue Yeti Review + Test

Buy Blue Yeti on Amazon

Blue Yeti Pop Filter (Amazon)

A good USB microphone should do two things: sound great and have a quick easy setup. For years the Blue Yeti has been referred to as the best USB microphone from many different experts such as bloggers, podcasters, and YouTubers, and it has a nearly perfect 5-star rating almost anywhere you look online. But just like Big L said people are praying on its downfall, hoping it flops, hoping it stops so in this video I’ll put an end to the debate and show you why the Blue Yeti is still the best USB microphone. First I’ll go over the features and then I’ll show you how to get good sound quality every single time from it and I’ll let you hear some sound quality tests, I’ll even rap for you guys, so stick around for that.

The Blue Yeti is currently $129 on Amazon, but some colors are cheaper than others which can bring the price down even more if you don’t care about the color and just want to save as much money as possible. I’ll put the Amazon link in the description below so you can check it out yourself. When you first open the box you’ll notice the Blue Yeti is not a small microphone by any means. It’s made of a sturdy metal and stands almost a foot tall and weighs about 3.5 lbs. The color I have is the Grey model which looks really good and complements my iMac and Space Grey MacBook Pro quite nicely. I think I just realized grey is my favorite color. Hmm is that good or bad? I don’t know. The Blue Yeti comes with a USB cable and is compatible with Mac and PC right out of the box. No drivers or software needed. Just plug it in and start recording. Even though the Yeti can fold down to make it a little better for storing or packing, it’s still mainly designed to stay put on your desk because of its fairly large size and solid build. It’s going to take up a good amount of space in a backpack.

At its price range the Blue Yeti is the absolute best choice for most people. If you look at mics below $100 you’ll see they lack a key feature that the Blue Yeti has, and if you want something that sounds better than the Blue Yeti, you’ll most likely need to spend a lot more money on a complicated setup consisting of an XLR mic with a separate audio interface. The advantages of having a USB mic like the Yeti are: one, USB mics are much cheaper, and two, USB mics are much simpler. The Blue Yeti already has an internal preamp and analog-to-digital converter that takes the incoming signal, amplifies it, and converts it to digital, and sends it directly into your computer. That means you don’t need any other gear to start recording. The Blue Yeti does a great job at fusing simplicity with just enough pro features, along with high quality sound and physical aesthetics all in one single microphone which is why it’s the best.

On the front of the mic there is the Blue logo, a Mute button which is solid red when the mic is powered on and connected to your computer and it will flash red when the Mute is enabled. I kind of wish the Mute button wasn’t lit up the entire time, but I guess that’s the only way to know it’s powered on. Under that there is the headphone volume knob because when you look on the bottom there is a headphone jack that allows latency-free real-time monitoring of your microphone so you can make sure your recording levels are just right and you’re not peaking, which is a clutch feature to have on a microphone. What’s also cool about the headphone jack is you can not only use it to monitor the mic but you can also use it to listen to your computer’s audio because of the dedicated amp and converter that’s built into the Yeti. There’s also the USB cable port and a standard thread mount for if you ever want to unscrew the side screws and remove the Blue Yeti from the included stand you can use the standard thread mount to put it on a standard microphone studio mount. The bottom of the mic stand has this firm foam on it that allows the mic to stay in one place really well and doesn’t allow it to be moved or slid around easily which is nice. Under the mesh top there are actually three condenser microphone capsules which make the Yeti extremely versatile for almost any recording situation. On the back there is a gain control knob which is a hugely important feature, and this is how you can adjust the sensitivity of the mic or how loud your recording is. Below that there is the pattern selector where you an choose up to 4 different recording settings.

Cardioid
Probably the most popular setting on the Yeti, cardioid mode records sound sources that are directly in front of the microphone, delivering a rich, full bodied sound and it minimizes the pickup of noise from the sides and back of the microphone. It’s perfect for recording your voice, whether it’s a voiceover for a video, a podcast episode, gaming commentary, singing vocals, or rapping. So if I were to hit you with something like “(RAP)”. Or if you’re musically talented unlike myself, cardioid mode is also great for recording solo instruments.

Stereo
This uses both the left and right channels to capture a wide, realistic sound image so it’s good for when you want the listener to hear the movement from one ear to another and also ideal for recording things like acoustic guitar or a choir.

Omnidirectional
Picks up sound equally from all around the mic. It’s best used in situations when you want to capture the ambient noises and want the listener to have the feeling of “being there”—like recording a band’s live performance, a multi-person podcast or a conference call.

Bidirectional
Records from both the front and rear of the microphone while the noise from the sides are not picked up. It’s good for recording a duet or a two-person interview or two-person podcast episode. So it comes in handy when you don’t have multiple microphones for multiple people.

So now let’s talk about how to get great sound quality the Blue Yeti. It records in 16-Bit at 48 kHz and when it comes down to it, the Yeti is perfect for the following uses: Voiceovers (any type of voice recording), podcasts (podcasters), videos (YouTubers or any other audio for video), video chats or live streams (Skype/YouTube Live/FB Live/Hangouts/FaceTime), musicians (vocals/instruments, singing/rapping). The Yeti just does an excellent job at capturing a voice the way it sounds in real life with all the different pitches and tones, but with clarity as well. I mainly use it for video voiceovers for YouTube so let me show you how I set it up and let you hear how it sounds.

First thing you want to make sure is that you’re speaking into the front of the mic and not the top, that’s a common mistake that beginners make. So be sure you’re speaking into the front when you’re in cardioid mode for recording your own voice. I like to use ScreenFlow to record my audio, but you can use any recording software of your choice. GarageBand is a very popular choice for Mac users, and Audacity is very popular free program for Windows and Mac users.

To get good sound quality from the mic you should do the following:

First you want to be fairly close to the mic for it to capture that richness of your voice. I like to be about 3-4 inches away from the mic when recording voiceovers. If you do get pretty close to the mic, you may want to invest in a pop filter like this one. This prevents the loud popping noise you get from when you say certain words like Powerful Puppies on Picnics, or something like that. These are pretty cheap, I’ll leave a link to the best selling pop filter on Amazon in the description below.
Next you want to set the correct gain level using the knob on the back. The more gain, the louder and more sensitive the mic will be. So do a couple test recordings or monitor your audio levels and make sure your levels are high enough but not peaking into the red levels on your recording software.
Also if you’re in cardioid mode you’ll want to eliminate as much background noise as possible. The Blue Yeti does a fairly good job at not picking up a lot of background noise, but no mic will absolutely eliminate all background noise. So just keep that in mind when recording.
Lastly, once your recording is done you can use your audio software to raise the levels if needed or edit the recording in whichever way you want to improve it ever so slightly. I usually record with a lower gain, and then using Final Cut Pro X I will use the Louder feature to raise the audio levels to the correct level and it does a fairly good job at increasing the loudness of my voice while keeping the room hum at a minimum.

Before we get into the last audio test, even though I think the Blue Yeti is the best USB mic overall because it has professional studio sound quality, has a very solid and attractive design, along with the multi-pattern recordings and tri-capsule microphone array, having said that if your budget isn’t enough for the Yeti, you should look at the Audio Technica ATR2100. That is my 2nd recommendation because it’s almost half the price of the Yeti and it is one of my all time favorite USB microphones for under $100. I’ll leave the link to my full review of that in the description below if you want to check that out.

Ultimate HP Setup Under $1,000! Pavilion x360 + 27xw Monitor

Did you know last year I reviewed the 13″ HP Pavilion x360 (Amazon which was one of the best budget laptops for students? Well for this video I’ve teamed up with HP to showcase the new 15.6″ HP Pavilion x360 (Amazon) laptop along with the HP Pavilion 27xw (Amazon) monitor, and this particular combo is what I like to call the ultimate HP setup for under $1,000 because it’s not only great for productivity but it’s also a lot of fun. Let’s get right into it and I will show you what each item in this setup brings to the table, or desk. Literally.

The main piece of equipment is obviously the star of the show, the new 2017 HP Pavilion x360 convertible laptop, and more specifically this model is the 15-br010nr in the silver finish and it’s a great looking laptop.

I’m primarily a Mac user, but I wanted to try the HP Pavilion x360 because 1. It is a way more budget-friendly option especially for those of you who are students, saving money is a priority. And 2. there are no Mac convertible laptops or Macs with touch screens, and Windows 10 on HP touch screens works really well for productivity which you know I’m a huge fan of. For example if you have a compatible digital pen like this HP Active Stylus you can write with it using Microsoft inking, and the Pavilion x360 (like the name suggests) has a 360 degree rotating screen which is in fact its primary feature. So you can use it like a normal laptop when you want to type, but you can also flip it into Tent mode when you want to utilize the touch screen more or if you just need a break and want to watch some YouTube videos, and you can also flip it all the way into Tablet mode for when you want to use it like a tablet for something like games or reading.

The Pavilion x360 offers pretty good performance while only sacrificing a couple of features that higher-end laptops have, mostly hard drive speed. With this being budget-friendly, it’s not going to come with a blazing fast solid state drive. Instead it has a 5400RPM mechanical hard drive that is slower than an SSD, but based on my benchmark tests it does read and write at around 100MB/s which isn’t bad and since it is a hard disk drive you’re able to get a lot more storage for the price. This model has a 1TB hard drive which can store almost double of what my MacBook Pro can store, but at a much cheaper price point.

It’s also sporting a 7th generation Intel Core i5-7200U Dual-Core Processor at 2.5GHz with max turbo up to 3.1GHz so it’s been able to handle a lot of tasks that I’ve thrown at it such as having multiple browser tabs open while listening to Spotify and typing a document which is a normal work day routine for me. And if you’re into numbers, on the official GeekBench test it scored 2997 for single-core and 6613 for multi-core. For things like HD video editing it’s not as fast as some other quad-core i7 laptops, but it does have 8GB of fast and efficient DDR4 SDRAM which helps out a ton so it certainly is capable of editing videos, something that I personally love doing.

Now if you’re not doing intensive tasks that require a lot of CPU rendering, you can expect to get very good battery life from the Pavilion x360, usually around 8-9 hours on average for me, possibly 10 if you’re very conservative. Long battery life is a very important factor for laptops these days, and it seems to be a nice benefit of this laptop.

This setup is perfect for people who are like me and want a lot of screen real estate. It’s definitely not the most mobile laptop. It’s fairly large and is built for getting work done, with its full size keyboard and number pad along with a nicely sized trackpad. It has Bang & Olufsen speakers for some crisp sounding audio, HP wide vision HD webcam with built in microphone, and a super smooth finish on the inside. On the left side there is the power button, headphone jack, and volume rocker, and on the right side there is the charging port, a full size HDMI port, two USB 3.1 ports, one USB-C port, and an SD Card reader so it definitely has a wide variety of ports. But one of its best perks is the beautiful 15.6″ Full HD IPS WLED backlit screen that is of course multi-touch enabled from edge to edge. The touch is responsive and it has great viewing angles. Watching videos and movies is definitely something that this laptop was built for. But since I’m a YouTuber and filmmaker, I probably create more videos than I watch, and that’s where the next item in the setup comes into play. With the HP Pavilion 27xw monitor I’m using this setup as a way to finally learn how to use Adobe Premiere Pro which is something I’ve been wanting to do for a long time. When I’m on my Mac I use Final Cut Pro X, but that’s not available for Windows so it’s the perfect time for me to learn a new program.

The Pavilion 27″ monitor is currently on Amazon for just under $200, and it’s one of the best looking monitors in its price range. You can tell that HP took some inspiration from Apple in the way they designed this monitor. It’s sleek, thin, but also simple. It has a white and silver finish and the way the stand is made it gives you easy accessibility to the VGA and HDMI ports on the back. And yes this does come with an HDMI cable which is always nice and to connect it to the Pavilion x360 all you have to do is connect the HDMI cable to the HDMI port on the monitor and the other end of the cable into the HDMI port on the laptop and you’re all set. The monitor can be tilted back and forth and similar to the Pavilion x360 display, this also has In Plane Switching IPS technology for amazing viewing angles.

The Pavilion 27″ monitor is a Full HD 16×9 display with 10,000,000:1 dynamic contrast ratio and a Technicolor Certification, and only 8ms response time so it’s a great monitor for designers and content creators who are still on a fairly small budget. And the bezels on this monitor are pretty thin, it’s just a very attractive monitor. As a video editor it’s so much easier to edit footage when you have multiple displays because you can have the editor in full screen on one monitor while being able to import or organize your media files on the other monitor. I would highly recommend getting some sort of stand to put the laptop on so it’s more aligned with the monitor, and you’ll also want a Bluetooth keyboard and a wireless mouse, such as this HP Z3700 (Amazon) which is super portable and the battery life is outstanding. And once you have those things you’ll have yourself a fantastic looking dual-screen setup so you can increase your productivity while also being able to kick back and be entertained, all for $1000 or less.

So that’s my ultimate HP setup for under $1,000. I hope you enjoyed it. Thanks to HP for sponsoring this video. If you have any questions, just leave a comment below!

« Older posts Newer posts »

© 2023 My Tech Methods

Theme by Anders NorenUp ↑