Videos by Andy Slye

Category: Guides (Page 8 of 18)

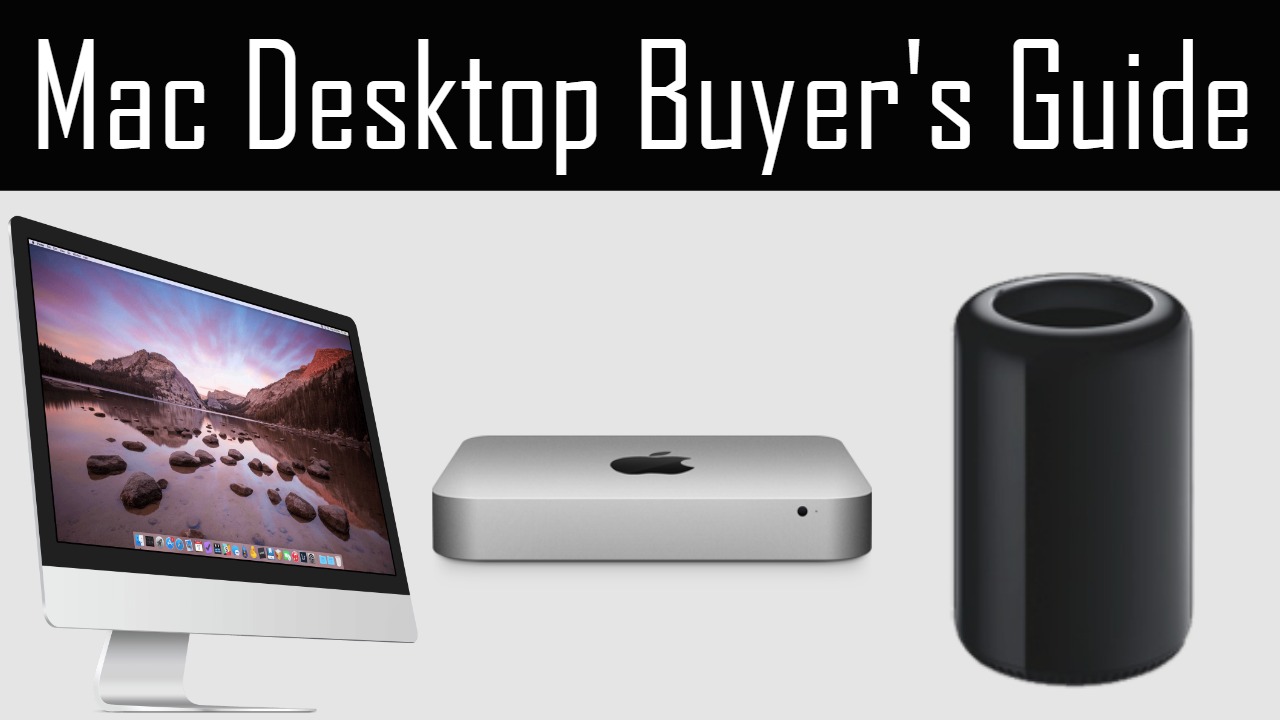
Which Apple Desktop to Buy in 2015: Mac Mini vs iMac vs Mac Pro

Which Apple desktop should you buy in 2015?

Mac Mini

The Mac Mini is the entry-level Mac desktop. It’s the cheapest and most suitable for people on a tight budget who already own a monitor, keyboard, mouse. It doesn’t come with any accessories. I own a Mac Mini and it’s worked out great for me. Powerful and fast for such a compact machine. I highly recommend getting a fusion or SSD. Avoid 5400 RPM hard drives.

Mac Mini starts at $499, $699, and $999
Dual-core i5 processor, configurable to dual-core i7
500GB HD, 1TB fusion drive, or 256/512/1TB SSD on highest model
4GB RAM configurable to 16GB
Good amount of ports
Built-in wifi
Last update was October 2014 so new version should be coming soon.
Can’t replace RAM (unless you get older 2012 version from Apple Refurbished).

iMac

The iMac is Apple’s all-in-one desktop and probably their most popular desktop model. It comes with Magic Mouse 2, Magic keyboard, and a lightning cable. Best for users who want a more powerful and simple setup than a Mini and who don’t already own an HD monitor. The all-in-one setup looks cleaner and less cluttered on a desk. Incredible Retina screens. Overall a beautiful computer/monitor combo.

Starts at $1099 for non-Retina (still full 1080p HD display)
Cheapest 21.5″ Retina starts at $1499 (4K)
Cheapest 27” Retina starts at $1799 (5K)
Ultra thin; just updated October 2015

Mac Pro

The Mac Pro is Apple’s top-of-the-line desktop. The most powerful and the most expensive. Recommended for power users – people who need the fastest and most powerful Mac computer who have a very large budget (can be configured to nearly $10,000). It has a unique design that may look weird to some people but is very sleek. Con: for the high price you don’t even get a keyboard/mouse 🙁

Starting at $2999 for quad-core and $3999 for 6-core
Intel Xeon processors
At least 12GB RAM
At least 256GB flash storage
 

How to Format an External Hard Drive on Mac OS X

Video Transcript:

Hey guys it’s Andy, and in this quick video tutorial I’m going to show you how to format an external hard drive on a Mac. So if you’re on a Mac, and you want to format an external hard drive, maybe you want to back up your Mac using Time Machine or another backup program. Or you just want to use an external hard drive on your Mac exclusively this is how you’ll format it so that the Mac can read it. So the first thing you want to do is connect the external hard drive to your Mac. And you may need to power it on if that’s an option. But once it’s powered on and connected it will show up on the desktop of your Mac. Mine is called Untitled. Yours may be called something else, but once you see it you know that it’s connected. Next thing you want to do is go to Spotlight search. You can click the magnifying glass in the top right or you can hit Command Space. It’ll bring up the Spotlight search and just search Disk Utility and then hit Enter. It’ll bring up the Disk Utility and this is where you’re going to partition and format the external hard drive. On the list here you’re going to select the hard drive. You’ll see it’s got two options. You got the Untitled and then you got the main disk. Click on the one above it right here, the one above the name. And then once you have that selected you’ll see an option to partition that hard drive so click on Partition. Then you want to click on Partition Layout and choose 1 Partition. Then give it a name over here so name it whatever you’d like if you want to name it like Backup. I’m just going to name mine Wet Socks just because I want to. Then right here on the Format you’re going to make sure that the format selected is the Mac OS Extended Journaled. That’s what you want okay. And here’s a warning before you partition this drive. This will erase any current data that’s on the external drive. So make sure that you don’t need any of the data that’s on the external drive because this will erase it. And one last thing before we apply it is click the Options button and make sure that the GUID partition table is selected. And then hit OK. Now we can apply it and when you apply it it’s going to format your external hard drive and wipe it and erase it. Make sure you’re ready for that and then hit Apply. And it’ll ask you are you sure you want to partition the disk. Partitioning the disk will delete all the data on this disk. And we want to go ahead and partition. It should be fairly quick. Mine did it within a few seconds, depending on your hard drive size and your computer speed it might vary. But it should be fairly quick, and when it’s done you should see the new name over here on the left hand side. Once you see that new name that you just named it you are good to go. It is now been formatted for Mac OS X operating system, and there it is right there on my desktop with the new name. When I go into it there is no data on it and it’s ready to be used with Time Machine or any other backup program like Super Duper. And I actually did a video over how to backup your Mac using Time Machine. I will leave that link right here. You can click on that and check that out. Thank you so much for watching. If this helped you out make sure you give it a thumbs up and leave comment down below if you have any questions about it. And subscribe to this channel for more Mac videos in the future. I will talk to you guys in the next video.

Which Mac Should You Buy in 2015?

Which Mac should you buy? MacBook Buyer’s Guide 2015

Since I’m a Mac user and I’ve reviewed many Apple products I decided to make a Mac Buyer’s Guide video to help you decide which MacBook would be the best for you.

3 MacBook Models
MacBook, MacBook Air, and MacBook Pro

MacBook

  • Brand new; available in April 2015; Base model starts at $1299
  • 1st MacBook to be available in silver, gold, and space gray (like iPads and iPhones)
  • 12” IPS Retina display with 3 million pixels
  • Intel Core M mobile processor
  • 8GB of RAM and at least 256GB of flash storage

 The MacBook is for you if you

  • Love having the newest Apple features (Force Touch Trackpad and new butterfly mechanism keyboard)
  • Care about looks more than performance (sexy; Retina display; colors)
  • Want something ultra portable & mobile; Apple’s thinnest & lightest laptop (2 lbs & 9 hours battery life)
  • Running basic applications like web browsing, email, productivity software, and nothing too CPU intensive (has a mobile processor)
  • Don’t use USB drives or other external devices often such as SD cards, cameras, charging phone/tablet, connecting to a monitor (has only 1 USB-C port for charging/input/output)
  • Don’t Skype/FaceTime much and don’t need to record HD videos with the webcam (only 480p)
  • Want something that resembles an iPad
  • Most of your digital life is all wireless and on the cloud
  • Have the budget for it (expensive for what you get)

MacBook Air

  • Comes in 2 sizes: 11” starting at $899 and 13” starting at $999
  • Does not have an IPS Retina display
  • 4GB of RAM (can be upgraded to 8GB) and 128GB flash storage (can be upgraded to 256GB)
  • 5th-generation Intel Core i5 dual-core processor (can be upgraded to i7)

MacBook Air is for you if you

  • Want a small, lightweight and thin laptop
  • Are always on the go (great for students and travelers)
  • Don’t mind having a non-HD display
  • Care about battery life more than anything (13″ gets up to 12 hours; longest battery life of any Apple laptop)
  • Run typical everyday applications and even do some light photo/video editing
  • Still need access to Thunderbolt & USB ports and an HD webcam (720p)

MacBook Pro Retina

  • Comes in 2 sizes: 13″ starting at $1299 or 15″ starting at $1999
  • Both models have IPS Retina displays (13″ has over 4 million pixels; 15″ has over 5 million pixels)
  • 13″ comes with 8GB RAM (can be upgraded to 16); 15″ comes with 16GB RAM standard
  • 13″ has 128GB flash storage (can be upgraded to 256GB or 512GB); 15″ comes with 256GB flash storage (can be upgraded to 512GB)
  • 13″ comes with 5h-gen Core i5 dual-core processor (can be upgraded to i7)
  • 15″ comes with 4th-gen Core i7 quad-core processor

MacBook Pro is for you if you

  • Want the best performance and fastest speed out of all the Apple laptops
  • Run CPU-intensive or graphics-intensive applications such as gaming, HD video editing, 3D modeling, CAD, virtual machines, Photoshop
  • Don’t mind having a heavier laptop compared to the other MacBook models
  • Want a desktop replacement
  • Need as many ports as possible (HDMI, Thunderbolt, USB, SD)

13″ or 15?

Get the 13″ if you want long battery life, the new Force Touch Trackpad, and fastest read/write SSD speed.

Get the 15″ if you want the bigger display and the best processor/graphics performance.

How to Play a Blu-ray on a Mac

In this quick tutorial I’m going to show you how to play a Blu-ray on a Mac. To do this you’ll need 2 things.

1. External Blu-ray Drive

Here’s the Blu-ray drive that I recommend. It’s a #1 best seller on Amazon from Samsung.

2. Mac Blu-ray Player

A Blu-ray player app is needed because Mac OS X does not come with a Blu-ray player by default. The MacGo Mac Blu-ray Player is the best Blu-ray Player for Mac by far. You can try it out for free, but you’ll want to get the full version to get rid of the free trial limitations.

Once you have the Blu-ray drive connected to your Mac and the Mac Blu-ray Player installed, insert your Blu-ray disc into the Blu-ray drive. Open the Blu-ray Player from your Applications folder. It may automatically start playing the Blu-ray disc. If not just click the “Open Disc” button then browse to the Blu-ray disc and select it.

That’s it. It should start playing your Blu-ray on your Mac. Now excuse me while I sit back and enjoy Guardians of the Galaxy in full 1080p HD. Just living the dream.

« Older posts Newer posts »

© 2024 My Tech Methods

Theme by Anders NorenUp ↑