Videos by Andy Slye

Author: Andy (Page 19 of 21)

How To Run Windows On Mac Using Parallels

Click here to get Parallels for Mac
Click here to get Windows on Amazon

In this video I’ll be showing you how to run Windows on your Mac using Parallels. This is a virtualization program for your Mac and allows you to run Windows virtually so you can run both operating systems at the same time. You don’t have to boot into a separate hard drive or anything like that. So the first thing you want to do is click the links above to get Parallels and a valid Windows install disc.

So once you have Parallels installed you’re going to open it and choose to install Windows from a DVD or image file. If you have a Windows install disc you can insert it into your Mac DVD drive or choose a Windows installation ISO file. Enter the product key for Windows (or skip and activate later). Choose how you want the virtual Windows machine to behave. You can have it run Windows applications without opening up the Windows desktop, or you can have it all in one single virtual program. Choose a name for the virtual machine. Parallels will load the disc or image file, and it will start the Windows set up. Next choose your language, choose Install Now. Select I accept then Next. Choose Custom (Advanced). Choose Disk 0 then click Next.

Here’s an overview of the Parallels virtual machine settings. You can allocate a certain amount of memory to give the virtual machine while it’s running. Also you can allocate the number of CPU cores for the virtual machine, the total size of the virtual hard drive. It’s actually expandable so it expands as it needs to. The Options tab has all kinds of different categories that you can change. Startup and Shutdown, Optimization, Security, Backup, Sharing, Applications, Coherence, Full-Screen, Modality, and Advanced. The Hardware tab shows the hardware your Mac is sharing with the virtual machine: DVD drive, hard drive, network, USB, Bluetooth, iSight camera, etc.

Windows will perform a restart automatically after it gets done installing the first main files then it will complete the installation. Finish setting up Windows by entering a username, password, product key, time zone, recommended settings, and network settings.

When Windows installation is complete you’ll be in the Windows desktop. As you can see it’s running virtually on the Mac so it’s just like Windows in its own application. The mouse integration is seamless as well as the network. It’s bridging the network from the Mac so it already has Internet access. Parallels really makes this an easy setup, and everything is automatically set up through Parallels. It all does it in the background for you. That’s why I think Parallels is the best application that you can use when you want to run Windows on a Mac. Not to mention you can pretty much use all your Mac hardware in the Windows virtual machine. So as you can see you can do anything like you’re running a normal Windows machine, but it’s on a Mac. That is how to install and run Windows on a Mac using Parallels. It’s the absolute best way to do it.
Subscribe on YouTube
Twitter
Facebook
Google+
Instagram

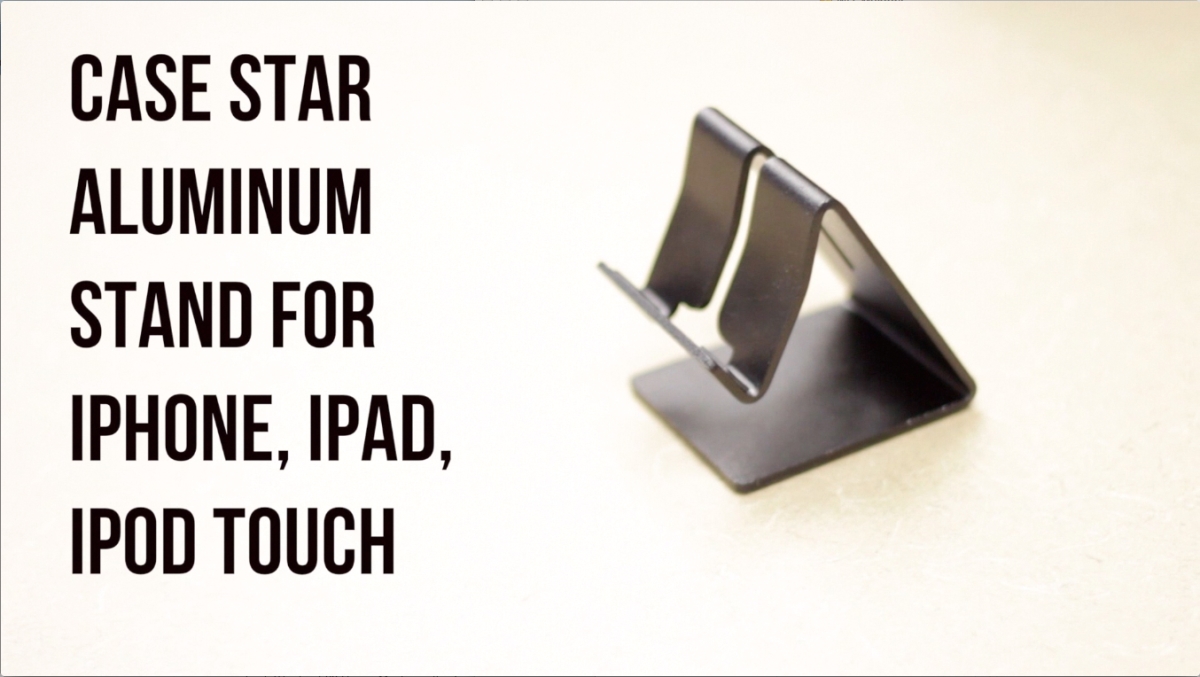
Review: Case Star Aluminum Stand for iPhone, iPad, iPod Touch

Buy the Case Star Aluminum Stand on Amazon
Subscribe on YouTube
Twitter
Facebook
Google+
Instagram

Alright I may have found the perfect stand for my iPhone. This is the Case Star aluminum desktop stand. This is going to be a short video review over it. This is a nice sturdy stand, and it’s very affordable. I got it for $10 on Amazon with free shipping. So if you want to get this stand click the link in the video description. This is a very nice stand. It’s made out of pure aluminum. It has rubber feet as you can see so it doesn’t slide. I wanted to make sure I got a very well made stand that wouldn’t tip over or move when I used my device. I not only wanted a dock, but I wanted to be able to have a stand that I can use my device and press the physical buttons and the screen while the device was sitting in the stand. This one does a great job at that.

What I really like about this stand is that it doesn’t tip over. It actually comes in more colors than black. Amazon had silver and blue editions as well. There are probably more. As you can see from the video when I touch the screen the stand does not move. It remains stationary, which was a big plus for me. That’s why I bought this one, and I wanted to show you that this stand does not move. You can press the physical buttons as well as tap the screen while it’s in the stand. It also has a hole in the bottom and a slit on the back where you can put your charger through so you can charge your device while it’s in the stand. In the video you can see my phone charging while it’s in the stand. It’s a very nice looking stand, and it seems pretty durable. A device can sit in portrait view as well as landscape. It not only holds my iPhone, but it actually holds my iPad Mini very well too. Plus I can actually use my iPad while it’s sitting in the stand so that’s awesome. It doesn’t move when the iPad is in there. It holds up very well, and it doesn’t rock or tip over and the iPad does not fall.

Overall I’ll give this stand a thumbs up. It looks nice, and I can see it holding up strongly over a long period of time. So again if you want to pick this up the link will be in the video description. You can get it on Amazon for a very affordable price. It’s a super good deal if you’re looking for a nice stand for your iPhone, iPod Touch, or iPad.

How to Convert YouTube to iTunes Files – The Easy Way!

How to Convert YouTube to iTunes

Click here for a Windows Instant Download
Click here for a Mac Instant Download

Using MacX Video Converter Pro is the easiest way to convert YouTube to iTunes file formats. With this app you can download and convert YouTube videos and put them into iTunes and from there you can sync them onto a device such as an iPhone, iPad, or iPod.

This application is available for Mac & Windows users so if you click on a link above you can download it instantly to your system. It also converts many video files so you can convert an FLV file to an MP4/MP3, etc. You can convert nearly any video file, as well as download & convert YouTube videos to put them into iTunes.

First go to YouTube and find your video. Then copy the URL address of the YouTube video that you want to convert into an iTunes compatible file. Then click the YouTube button in MacX Video Converter Pro. Here you’ll paste the YouTube URL address into the text box then click OK. Choose the output folder where you want the YouTube video to be saved.

If you’re planning on leaving the YouTube file in iTunes all you have to do is click the Apple tab and choose the iTunes tab and then click Start. But if you plan on putting the YouTube file on a device after it’s in iTunes you can choose your device specifically on the corresponding tabs. This not only converts YouTube to iTunes, but it also converts YouTube to all kinds of formats. You can choose from all the different tabs available for specific devices. You can even convert the YouTube video to an MP3 file so you can have it as a song in your iTunes library. You can do that by using the Music tab. But for now I’ll just choose Apple and iTunes so I can put the YouTube video into iTunes directly and then click Start.

It will download, convert, and add the YouTube video into iTunes automatically for you. Once it’s finished downloading and converting you’ll see it pop up in your Explorer window. Then open iTunes and you’ll see the YouTube file in there. You can watch it in iTunes or sync it to a device such as an iPad, iPod, or iPhone by plugging in the USB cable and syncing iTunes with your device. That’s how easy it is to convert YouTube to iTunes files!

Built in 420+ video/audio codecs and advanced HD video decoding engine, MacX Video Converter Pro brings users an all-in-one video converting solution with top quality and efficiency. The is app owns powerful abilities to convert HD videos including MKV, M2TS, AVCHD, H.264/MPEG-4 AVC, and SD videos like AVI, MPEG, MP4, H.264, MOV, FLV, F4V, RM, RMVB, WebM, Google TV to Mac & Windows computers, iMovie, iTunes, iPhone 5, iPad Mini, iPad 4, iPod touch 5, iPod classic, Apple TV, PSP, etc.

With this video converter users can download website videos from YouTube, Vimeo, Metacafe etc. It also features unique ability to convert Multi-track HD videos in M2TS, MKV, AVCHD, HDTV BDAV and MPEG-TS formats, offering users the most convenient way to choose preferred audio language track, as well as create VOB files from videos to burn your favorite videos to DVD for a backup.

By Andy Slye

What is Cydia? How to Use Cydia After Jailbreaking


So you’ve just jailbroken your device and want to know more about Cydia. In this video I’ll explain what Cydia is and how to use Cydia so you can customize your iPhone, iPad, or iPod Touch!

Cydia is basically the App Store for a jailbroken device. It’s like the secondary App Store where you can get third-party custom apps after you jailbreak. Jailbreaking is the only way to get Cydia on your iOS device. Cydia is where you download, install, and manage everything for your jailbroken device.

A good analogy is to look at your device as a town, and this town has a mall. This “mall” is where you get everything that you can put on your device and that mall is the Apple App Store. When you jailbreak your device it’s like getting an extra mall put in that town. So now you have the old mall (the Apple App Store) and the new mall (Cydia). Cydia is where you can get everything that the old mall does not offer.

The Cydia app’s home screen has all kinds of different information and you can see a list of featured and popular apps for jailbroken devices that you can get through Cydia. It also has a User Guide section where you can learn more about Cydia and jailbreaking. Also from the home screen you can manage your Cyda account.

The Sections area lists the categories of everything that’s offered through Cydia – all the apps, all the tweaks, and all the themes. To install an app or tweak or theme from Cydia just tap on a Section, then tap on an app and tap the Install button on the top right.

The Changes section is where you can see all the upgrades and updates for all your apps that are offered by your sources that are installed on your device. It’s basically like the Updates section in the regular Apple App Store.

The Installed section is where you manage all your apps that are installed on your device via Cydia. Here you can reinstall or remove any app by tapping on it and clicking the Modify button in the top right hand corner.

A Source is also called a Repo or repository. If Cydia is a “mall” then the Sources are the individual stores within that mall. Cydia comes with default Sources installed where you can get almost any app. But if there’s an app out there that comes from a different source you can add it within the Sources section. Sources are basically the host of every app that you can install. It’s where you download and install the apps from. So whatever source you have in Cydia you can get any app from that repo.

The Search area is where you can search for any app or tweak or theme within Cydia. It searches any repo that you have in Cydia. If the app is in blue text that means it’s a paid app. Black text means it’s free. Cydia accepts two different forms of payments, Amazon or PayPal.

Those are all the basic things you need to know about Cydia to get you up and running and installing apps and tweaks and themes and customizing your iPhone, iPad, or iPod!

What Is Jailbreaking? How a Jailbreak Works

What is jailbreaking? How a jailbreak is developed & how it works!
Subscribe on YouTube!

Video Transcript:
Most people with an iOS device (iPhone, iPad, or iPod Touch) have probably heard of the term jailbreaking. Maybe you’ve even jailbroken a device before. But what does jailbreaking actually mean, and what is the process behind it? Well today you’re going to find out in this jailbreaking edition episode of “What Is?”

To jailbreak means to gain the ability to install custom third-party apps on your device. It’s completely legal, but Apple does not want you to do it because they want to control the user experience. Now before we get into the jailbreak process, let’s learn how an iOS device boots up. The iOS bootup involves a series of signature checks that makes sure everything that’s being ran is approved by Apple. It happens in the following order: BootROM, BootLoader, Kernel, and iOS operating system.

The jailbreak itself involves obtaining control of the root and media partition of the device. This is where all iOS’s files are stored. And in order to be controlled, the “private/etc/fstab” must be patched. FSTab controls the permissions of the device’s root and media partition. The main problem is not getting the modified code in but getting it through certain checkpoints. Apple put in these checkpoints to verify if a file is actually legit or if it’s from a third-party. Every file is signed with a digital signature, or key, and without it the file is useless.

Signature checks are the main roadblocks in the jailbreak process. While the kernel is loading there are tons of signature checks happening to make sure every file has been approved by Apple.

The main objective for a jailbreak is to either patch the checks or bypass them. So this brings us to the two main exploit categories.

The first is the BootROM Exploit. This is done during the BootROM, and it can’t be patched by a normal update. Since this is before almost any checkpoint, the modified code is put in and this creates a gateway to bypass all the signature checks or simply disable them.

The second exploit is the Userland Exploit. This is done during or after the loading of the kernel, and it can easily be patched by Apple. Since it’s after all the checks, it puts the modified code directly into the openings and back into the kernel.

That is how jailbreaking works! If you’re not worried about voiding your Apple warranty or if you don’t even have a warranty, I would recommend trying jailbreaking out. It’s really easy!

« Older posts Newer posts »

© 2024 My Tech Methods

Theme by Anders NorenUp ↑