Videos by Andy Slye

Author: Andy (Page 14 of 21)

Best Bluetooth Speakers Under $70 – Creative T12 Wireless Review

Link to buy on Amazon (Free shipping)

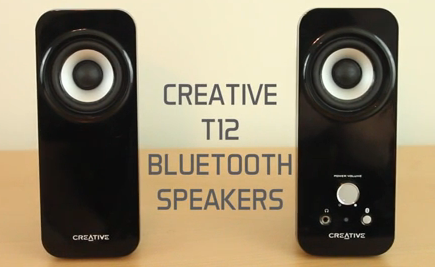
This is my full review over the best Bluetooth speakers for under $70. These are the Creative T12 wireless speakers. I’ve had these speakers for over a year now, and they are still awesome. These are averaging 4/5 stars on Amazon, and if you click the link at the top of this post that will take you to the best price on Amazon where you can get free shipping. The Creative T12 Bluetooth speaker system comes with two speakers, a power cable, and an audio cable to connect the two speakers together. The speakers have Bluetooth technology already built into them that requires no extra dongle, but they do not have a battery so they were not made to be portable. They do require a plug into an outlet. The speakers have the ability for both wired and wireless connections, and the speakers themselves are about 2.5 inches wide and about 6 inches tall so they’re mostly made to be on a desk of some kind, most likely a computer desk.

To show you the relative size of these speakers I put my iPhone 5s in between both of them in the video so you can see how big the speakers really are. Some of the main features of these Bluetooth speakers include apt-X audio codec for high-quality low latency wireless music playback and BassFlex technology that extends the low-frequency and improves the bass response. The front of these speakers are a glossy black finish, and the back of the speakers have a light gray finish with the Creative T12 wireless logo. The right speaker is the one with all the buttons and connections. There’s the main power and volume knob. It also has a very convenient headphone jack on the front so you can quickly plug in some headphones, and it has the Bluetooth button on the front as well. On the back of the right speaker it has an audio connection to the left speaker, the power connection, and an additional audio input for another wired connection.

I use these speakers to play music wirelessly from my Mac and my iPhone, and they will work with any other Bluetooth enabled device. If your Windows computer has Bluetooth or you have any other smart phone you can connect them wirelessly to the speakers. Or you can use the wired connections. The range is pretty nice. I’ve been able to play my iPhone from about 20 feet away. What I like about these speakers is the sound quality when playing over Bluetooth. For how small and compact these speakers are they do really put off a nice powerful sound.

In the video I’m playing a song wirelessly from my iPhone to the speakers to give you a sense of what they sound like. So as you can tell they sound very good over the Bluetooth connection. They have some power as well. You can definitely feel the bass when you’re in the room. It’s very easy to connect a new Bluetooth device to these speakers. All you have to do is hold down the Bluetooth button on the speaker until it’s in discovery mode and then you go to your Bluetooth device and tap on your speakers when they show up and it will connect automatically.

The only complaint I have about these speakers is that sometimes they don’t connect automatically to my phone or my computer when Bluetooth is already on. So I have to press the Bluetooth button on the speaker and then it will connect to my device. That’s the only complaint I have. Everything else about these speakers is fantastic, and I do highly recommend them to anybody looking for an affordable set of wireless speakers. Being able to play any wireless audio from my phone and my computer to these speakers is really nice. So that wraps up my review over the Creative T12 wireless Bluetooth speaker system. I hope you enjoyed it!

By Andy Slye
Best HD Monitor Under $160 – ASUS VS238H-P Review

Best HD monitor? 23″ ASUS VS238H-P LED Review
Click here to buy on Amazon (Free Shipping)

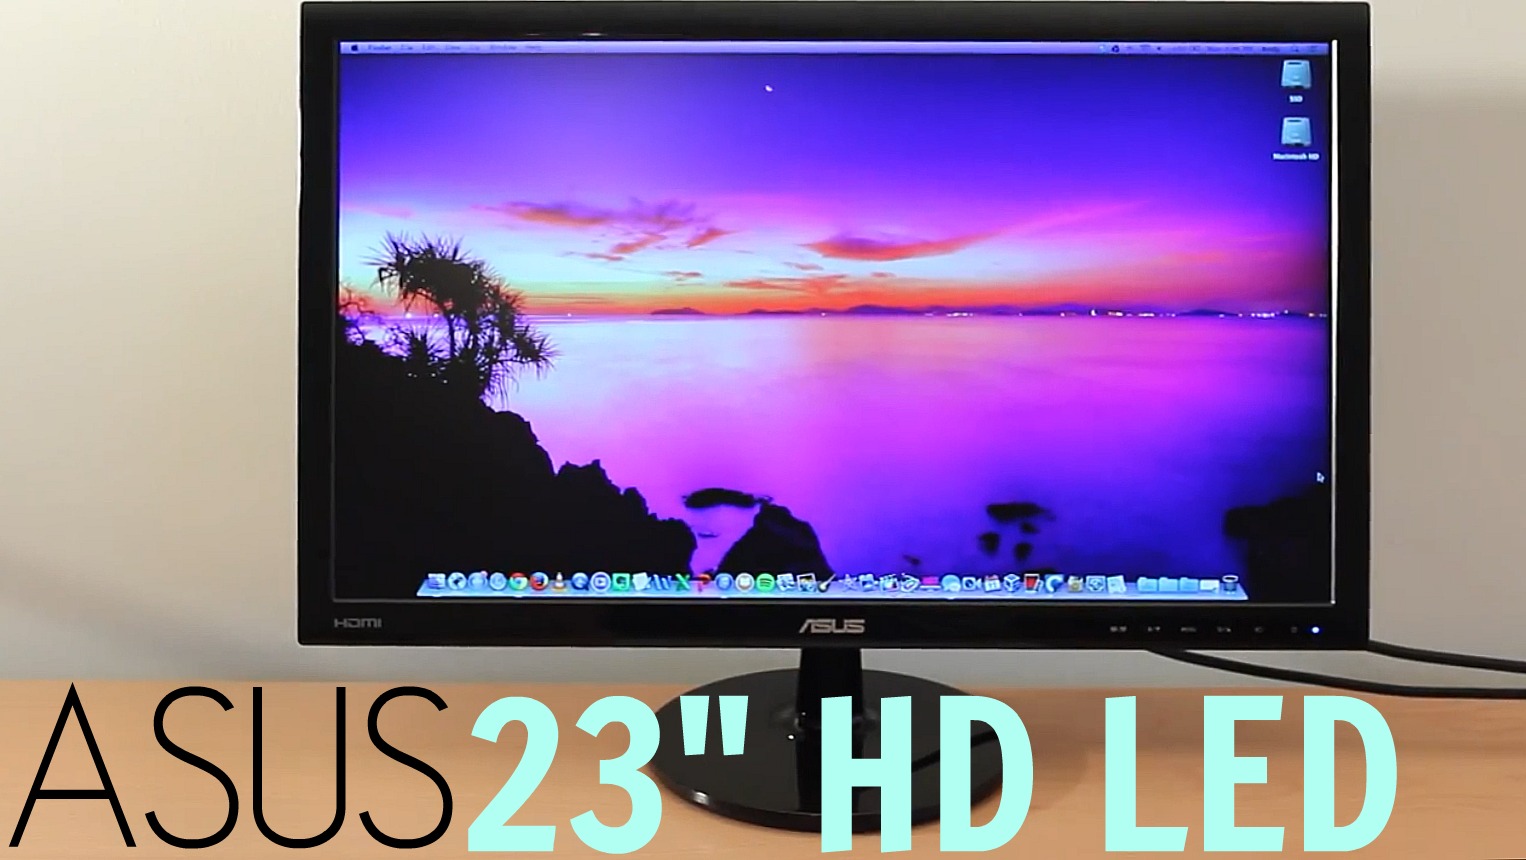
This is my ASUS VS238H-P HD LED IPS monitor review. This monitor is one of the best monitors that you can get right now for under $160. It’s currently $159 on Amazon with free shipping. It has great reviews: an average of 4.5/5 stars. If you click the link at the top of this post that will take you to the best price on Amazon for this monitor so you can order it. This is a 23 inch HD LED monitor with IPS technology. It supports a full HD resolution of 1920×1080, and it has an all black finish which looks really nice. On the back of the monitor you’ll see it has 1 HDMI port, 1 VGA port, 1 DVI port, and a 3.5mm audio jack input. In the box it comes with a power cable, a VGA cable, and a DVI cable but no HDMI cable. This monitor does not have a built-in speaker, but I’m not a big fan of built-in speakers on monitors so that wasn’t a problem for me.

Some of the features for this monitor include a slim elegant form factor which makes it very lightweight. It has a 2 millisecond response time for smooth motion playback. Since it is LED-backlit it is more energy efficient. It has a 50,000,000-1 smart contrast ratio for more defined images and dark colors. It also has a feature called Splendid Video Intelligence technology which provides quick image presents for your display. This is an IPS display which provides some of the best viewing angles for monitors currently on the market, and it does produce very accurate colors. I’ve been using this monitor for months, and I can tell you right now that the colors and fonts are very crisp. They look so good on this monitor.

This is a very good monitor if you’re a Windows or Mac user, even if you’re a gamer or not. I don’t play many games, but I use this on my Mac and I’ve played some games. It looks really good to me. The response time is very high so you don’t get any blur during high motion gaming. What’s great about this monitor is you can quickly toggle through the built-in presets for your image display. It has theater mode, gaming mode, standard mode, scenery mode, and a couple others. Each mode looks different and is made to be suitable for whatever you’re doing on the screen. For me I really like the theater mode. It brings out the colors and looks very good. Most of the time I leave it on standard because the brightness is a little too bright for me on the other modes, and I just turn the brightness down to below 50 on standard.

I also like the fact that you can tilt this monitor. You can tilt it back and forth and change the viewing angle very easily. The stand for this monitor could be a little bit better. It’s kind of a small stand and can be a bit wobbly if you’re on an uneven surface or if you tend to hit your desk frequently. But it’s not that big of a deal, and I actually like the smaller stand. It doesn’t take up very much room at all so I like that aspect of it. The stand and the bezel of the monitor both have a glossy black finish to them. They’re shiny, but the screen itself is a matte screen so you don’t get that glare if there’s a light behind you which is really nice.

After months of using this monitor I have no dead pixels whatsoever, and the screen looks just as good as the day I got it. This is an excellent monitor, but if you’re doing high-end graphic design or hardcore photo editing you probably want to spend a little bit more money and get a higher quality monitor. However, this monitor is perfect for people who want to upgrade to a large high quality HD monitor but want to save money and not break the bank. So I highly recommend this monitor. 95% of the users out there will be extremely pleased with this monitor.

By Andy Slye

How to Convert DVD to MP4 (PC & Mac)

How to Convert DVD to MP4 (PC & Mac) – The Easy Way

Windows users: click here for a free trial download for Windows
Mac users: click here for a free trial download for Mac

In this video I will be showing you how to convert a DVD to MP4 so you can put all your favorite DVD movies onto your smartphone or tablet such as your iPhone, iPod, iPad, Android smartphone or tablet, or any other device that is compatible with the MP4 video file format. It’s very easy to do with the program that I will be showing you how to use today, and it’s compatible with Mac and Windows computers.

First, click the link at the beginning of this video description. I have links to both the Windows and Mac downloads for this software above. Once you click that link it will start an instant download of the free trial version of this program. It’s 100% safe & secure. The free trial version will copy the first 5 minutes of the DVD just to show you that it works, and if you want to copy the whole DVD (and unlimited DVDs) you can purchase a full license from the program itself.

Once it’s downloaded you’re just going to click on it right from your browser or go to wherever you downloaded it to (usually it’s your Downloads folder) then just double-click on the file and click “Run”. It will install the program. You can try it out for free, but if you want to copy the whole DVD like I said earlier you can go ahead and click the Buy Now button and get this application at a special discount.

Next, insert the DVD movie into your DVD drive that you want to convert to MP4 then click the DVD Disc button in the top left corner of the application’s home screen. On the next pop-up you’ll see your DVD that’s inserted into your CD/DVD drive right now, just click OK. It’ll load the DVD. The output profile window will pop up. Choose PC (or Mac) General Video then choose the MP4 video file format recommended option. Click OK. On the next window you’ll see that the application has automatically selected the main movie file: Title 1. Yours may be a different title, but it automatically selects the main movie file so you can copy it off the DVD and convert it to an MP4.

Next, go down to the destination folder option. You can browse and change it to a different folder if you want to copy to a different folder. You can choose whatever folder that you want. Keep in mind that that’s the folder that your MP4 file will end up in. Now we’re ready to convert the DVD to MP4. Just go to the bottom-right and click the blue Run button. You can see that the conversion process has started, and it’s copying the DVD onto our computer in the MP4 file format.

When the job is complete you’ll see the window pop up with your video file in it. Your DVD has now been converted to an MP4 video. Now you can add it to iTunes or sync it to your smartphone or tablet or just keep it on your computer and play it on your computer now that it is an MP4 video. That’s how easy it is, folks. That’s how to convert a DVD to MP4. You’ll be able to copy any DVD movie, no matter what it is, with this program here. It’s high quality, it’s fast, it’s easy, and it’s highly recommended by me.

By Andy Slye

How to Copy DVD to Mac – MacX iTunes DVD Ripper

How to Copy a DVD to a Mac (MacX iTunes DVD Ripper Tutorial)

Click here for for the free trial instant download for Mac users
Or visit the MacX DVD Ripper website

Video Transcript:

What’s up everybody? It’s Andy with MyTechMethods. In this video I’m going to show you how to copy any DVD movie to your Mac using Mac X iTunes DVD Ripper. This is an awesome application for your Mac. It’s usually 30 bucks, but if you buy it now you get a special discount. It’s only 20 dollars so it’s an awesome deal for a Mac user who wants to copy any DVD movie to your Mac. So there are two links in the video description below. One link will be to this website where you can see everything about this application. The other link will be an instant download link so you can try it out for free. If you click that instant download link it’ll start that download of the Mac X iTunes DVD Ripper application here, and once it’s downloaded it’ll be in your Downloads folder. So if you go to your Downloads folder you should see it in there. You can double-click on it and run it to install it. Alright and then you just drag the Mac X iTunes DVD Ripper icon to the Applications folder. Alright after you’ve done that just go to your Applications folder and search for Mac X iTunes DVD Ripper, and you should see it right there. Double click on it to start it. Click Open. Okay and here it tells you that the free trial version only copies the first five minutes of the DVD just to try it out for evaluating purposes. And if you want to purchase the full version at that special discount you can go ahead and click that “Buy Now” button and you can get that registration code. Now the next thing you want to do is insert the DVD movie into your Mac’s DVD drive and then click this DVD button and it will show you the DVD right here in this box right here. And you click OK. It will load the DVD. Now in order to copy the DVD to your Mac you’ll have to choose the format that you want the movie to be copied in here on this output profile window. And here you have a few options. You can choose Mac general video which is usually what you’ll be choosing most of the time, just this MP4 video recommended. Or you can even copy the DVD as an MP3 if somehow you want to do that. And you can choose iTunes video to put it directly into iTunes as an iTunes MPEG4 but the iTunes MPEG4 and the Mac general video MP4 recommended are basically the same thing so I’ll just use Mac general video MP4 video recommended then click Done. Alright now the DVD is loaded. We have our target format MP4 video selected, the output file name right here. You can choose to select more titles. Title one is already checked automatically. That’s the main movie file. If you want to copy any of the extras you can select the additional titles here. I’m just going to leave it as title one. I just want to copy the main move file itself, and the destination folder is down here. It’s automatically going to this folder here, and you can change it if you want. I’ll just browse and change it to my desktop folder. Choose desktop then open. You can copy it to whatever folder you want. And now all you have to do is go to the bottom right and click this blue Run button, and it will to start to copy the DVD to your Mac. And now it’s finished. You can see the main movie file has been copied onto my Mac from the DVD right there. And you can do whatever you want with it. You can put it in iTunes. You can store it, and you can do as many of these as you want as long as you have the full version of the Mac X iTunes DVD Ripper application. So that’s how to copy any DVD movie to your Mac. Very easy to do. One of my favorite applications. Make sure you check the links in the video description below and get that application for your Mac. If you have any questions just leave a comment and I’ll get back to you. Thank you so much for watching. I hope this video helped you out. Make sure you subscribe and like this video. Keep having fun out there, and I’ll talk to you later.

By Andy Slye

How to Backup iPhone, iPad, or iPod with iTunes (PC & Mac)

How to Backup iPhone, iPad, or iPod with iTunes (PC & Mac)

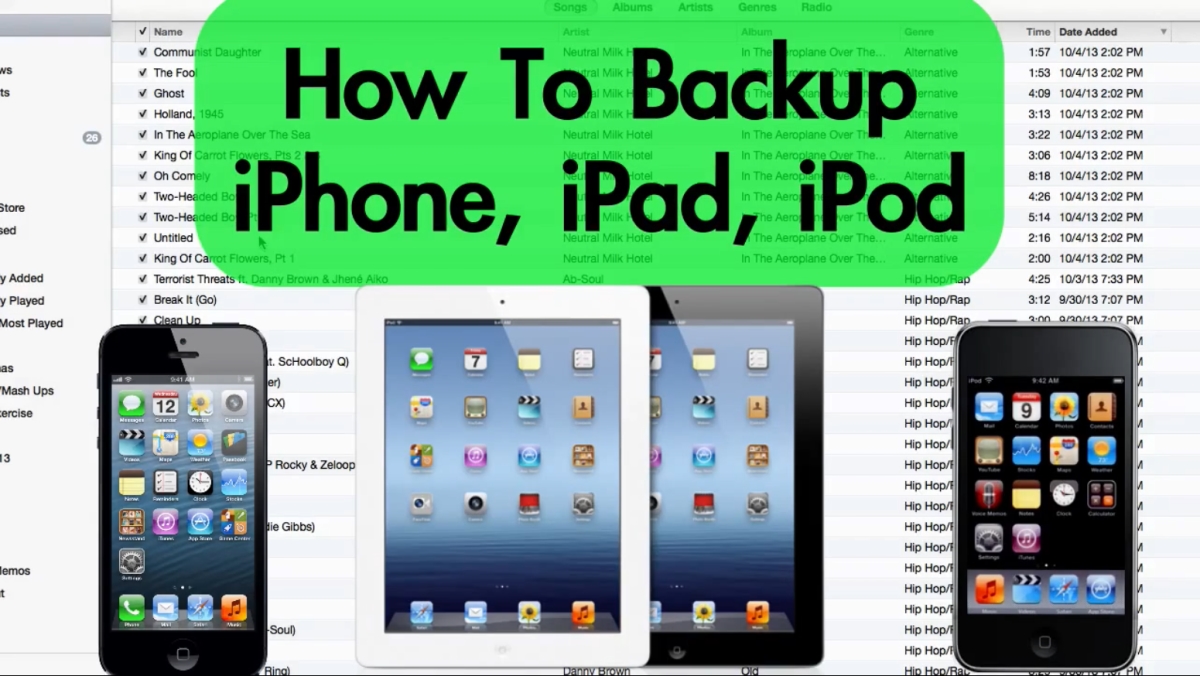
This video is going to show you how to backup your iPhone, iPad, or iPod to your computer using iTunes. This works on a Mac and a Windows PC. Backing up your iPhone, iPad, or iPod is an easy task, but I get a lot of questions about it so I figured I’d do a video for you guys. There are 2 main ways to backup your iPhone (or whichever iOS device you have). One way is to go on your iPhone itself, and go to Settings, iCloud, Backup. As long as you’re connected to a Wi-Fi network you can back up your iPhone to your iCloud account. The second way is what I do and what most people do, and that is to back up your iPhone to your computer using iTunes so I’m going to show you that today.

First, open iTunes then connect your iPhone to your computer using the USB cable. Most likely it’ll automatically backup your iPhone when you connect it so if you click on your iPhone in the devices list on the left hand side you can see when the most recent backup was on your computer. My iPhone automatically backs up whenever I connect it. If yours doesn’t do that you can manually back it up by clicking the “Back Up Now” button or you can go up to File, Devices, Back Up. Either way they both backup your iPhone to your computer.

If you want to view a list of recent backups just go to Preferences and go to Devices, and you can see all the backups that it has stored on your computer. If you want to see where these backups are stored on your computer just right-click and then choose Show in Finder if you’re on a Mac or Show in Explorer if you’re on a Windows PC. It will open up the folder where your iOS backups are stored.

What is all included in the iPhone backup when it backs up to your computer? Well pretty much everything that is not in iTunes is backed up. Now what I mean by that is your music, movies, TV shows, podcasts, books, apps, and ringtones are already in iTunes so those don’t get backed up to that backup folder. What does get backed up is your camera roll, your saved photos on your phone, your text messages, your iMessages, your contacts, your calendar, all your settings, app data, etc. All that data gets backed up during your iPhone backup. See the official iTunes backup details here.

If you want to restore an iPhone, iPad, or iPod to one of your backups all you have to do is connect that iOS device to your computer, open iTunes, and once it’s connected go to File, Devices, Restore from Backup. You can choose from your most recent backups to restore the device. So that’s how to backup your iPhone, iPod, or iPad to your Mac or Windows computer!

By Andy Slye

« Older posts Newer posts »

© 2024 My Tech Methods

Theme by Anders NorenUp ↑