Videos by Andy Slye

Author: Andy Slye (Page 34 of 40)

Google Wifi Review & Setup!

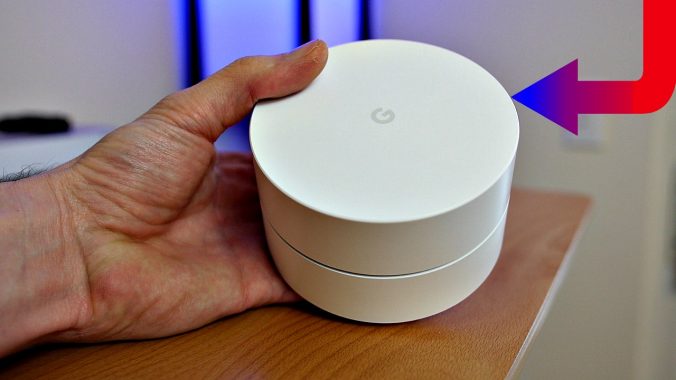
Google Wifi (Amazon) is not your typical wireless router. It’s a sleek, easy-to-use device that’s designed to be the simplest and most future proof way of filling your home with WiFi. It comes in a 1-pack for $129 or a 3-pack for $299. So you can get just one if you want to replace your current WiFi router in an area up to 1500 sq ft. But one of the main features of Google Wifi is the expandable mesh network which lets you have multiple Google Wifi points that work seamlessly together to fill up an area up to 4500 sq ft with no dead spots. It has a quad-core ARM CPU, blazing fast AC1200 Wi-Fi standard, simultaneous dual-band Wi-Fi (2.4/5 GHz) with Network Assist Technology, and it’s backwards-compatible with your current devices (supporting 802.11a/b/g/n/ac)

In the box you have the Google Wifi point with two gigabit Ethernet ports, a quick start guide, a 6.5 ft Ethernet cable, and the power cable. To set up Google Wifi you’ll need: a free Google account, an Android or iOS device, high speed internet, and a modem. First connect your power cable to the Google Wifi point then connect the Ethernet cable from your modem into the globe icon port on the Wifi point, then connect the power adapter to an outlet. Next, install the free Google Wifi app on your smartphone or tablet and make sure Bluetooth is turned on as well.

When the app finds your Wifi point it will ask you to scan the QR code that’s on the base of the device or you can type the code manually. Select the location of your Wifi point so you can identify it later. The next steps will ask you to name your Wifi network and create a Wifi password. Google Wifi uses WPA2-PSK security if you were wondering. The app will proceed to create and finalize your network. Tell it how many Wifi points you have then click next and it most likely will start to install available updates. That’s another good thing about Google Wifi, it has automatic security updates. When you see that your Wifi is ready you can go to your WiFi settings and connect to the new Wifi network that you just created.

One of the best features of Google Wifi is the app which not only walks you through the entire setup like we just did, but it’s also the one-stop shop to easily manage your wifi network. Some of the things you can do include network checks which tests your internet download and upload speeds and keeps a history of the speeds for you to compare. You can also test the speed of the Wifi to your device to make sure you have a good base connection.

You can set up Guest Wifi that creates a totally separate wifi network for guests with its own separate name and password. You can enable a feature called Family WiFi Pause which is good for parents who want to turn off Wifi access to their kids devices at certain times. You can also see all the devices that are currently connected to your network along with a list of devices that have connected in the past. You can give priority to a device for a certain period of time. You can see your network data usage. In the settings area you can change various settings of your wifi point, reset it, do some advanced tasks like setting IP reservations, UPnP, port forwarding, or changing DNS servers.

One of the biggest concerns of owning a router made by Google is wondering if Google is spying on your data. Well here’s the clause from the Wifi app. It states in bold: “Google Wifi app and your Wifi points do not track the websites you visit or collect the content of any traffic on your network.”

So I’m not too worried about Google spying on my data traffic. However some of the things I don’t particularly like about Google Wifi is the lack of ethernet ports. Most routers have at least 4 ethernet ports while Google Wifi only has 2. And for $129, it seems like it should definitely have 4 ports. I also wish they offered a 2-pack, instead of just a 1 and 3 pack.

Having said that, I still think Google Wifi is one of the best wireless routers you can get right now because of the automatic updates, the simplicity of setup and management using the free app, the sleek white design, and especially the super fast expandable mesh network for future proofing. I bought it to replace my old wireless router and i’m definitely keeping it.

My question for you is: what router do you have right now and will you be replacing it with Google Wifi? Leave a comment and let me know!

Dell XPS 13 vs MacBook Pro 13″ – Which is Better?

Welcome to the ultimate showdown between the best 13″ laptops: The MacBook Pro 13″ vs the Dell XPS 13.

Both of these models I have were released in 2016 and both of them have the 6th generation Intel Skylake processors in them. Having said that, the XPS 13 and the MacBook Pro that I have are not 100% the same when it comes to the rest of the specs, but this video will focus on the bigger picture, and at the end of this video I’ll share my verdict so you can figure out which one is best for you.

Price

The Dell XPS 13 is obviously cheaper. It’s cheaper overall, they offer more affordable options for under $1000 while the MacBook Pro starts at $1499 in the US. For the models I have here, it’s currently $1699 for the Dell XPS 13 and $1999 for the MacBook Pro. Now to make pricing more fair when you’re shopping, you can compare the non-touch screen of the Dell XPS 13 to the non touch bar model of the MacBook Pro along with other different hardware configurations. But overall, Dell is obviously cheaper so Dell does win the pricing battle.

Ports

Dell has a much wider variety of ports on the XPS 13 featuring one USB-C Thunderbolt 3 port, two USB 3.0 ports, a headphone jack, and an always convenient SD card slot. The MacBook Pro, on the other hand, only has a headphone jack and either two USB-C Thunderbolt 3 ports on the non-touch bar model or four USB-C Thunderbolt 3 ports on the touch bar model. So that’s a pretty no-brainer; Dell obviously wins the ports battle because they offer more ports than the new MacBook Pro, which Apple went ahead and took away all the ports that you’re used to and replaced them with USB C ports, so nobody has all of those ports for their devices yet, so it’s kind of an inconvenience right now. It will probably be beneficial in the future sometime, but not right now. For right now, Dell does win the ports battle.

Performance

Both the Dell and the MacBook Pro come in configurations of i5 or i7 processors with turbo boost, 8 or 16GB of DDR3 RAM, and SSDs from 128GB to 1TB, and Intel Iris graphics. So the performance really just depends on the configuration you choose. However, I will point out that my XPS 13 has a Core i7 with 16GB of RAM while my MacBook Pro has a Core i5 with just 8GB RAM, and I did a video editing export test and the MacBook Pro handled it way better, 4x better to be exact. Now that test was obviously dependent on the software, and Final Cut Pro X on a Mac is known to usually have faster export times because it’s optimized specifically for the Mac hardware. But since these laptops have so many similar specs, I’m calling this one a tie.

Display

Both of these displays are very beautiful. The Dell XPS 13 comes in at 3200×1800 on that Quad HD InfinityEdge IPS touch display, with super thin bezels, so right off the bat Dell is hard to beat. The MacBook Pro screen still looks great with a resolution of 2560×1600 plus the new P3 color space and at 500 nits, it gets a little brighter than the XPS 13, and in my opinion it does have the advantage of having a 16:10 aspect ratio, but when the display is compared side by side to the Dell XPS 13 you can tell that the XPS display is just better. So Dell does win the display battle. Up next is the battery life. Dell has a slightly bigger battery at 56 wH compared to the 49 wH on the MacBook Pro. However, the non touch bar MacBook Pro has a 55 wH battery, which should be right around the same battery life as the Dell XPS 13. In my test, the XPS 13 went from full charge to 0% in about 8 hours, and the MacBook Pro went from 100%-0% in about 7 hours so you’re getting about an hour longer battery life with the XPS 13; however, the MacBook Pro did charge faster than the Dell XPS 13, actually by 50 minutes faster. It went from 0-100% charge in 90 minutes, while the Dell XPS 13 went from 0-100% in about 140 mins, so the MacBook Pro does charge faster,  but the Dell has a bigger battery and a better battery life, thus winning the battery battle.

Portability

Starting off with the weight, the MacBook Pro 13″ weighs right at three pounds. The Dell XPS 13 weighs right under three pounds at two pounds and fourteen ounces to be exact. The XPS 13 is squeezed into a typical 11″ laptop shell which makes it one of the most portable 13″ laptops out right now. They’re both almost the same exact length, but the MacBook Pro is about a half inch longer in depth. However the MacBook Pro appears to be thinner than the XPS 13. It’s so close, and even though Dell wins the weight battle by two ounces, the MacBook Pro wins the thinness battle by a hair, so that makes it a tie for me. You really can’t go wrong with either of these laptops if you’re planning on being portable and mobile.

Design

Starting off with audio, the speakers on the MacBook Pro just sounded better to me; they have the faux grills on top, so the speakers aren’t really directly under the grills on the MacBook Pro but they do sound better. They’re coming up through the top while the Dell XPS speakers are really small and they’re on the side. So the MacBook Pro just sounded cleaner to me when I was listening to music and vocals and things like that. The MacBook Pro build is very solid, it’s attractive and symmetrical, the space grey looks very sleek, and I can open the lid without the laptop moving. The XPS 13 looks very good with the silver on the outside and the inside has a nice black carbon fiber finish. And I love the battery gauge button that used to be an advantage that MacBooks had until they stopped doing it, but the XPS 13 does have a common issue with coil whine and some trackpad issues with certain software. It’s not symmetrical, and you cannot open the lid without the laptop moving, which doesn’t seem like a big deal, but it does make a difference. Both keyboards have backlights; the MacBook Pro’s keys are a little bigger than the Dell’s keys but the biggest difference is the key travel. The MacBook Pro has Apple’s new 2nd generation butterfly mechanism keyboard which is totally subjective to the user but I like the MacBook Pro keyboard a little better than the traditional keyboard on the Dell XPS 13. It feels nicer when typing on it. Some people hate the butterfly mechanism but I’m a fan, especially with the 2nd generation. The MacBook Pro trackpad is king compared to the XPS 13. It’s bigger and works like Apple has always made them even with the Force touch. The Dell trackpad still physically clicks down but I still have issues with the Dell trackpad in Google Chrome. Having said that, the Dell XPS 13 still does have the best trackpad on a Windows machine that I’ve ever used, but just not as good as Apple’s yet. So MacBook Pro wins the overall design category.

OS

Which has the best operating system? This is going to cause a lot of ruckus in the comment section! Windows 10 is fantastic and is the Windows version ever, but MacOS is still superior. You will most likely run into fewer problems in a five year span with a Mac than you would with Windows. Plus, the MacBook Pro can run Windows 10 virtually if you need it while Windows still cannot run MacOS which isn’t Windows fault but it’s still an advantage. Lastly, it is entirely possible and becoming more prevalent for Macs to get viruses but it’s still nowhere near the virus problem that Windows machines face. So as you can tell I think the OS battle goes to the MacBook Pro.

Verdict

Based on those categories that we just went over, if you add them up the Dell XPS 13 does win. Does that mean the MacBook Pro is a bad buy or it’s a bad laptop? No, it’s a good laptop, very expensive, but it’s a good laptop. And it all depends on what you do specifically as a user, depends on what kind of equipment you own, maybe you own an iPhone, maybe you’re invested in the Mac environment. Just like I am, I’m a Final Cut Pro user. It makes more sense for me to own a MacBook Pro because I can edit videos faster than on the Dell XPS 13. But if you are looking at them side by side, the comparison tests we did, I tried to be objective as possible with these tests and the categories. And just prioritize the categories based on your use and then you can find out which one is best for you. But if we’re going side by side with the tests we just did the Dell XPS 13 does seem to be a better laptop and the best 13 inch laptop that you can get right now. Both links to these laptops will be in the description below. Let me know in the comment section below what you think of these laptops, if you own one, if you’re wanting to buy one. Thank you so much for watching. My name is Andy. Make sure you hit that subscribe button and give this video a thumbs up if it helped you out. I will see you guys in the next video.

This Tiny Computer is a $75 Gaming Machine

This is the Raspberry Pi 3.

It’s a single board computer the size of a credit card and as the name suggests, it’s pretty sweet. It has a ton of uses from learning how to program to making your own DIY media center or maybe best of all which I’ll show you how to do in this video, turning it into your own Retro gaming console where you can play nearly any game from old-school consoles like Atari to Super Nintendo to Playstation and a lot more in between.

You can get the Raspberry Pi 3 on Amazon, but what I have is the #1 Best Seller CanaKit Raspberry Pi 3 Complete Starter Kit 32GB Edition. It’s the one I recommend because it comes with everything you need to get started. So let’s get into it. Here’s how to set up a Raspberry Pi 3 as your own Retro gaming machine.

First you’ll need to install the Raspberry Pi board into the CanaKit case that’s included in the kit. It’s very easy to do, just snaps right in there. Next you’ll need to insert the MicroSD card into the MicroSD card reader then connect it to your PC or Mac.

Download the free RetroPie image file.

Download a free SD Card Image writer for Mac or Windows. Use the SD Card Image writer to apply the RetroPie image file onto the MicroSD card then eject it when it is finished.

Insert the MicroSD card into your Raspberry Pi MicroSD slot, and finally connect the HDMI cable and the power adapter. Now you can either connect a regular keyboard and mouse if you want to play old school PC games, but you’ll eventually want a USB gaming controller like this Playstation one or this SNES one. I’ll leave links to the best USB controllers below.

When the Raspberry Pi is connected to power it will start up and you’ll see it boot into EmulationStation then you’ll need to configure your keyboard or controller. After you configure the buttons on your controller you should now see the RetroPie home screen.

From here you can go into your settings and connect the Raspberry Pi to your WiFi network or connect Bluetooth devices.

The last part is getting ROMs. ROMs are basically digital files of games that you can find online. The rules behind it are simple: only download ROMs to games that you physically own. I can’t provide the actual sites that host the ROMs, but you can find them with a simple Google search.

Once you have the ROMs downloaded on your Mac or PC, copy them to the correct console folder in the ROMs folder on your Raspberry Pi either over the network or using a USB flash drive. Since mine is connected to WiFi I just copied over the network from my Mac.

Once the ROMs are copied, restart the Raspberry Pi and there you go. You should be able to choose the game and start playing. By the way Donkey Kong is the best Super Nintendo game ever, hands down, no questions asked. If you have any other suggestions I’m happy to hear them. Comment down below!

2016 MacBook Pro 13″ Touch Bar & Touch ID Unboxing!

Hey guys, it’s Andy. This is the 2016 MacBook Pro, the 13” Space Gray model with a 512GB SSD and 8GB of RAM, and this is the Touch Bar and Touch ID model so we’ll take a look at both of those in this video. This model I have cost right around $2,000 US.

In the box we have the most important piece of equipment, the MacBook Pro itself. Not sure why I have to tell you that but hey I ain’t gonna lie to you. There’s not much else in the box, just the quick start guide, some Apple stickers, the power adapter with the USB-C port, and lastly the USB-C cable.

The first thing I noticed was that the MacBook Pro automatically powered on when I opened the lid. Now I don’t know if that’s a new feature of MacBook Pros because my last MacBook Pro purchase was over 7 years ago, but I thought that was interesting.

During the setup it asked me to place my finger on the Touch ID button and it works just like Touch ID on the iPhone and my fingerprint was registered in less than a minute. What’s weird though is that after a cold boot it did not let me sign on to the laptop with Touch ID. I had to enter my password which was strange because I thought we could use Touch ID to log in, not just unlock the MacBook Pro.

It’s really thin and light, something that Apple is making a priority with most of their laptops recently. However I would still prefer performance over mobility when it comes to the Pro models any day of the week.

It has 4 USB type C ports, 2 on the left side, and 2 on the right side along with, oh you guessed it, a headphone jack. Apple, where’s the courage?

Some of the most notable new features are the new Trackpad which is huge, and the good news is while I was typing, the Trackpad did not register the palms of my hands as clicks which is something I was concerned about but it seems to be a non-issue.

Speaking of typing, this has the new 2nd generation butterfly keyboard and I never owned a 1st-generation butterfly keyboard like on the 12” MacBook but I love this 2nd-gen keyboard. It feels great typing on it from the short time I’ve had it. I really enjoy it which is a nice surprise.

Lastly, the thing you’ve been wanting to see the most, the new Touch Bar. This is an OLED touch bar across the top of the keyboard that replaces the old physical function keys but also integrates with whatever app you have open and gives you a more customized and better experience according to its maker. I called this a gimmick in my previous video after the announcement was made, and I’ll see for sure if it is a gimmick or if it’s actually useful in the coming weeks when I’ll be sharing my full review video so be sure to subscribe to see that. From my short time with it so far it seems pretty cool. I think it will definitely be the most useful in Final Cut Pro when I’m editing videos. I’ll find out soon. Until then, this has been a quick first look at the 2016 13” MacBook Pro. Thanks for watching, I’d love if you give this video a thumbs up, and I’ll see you in the next video.


« Older posts Newer posts »

© 2024 My Tech Methods

Theme by Anders NorenUp ↑