A good USB microphone should do two things: sound great and have a quick easy setup. For years the Blue Yeti has been referred to as the best USB microphone from many different experts such as bloggers, podcasters, and YouTubers, and it has a nearly perfect 5-star rating almost anywhere you look online. But just like Big L said people are praying on its downfall, hoping it flops, hoping it stops so in this video I’ll put an end to the debate and show you why the Blue Yeti is still the best USB microphone. First I’ll go over the features and then I’ll show you how to get good sound quality every single time from it and I’ll let you hear some sound quality tests, I’ll even rap for you guys, so stick around for that.
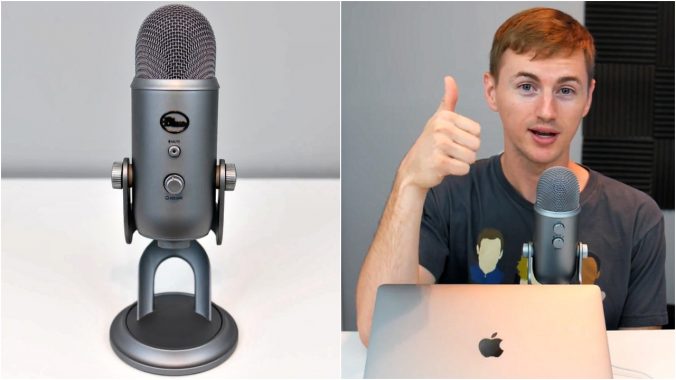
The Blue Yeti is currently $129 on Amazon, but some colors are cheaper than others which can bring the price down even more if you don’t care about the color and just want to save as much money as possible. I’ll put the Amazon link in the description below so you can check it out yourself. When you first open the box you’ll notice the Blue Yeti is not a small microphone by any means. It’s made of a sturdy metal and stands almost a foot tall and weighs about 3.5 lbs. The color I have is the Grey model which looks really good and complements my iMac and Space Grey MacBook Pro quite nicely. I think I just realized grey is my favorite color. Hmm is that good or bad? I don’t know. The Blue Yeti comes with a USB cable and is compatible with Mac and PC right out of the box. No drivers or software needed. Just plug it in and start recording. Even though the Yeti can fold down to make it a little better for storing or packing, it’s still mainly designed to stay put on your desk because of its fairly large size and solid build. It’s going to take up a good amount of space in a backpack.
At its price range the Blue Yeti is the absolute best choice for most people. If you look at mics below $100 you’ll see they lack a key feature that the Blue Yeti has, and if you want something that sounds better than the Blue Yeti, you’ll most likely need to spend a lot more money on a complicated setup consisting of an XLR mic with a separate audio interface. The advantages of having a USB mic like the Yeti are: one, USB mics are much cheaper, and two, USB mics are much simpler. The Blue Yeti already has an internal preamp and analog-to-digital converter that takes the incoming signal, amplifies it, and converts it to digital, and sends it directly into your computer. That means you don’t need any other gear to start recording. The Blue Yeti does a great job at fusing simplicity with just enough pro features, along with high quality sound and physical aesthetics all in one single microphone which is why it’s the best.
On the front of the mic there is the Blue logo, a Mute button which is solid red when the mic is powered on and connected to your computer and it will flash red when the Mute is enabled. I kind of wish the Mute button wasn’t lit up the entire time, but I guess that’s the only way to know it’s powered on. Under that there is the headphone volume knob because when you look on the bottom there is a headphone jack that allows latency-free real-time monitoring of your microphone so you can make sure your recording levels are just right and you’re not peaking, which is a clutch feature to have on a microphone. What’s also cool about the headphone jack is you can not only use it to monitor the mic but you can also use it to listen to your computer’s audio because of the dedicated amp and converter that’s built into the Yeti. There’s also the USB cable port and a standard thread mount for if you ever want to unscrew the side screws and remove the Blue Yeti from the included stand you can use the standard thread mount to put it on a standard microphone studio mount. The bottom of the mic stand has this firm foam on it that allows the mic to stay in one place really well and doesn’t allow it to be moved or slid around easily which is nice. Under the mesh top there are actually three condenser microphone capsules which make the Yeti extremely versatile for almost any recording situation. On the back there is a gain control knob which is a hugely important feature, and this is how you can adjust the sensitivity of the mic or how loud your recording is. Below that there is the pattern selector where you an choose up to 4 different recording settings.
Cardioid
Probably the most popular setting on the Yeti, cardioid mode records sound sources that are directly in front of the microphone, delivering a rich, full bodied sound and it minimizes the pickup of noise from the sides and back of the microphone. It’s perfect for recording your voice, whether it’s a voiceover for a video, a podcast episode, gaming commentary, singing vocals, or rapping. So if I were to hit you with something like “(RAP)”. Or if you’re musically talented unlike myself, cardioid mode is also great for recording solo instruments.
Stereo
This uses both the left and right channels to capture a wide, realistic sound image so it’s good for when you want the listener to hear the movement from one ear to another and also ideal for recording things like acoustic guitar or a choir.
Omnidirectional
Picks up sound equally from all around the mic. It’s best used in situations when you want to capture the ambient noises and want the listener to have the feeling of “being there”—like recording a band’s live performance, a multi-person podcast or a conference call.
Bidirectional
Records from both the front and rear of the microphone while the noise from the sides are not picked up. It’s good for recording a duet or a two-person interview or two-person podcast episode. So it comes in handy when you don’t have multiple microphones for multiple people.
So now let’s talk about how to get great sound quality the Blue Yeti. It records in 16-Bit at 48 kHz and when it comes down to it, the Yeti is perfect for the following uses: Voiceovers (any type of voice recording), podcasts (podcasters), videos (YouTubers or any other audio for video), video chats or live streams (Skype/YouTube Live/FB Live/Hangouts/FaceTime), musicians (vocals/instruments, singing/rapping). The Yeti just does an excellent job at capturing a voice the way it sounds in real life with all the different pitches and tones, but with clarity as well. I mainly use it for video voiceovers for YouTube so let me show you how I set it up and let you hear how it sounds.
First thing you want to make sure is that you’re speaking into the front of the mic and not the top, that’s a common mistake that beginners make. So be sure you’re speaking into the front when you’re in cardioid mode for recording your own voice. I like to use ScreenFlow to record my audio, but you can use any recording software of your choice. GarageBand is a very popular choice for Mac users, and Audacity is very popular free program for Windows and Mac users.
To get good sound quality from the mic you should do the following:
First you want to be fairly close to the mic for it to capture that richness of your voice. I like to be about 3-4 inches away from the mic when recording voiceovers. If you do get pretty close to the mic, you may want to invest in a pop filter like this one. This prevents the loud popping noise you get from when you say certain words like Powerful Puppies on Picnics, or something like that. These are pretty cheap, I’ll leave a link to the best selling pop filter on Amazon in the description below.
Next you want to set the correct gain level using the knob on the back. The more gain, the louder and more sensitive the mic will be. So do a couple test recordings or monitor your audio levels and make sure your levels are high enough but not peaking into the red levels on your recording software.
Also if you’re in cardioid mode you’ll want to eliminate as much background noise as possible. The Blue Yeti does a fairly good job at not picking up a lot of background noise, but no mic will absolutely eliminate all background noise. So just keep that in mind when recording.
Lastly, once your recording is done you can use your audio software to raise the levels if needed or edit the recording in whichever way you want to improve it ever so slightly. I usually record with a lower gain, and then using Final Cut Pro X I will use the Louder feature to raise the audio levels to the correct level and it does a fairly good job at increasing the loudness of my voice while keeping the room hum at a minimum.
Before we get into the last audio test, even though I think the Blue Yeti is the best USB mic overall because it has professional studio sound quality, has a very solid and attractive design, along with the multi-pattern recordings and tri-capsule microphone array, having said that if your budget isn’t enough for the Yeti, you should look at the Audio Technica ATR2100. That is my 2nd recommendation because it’s almost half the price of the Yeti and it is one of my all time favorite USB microphones for under $100. I’ll leave the link to my full review of that in the description below if you want to check that out.