Video Transcript:
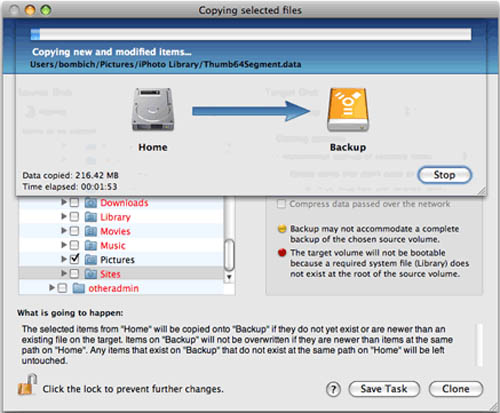
Hey what’s up YouTube? Today I’m going to do a quick little tutorial over Carbon Copy Cloner. It’s a free app for the Mac, and you use it to back up all your data to an external hard drive and I highly recommend it. If you go to Google and search Carbon Copy Cloner, the first result is the main website which is this right here. And the download button is this one right here. If you don’t want to do that I’ll put the link in the sidebar for you. Okay once you download it and install it when you bring it up it’ll bring you to this main screen right here. Now the source disk, your hard drive that’s in your Mac right now is going to be your source disk. It’s going to be the hard drive that you want to back up so I got mine. I have Macintosh HD. That’s the default name for all Mac hard drives. Yours might be different if you changed it, but most likely that’s what it will be. And I got everything checked, and here’s a setting you can put filters in like if you don’t want to back up certain file types. I’m just backing up everything. If you go over to the target disk section this is where you’re going to choose your external hard drive. I named my external hard drive Mac Backup so that’s the only one that I can choose. It’s the only external hard drive I have hooked up right now. Now the cloning options you can select back up everything or incremental backup of selected items. Now I think when the first time you do it the only option is to back up everything. Once, after the first time you back up everything you want to select incremental backup of selected items. This’ll only back up anything that’s changed since the last back up and I have this selected. Delete items that don’t exist on the source. This will delete anything on your backup hard drive which is your external hard drive. It’ll delete anything that doesn’t exist on the hard drive since the last backup. Say you backed up a song, you know, a couple weeks ago to your external hard drive and then you decided you didn’t’ want that song and you deleted it. And then you go back up your Mac again this will delete that song off the backup hard drive so you won’t have it anymore. I have it selected because I, whatever I delete I know I don’t want so; but some people like to, you know, keep everything even though they deleted it. So it’s up to you if you want to do that. And these? I don’t really check those because I don’t really see the point in doing it. That’s up to you if you want to check that. And I got mine; I got my external hard drive bootable because I would like to, if my hard drive dies I want to be up and running and I don’t want to wait and get a new hard drive and restore it and everything. So I have my backup hard drive bootable. I suggest you do that too because it’s really convenient. Alright now that’s about it. It’s real simple. Now you can save the task. I don’t save it because it automatically saves your settings so once you got everything set up like this you can go ahead and click clone, and it’ll back up everything. It might take a while depending on how big your hard drive, how much data you have, what you’re backing up. It shouldn’t take longer than 15 minutes, average user, so, not even that long really. So I hope you guys enjoyed the tutorial and hope you guys go check out this app – highly recommended by me. And if you have any questions comment, send me a message and I’ll get back to you alright? Thanks for watching. Make sure you subscribe, and I’ll talk to you guys later.
