Videos by Andy Slye

Category: Windows (Page 2 of 5)

Windows

Chromecast 2015 Review: How to Set Up a Chromecast 2

The Chromecast is one of my favorite devices. For those of you wondering how to set up your new Chromecast 2nd generation, look no further. This is my quick review and setup tutorial for the 2015 Chromecast.

What is a Chromecast?

A Chromecast is a small dongle that connects to your HDTV and enables you to use your smartphone, tablet, or computer to wirelessly stream video or audio to your TV. So if you want to make your TV “smart” then this $35 Chromecast is one of the easiest and cheapest ways to do it.

The box comes with everything you need: the Chromecast, a USB cable, and a power adapter along with simple instructions that I will walk you through in this tutorial.

How Set Up Your Chromecast

First, make sure you have the following:

  • WiFi connection
  • HDTV with an available HDMI port
  • Smartphone, tablet, or computer (Chromecast works with Android devices, iPhone/iPad, Windows, Mac, and Chromebooks)

Next, connect the small end of the USB cable into the Chromecast. Then connect your Chromecast to your TV’s HDMI port using the HDMI connector. If your TV has a USB port you can plug the USB cable into it to power your Chromecast. If your TV does not have a USB port, you’ll have to connect the USB cable to the power adapter and plug the power adapter into an outlet.

Once you see the Chromecast light up, that means it has power and the next step is to turn on your TV if it’s not already on and change the Source (or Input) to the HDMI port where your Chromecast is connected. For some TVs like mine it will say Chromecast next to the HDMI port so you know which one to go to.

Now once you see your Chromecast screen on your TV you can go to your phone, tablet, or computer and visit Chromecast.com/setup. Before doing this, however, make sure your phone, tablet, or computer is connected to your WiFi network.

If you’re on your phone or tablet, it’ll ask you to install the free Chromecast app. Once that’s installed, open it up and go to Devices and follow the prompts to set up a new Chromecast. Verify that your TV screen is displaying the same code. Select your Region and give your Chromecast a name.

The next part is where you will select your WiFi network and enter your WiFi password in order for the Chromecast to connect to your WiFi successfully. It may take a minute or two to finish the setup and once it’s finished it’ll most likely start the update process.

During the update the Chromecast will show a short instructional video on your TV so go ahead and watch that to get a little more familiar with it. The update may take a few minutes so just be patient.

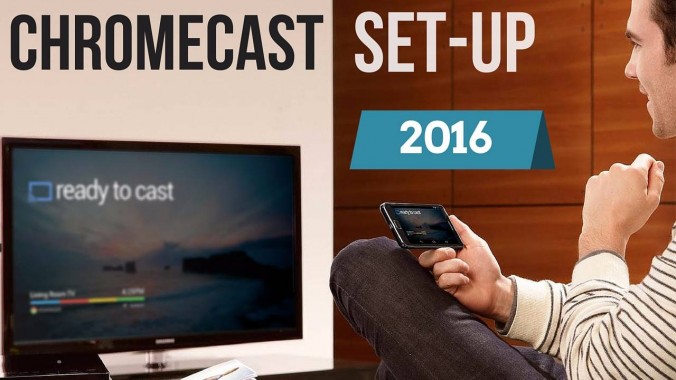
Now when it’s finished you should see your TV displaying “Ready to Cast”. Take a good look at the casting icon because whenever you see that icon in any of your apps that means it’s able to stream to your Chromecast. Another thing to remember is that your device that you’re streaming from must be connected to the same WiFi network that the Chromecast is connected to in order for it to work.

Using Chromecast with Apps

Let’s take a quick look at the new Chromecast app which now offers more features. From this app you can see which movies, TV shows, and music you can stream from your installed apps. You can search for entertainment titles in the app as well, and it will give you recommended apps that are compatible with Chromecast. You can also manage your Chromecast device from the app.

Now let me show you how to stream from some of the more popular apps that you probably have on your phone. Of course it works with YouTube, when you open it you should see the casting icon at the top and if you tap it and select your Chromecast from the pop-up menu it should connect to your TV. Now you can tap on a YouTube video from your phone and it will play on your TV. You can create queues of videos to have them automatically play after each other, and yes it will keep playing if you lock your device or go to another app.

You can also use apps like Netflix, Hulu, Spotify, and Pandora just to name a few. To see a full list of compatible Chromecast apps I will have a link in the description below so check that out. And an often overlooked feature of the Chromecast that I absolutely love is the screensaver feature that has some of the most amazing photos on it. Sometimes I’ll just have the Chromecast on so I can look at those pictures on my TV.

So there you go, you now have a smart TV thanks to your new 2015 Chromecast 2nd generation. If you have any questions leave a comment below and I’ll try to answer them for you.

By Andy Slye

How to Speed Up a Computer to 10x Faster

Here are my top 3 tips on how to speed up your computer (up to 10x faster)

Run Cleanup & Security Software

These are my top 5 favorite Windows apps for boosting your PC speed:

Add RAM

Basically, the more RAM you have the faster your computer will be. Simple as that. Check out Crucial’s RAM tool for your computer or laptop to see what RAM is compatible with your system.

Install a Solid State Drive (SSD)

Bottom line: You need an SSD. They are so much faster than hard disk drives. Here are the benefits solid state drives offer compared to traditional hard disk drives: faster, quieter, power efficient, durable, and less likely to fragment.

Best Antivirus 2015 – Top 3 Free Programs

Click here to see the updated post “Best Antivirus 2016”

If you’re a PC user, having an antivirus is almost always a necessity.

But which antivirus is the best? Here are my top 3 best antivirus applications in 2015 for Windows computers.

Best Antivirus: BitDefender

In my opinion, BitDefender offers the best free and premium antivirus applications for Windows in 2015. BitDefender Free Edition has everything you’d want in a free antivirus: hassle-free installation, easy-to-use and simple interface, quiet and unobtrusive, lightweight and optimized, real-time protection, and strong threat prevention. It’s a top-ranked antivirus that consistently gets rated as one of the best antivirus programs by security companies each year.

Most people can feel safe with the free edition, but if you’re less tech-savvy and want the peace of mind of having the most complete protection for your Windows computer then BitDefender Total Security 2015 is a solid choice when you want a premium antivirus. It gives you everything you need to keep your computer and data protected if you don’t know much about safe computing and safe web browsing.

Best Anti-Malware: MalwareBytes

MalwareBytes is a free anti-malware program that every Windows user should have installed. The free version features an on-demand scanner that does a great job at finding and removing malware such as worms, Trojans, rootkits, spyware, adware and other threats that can slip by your typical antivirus program.

It’s a smart move to have this installed as a second line of defense along with your main antivirus program. You can run a weekly scan to make sure your system is clean. They also offer a premium version for just $24.95 per year that can be used as your main antivirus and anti-malware program if you’d like.

Best Alternative: Avast

Avast Free Antivirus is a great alternative if you don’t want to use BitDefender. Avast has gained popularity and is known as one of the best free antivirus applications available. Many people swear by it. However, it’s not my favorite because it’s a little too annoying and obtrusive for my taste (default sounds, noises, and pop-ups). However, it does offer strong protection for Windows computers and gets my vote as my 3rd best free antivirus program for 2015.

More Tips to Stay Safe

  • Don’t install software from random websites. If you install software, make sure it’s from a trusted source.
  • Avoid Internet Explorer. Use a more secure web browser like Chrome or Firefox. Also consider an ad-blocker.
  • Don’t click on links or pop-ups. If you encounter links, hover your mouse over them to preview and verify the destination. If it looks suspicious, don’t click.
  • Don’t visit sketchy or unsafe websites.
  • Don’t install toolbars. Consider getting Unchecky.
  • Don’t click on links in emails or download attachments from un-verified sources.
  • If you see something like “OMG watch what happens when this fight breaks out!” on Facebook, don’t click it. Just don’t.
  • Subscribe to MyTechMethods on YouTube!

How to Rip a DVD on Windows 7 – Best Way!

In this video I’m going to show you how to rip a DVD to your Windows 7 computer using WinX DVD Ripper Platinum. This is my favorite program to rip and copy DVDs to my computer, and you can download it by visiting the link in the description below. And once you download it to your computer you can run the installer file. So just double-click on it. Click Run. Yes. You’re going to install it. Just hit Next. I accept, next, next, and install it on your computer. Just hit next, next, install, and it will install on your computer. And when you click Finish the program should open up or you can open it up from your desktop over here by clicking on it. Alright now once you have Winx DVD Ripper Platinum open next thing you want to do is insert the DVD movie disc into your DVD drive on your Windows 7 computer. Once it’s loaded in there just click this disc button on the top left of the program. It will pull up this window right here, the source DVD disc. You just choose your movie here. Most likely it’ll already be in there by default. Click okay. It’ll load the DVD into the program, and then you’ll see this output profile window here. And this is what you want the video format to be copied in. Most likely you’re going to be using a PC general video and just use the recommended MP4 video. That’s the best recommendation, but one of the best features about this program is the different profiles that it offers when you’re copying the DVD. So if you know you’re going to put it on a device later you can choose that particular device. So you got iPhone, you can go down to iPhone and just choose your recommended option for that. Same thing with Android tablet, Android smartphone. But if you just want to rip it to your computer and leave it there PC general video and the MP4 recommended option is what you want to do. So once you choose your outfit profile format, just click Okay. And here it’ll show you the DVD right here and show you all the titles. Title 1 is automatically selected. That’s the main movie file so if you want to just copy the main movie file it’s already selected there for you. If you want to copy any of the other chapters or extras you can select these as well. And down here at the bottom this is shows you where the DVD will be ripped or copied to when it’s copied to your computer. This is the folder. You can go in here and change. Click browser you can change the folder. Mine’s going to end up on my desktop which is okay with me. And now you are ready to rip the DVD to your computer so just hit that run button in the bottom right. If you’re using the free trial version it’ll only copy the first five minutes just to show you it works. To copy the full movie and to copy unlimited DVDs you can purchase a registration code for the software, and you can get a special discount on the software if you click that Register button from the program itself. Alright so when the copy is complete it should bring up the folder that it copied the DVD into, and there is my video file right there. So that is how to rip any DVD on a Windows 7 computer. So I hope this helped you out. Again the link is in the description below. You will definitely love this program.

By Andy Slye

How to Copy DVD to DVD – Make Exact Copies of DVD Movies

In today’s video I will be showing you how to copy a DVD to a DVD using Aimersoft DVD Copy. So this is a program that can pretty much copy any DVD movie to a blank DVD disc so it can make an exact duplicate copy of your DVD movies. This program is for Windows computers so if you’re on a Windows computer right now go ahead and click the free download link on your screen or the link in the description. That will start an instant download of this program, and you can try it out for free. So click the link and it will start the download. Once the download is complete it will end up in your downloads folder on your computer. Go to your Downloads folder then double-click on the icon to run and install it. You can go ahead and buy the full version to you copy unlimited DVDs or you can try it out for free. It has a free trial so if you don’t want to buy it now you can just hit the free trial button. It’s really easy to use. First thing you want to do is insert the movie into your DVD drive on your computer and then select it on the source. Select your DVD drive, and once you select it on the source you should see the DVD movie name right there. I have Superbad inserted in mine. So I got, I’m going to copy the Superbad DVD movie, and then the target folder is where it’s going to copy onto your computer temporarily. And then once it’s copied to your computer you can burn it to a disc. Okay so and then the output type you want to choose DVD 5. That’s really important because you want to be able to burn it to a normal DVD-R disc, a blank DVD+R disc so choose DVD 5 in the output type. In the copy mode it has a couple different options here. You can select to copy the whole movie or just the main movie with the menu or main movie without the menu. Okay I just want to copy the main movie without the menu. You can choose whatever whatever you’d like. I’m just going to choose main movie without menu, and then once you’re ready double check your settings. And then all you have to do is click the start button. It will start the copy process. Now depending on your computer speed it will take anywhere from 30 minutes to an hour. Mine is going to take about 45 minutes to copy a regular DVD movie. Okay so once the copy is complete it will automatically open up the Windows folder, and here is the Superbad folder. And if you double-click into the movie folder you’ll see this Video_TS folder and then right-click and send to DVD drive. That’s one way to burn it to a DVD. It’s going to ask you to insert a blank disc. Another way to do it, another way to burn it to a disc is just select the VIDEO_TS folder and then if you’re on Windows 7 you see the burn button right there on the top menu bar. Just hit that, and it will ask you to insert your blank DVD disc. So now all you have to do is just insert your blank DVD disc. It can be a DVD-R or DVD-RW depending on what your computer can write to, and once the burning process is complete you will have an exact duplicate copy of your movie. So that’s how to copy a DVD to a DVD. The easiest way to copy a DVD movie to a blank DVD disc.

By Andy Slye

« Older posts Newer posts »

© 2023 My Tech Methods

Theme by Anders NorenUp ↑